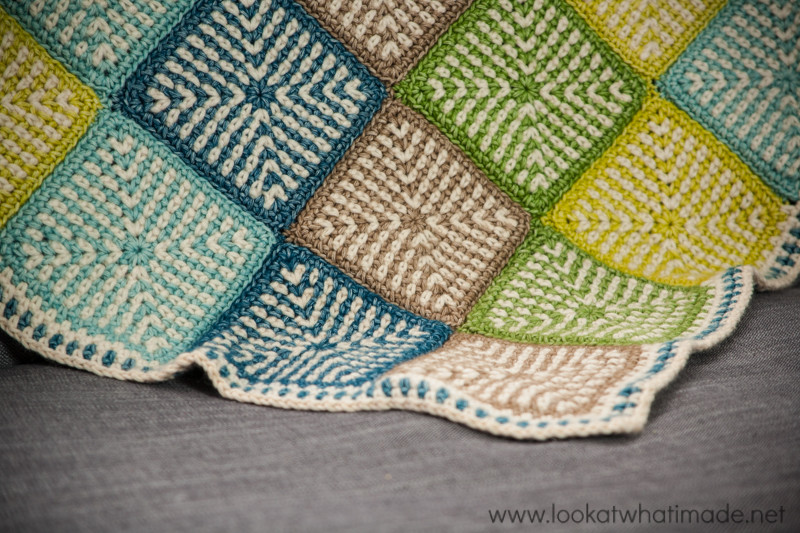
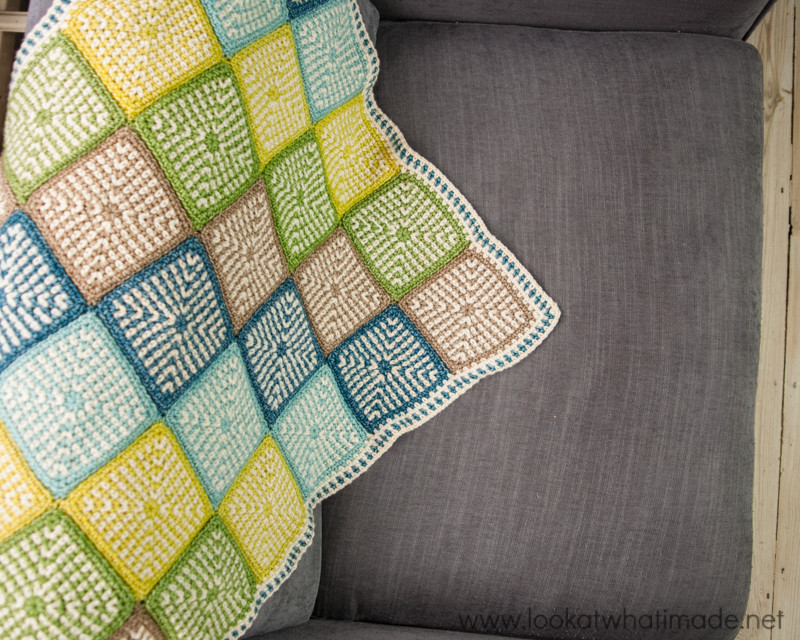
I have had so much fun making this Linen Stitch Manghan. The Linen Stitch has been one of my favourite stitches since I first started designing. It works up quickly, and you can alter the look of it so much by changing how often you change colours and how many colours you choose to use.
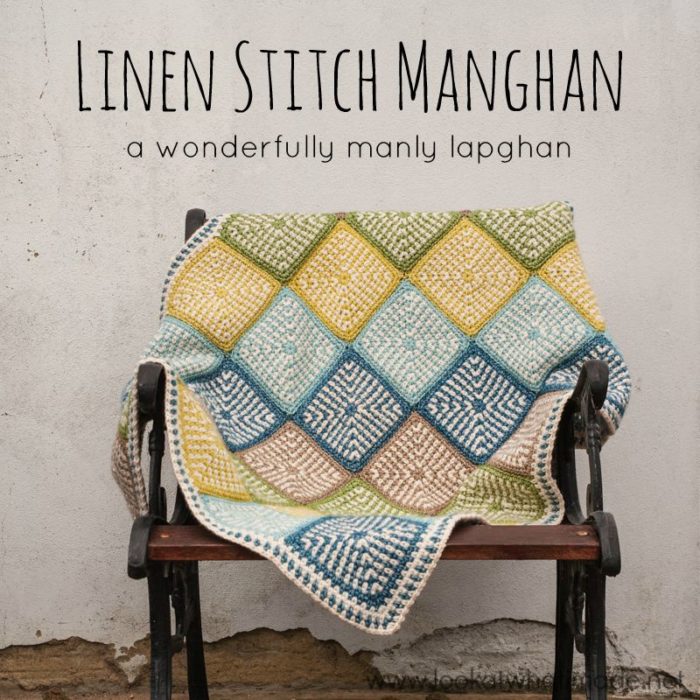
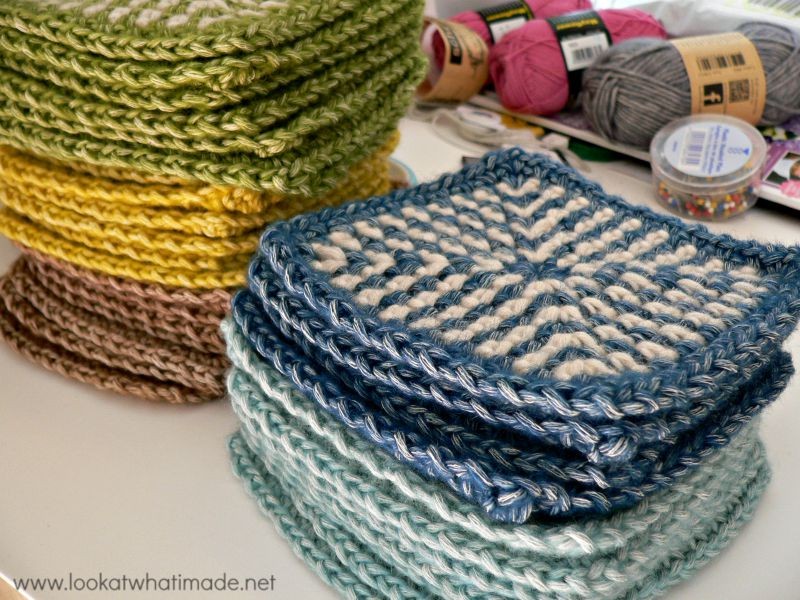
For my Linen Stitch Manghan, I have used Scheepjeswol Stonewashed XL in Canada Jade, Blue Apatite, Amazonite, Boulder Opal, Moonstone, and Lemon Quartz (Colour Packs available below) .
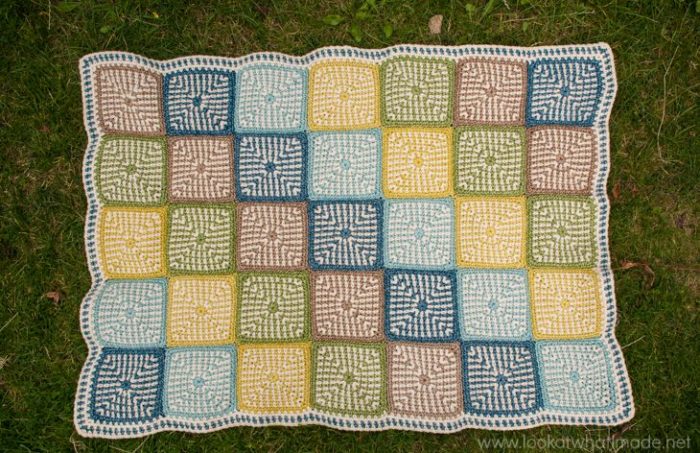
The final lapghan is 80 cm x 110 cm (31″ x 43″), which is perfect for me. If you would like to make it bigger, you can always add more squares or a thicker border. This specific lapghan is created by using a grid of 5 x 7 squares.
Linen Stitch Manghan Pattern
Add this pattern to your Ravelry Queue
Materials
- Scheepjeswol Stonewashed XL (Available from Wool Warehouse, Deramores and Scheepjes)
- Main Colour
- Moonstone (6 skeins) – Main Colour
- Contrasting Colours
- Blue Apatite (3 skeins)
- Amazonite (2 skeins)
- Canada Jade (2 skeins)
- Boulder Opal (2 skeins)
- Lemon Quartz (2 skeins)
- Main Colour
- 8 mm Clover Amour crochet hook (US 11/L)
- 6 mm Clover Amour crochet hook
(US 10/J UK 4) for joining only!
Colour Packs
You can buy the colour pack for the Linen Stitch Manghan HERE in my Wool Warehouse Shop (includes printed pattern). You can also buy them from Deramores.
Instructions
You will need to make 7 squares in each of the contrasting colours for a total of 35 Linen Stitch Squares. You can find the pattern for the Linen Stitch Squares HERE.
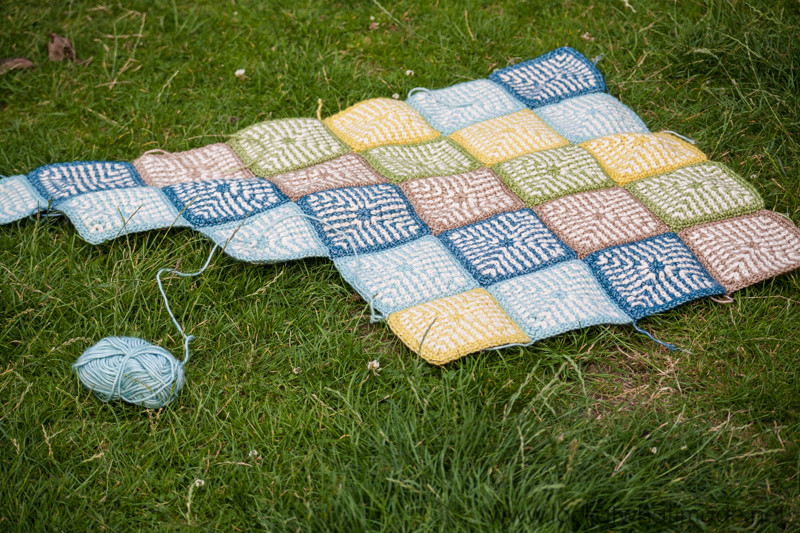
Once you have made all 35 Linen Stitch Squares, you will need to join them. Before you do, though, I should probably show you what the layout will look like. Please excuse the ruffled edges. Our grass hasn’t been cut in a while and doesn’t make for a very flat backdrop.
My favourite method for joining is the Diagonal Join, which I learned from my granny.
I have found that going down a hook size makes for a neater (and easier) join, so I suggest going down to a 6 mm hook to join your squares; however, you must keep your tension relaxed when making your sl st’s!! (!!)
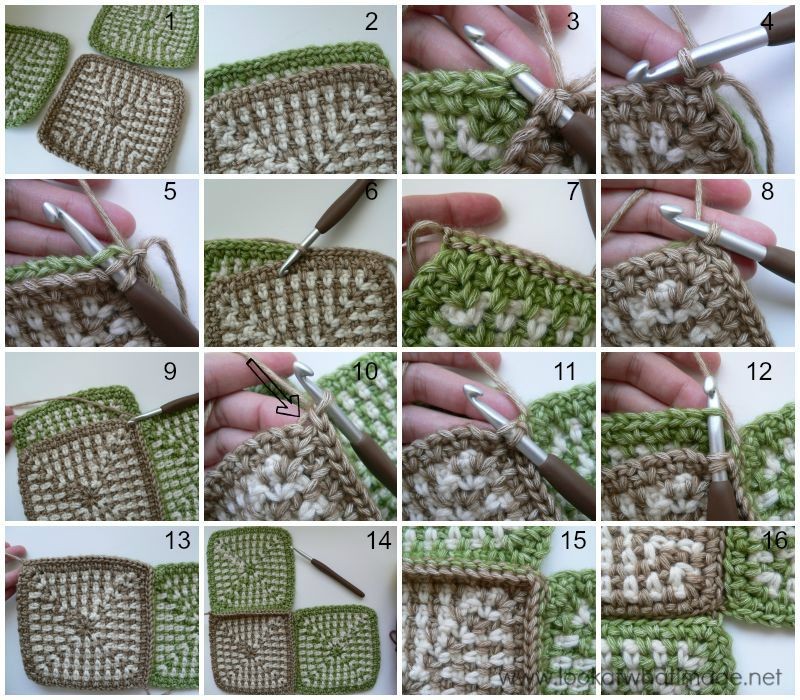
To join the squares diagonally, you will need to start with one of the corner squares (dark blue in the photo above and brown in the photos below). You will attach this square to the square that goes next to it and the square that goes above it (Photo 1). Please note that the squares below were used purely for the tutorial and do not reflect my layout. I suggest using the same colour as the corner square to join your first 3 squares together. By doing this, your joining stitches will melt into the design of the squares.
Lay the corner square and one of the other squares on top of each other so that the right sides are facing each other and the corner square is closest to you (Photo 2). With a slip knot already on your hook, insert your hook into the front loop only of the ch-1 corner space of the square closest to you. Then, insert your hook into the back loop only of the ch-1 corner space of the square farthest away from you (Photo 3). Make a sl st (Photo 4). Inserting your hook into the front loop only of the next stitch on the square closest to you and the back loop only of the next stitch of the square farthest away from you (Photo 5), make another sl st. Sl st in every stitch across (in this fashion) for a total of 23 sl st’s. The last sl st should fall in the corner ch-1 (Photo 8). Photos 6 and 7 illustrate what your join will look like from both sides.
Place the next square behind your corner square, again with the right sides of the square facing each other (Photo 9). Starting in the front loop only of the corner ch-1 of the square closest to you (indicated with an arrow in Photo 10 and illustrated in Photo 11) and the back loop only of the corner ch-1 of the square farthest away from you (Photo 12), make 23 sl st’s across this edge (Photo 13). Ch 1 and bind off.
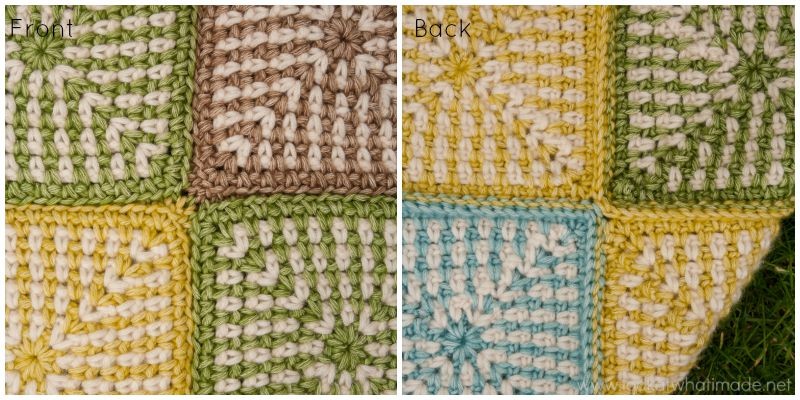
Photo 14 shows the first 3 squares joined, with the back of the blanket facing you. Photo 15 is a close-up of what the back of your join will look like. Photo 16 is a close-up of what the join will look like on the front.
When you add subsequent diagonal strips, you will need to know how to work into the ‘inside’ corners (the corners formed at the point where the 3 squares above meet), as well.
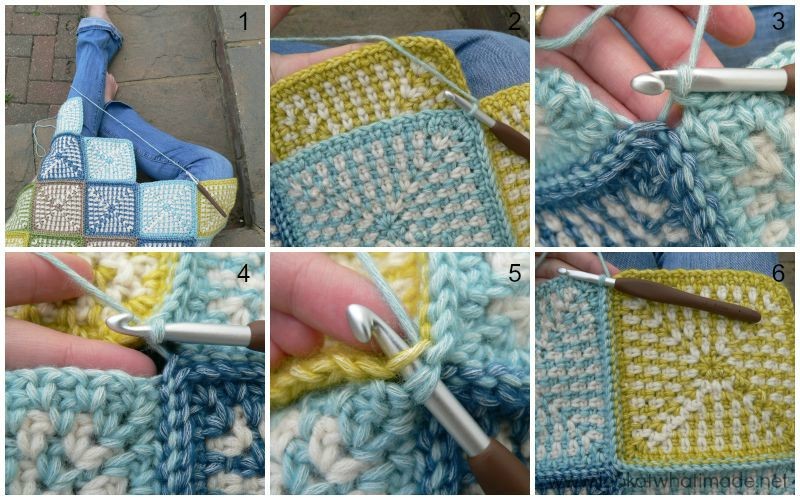
Photo 1 below shows me in the process of adding a diagonal ‘strip’. In Photo 2, I am placing the next square behind my work (as before). Photo 3 shows all 23 sl st’s completed. Notice how the last sl st fell in the front loop only of the corner ch-1, which already contains the join from the previous diagonal strip.
Once this edge of the square has been joined, you will need to turn your blanket 90 degrees to join the other side of the square to the blanket (Photo 4). Your first sl st will fall in the corner ch-1’s, which will each already contain a joining stitch (Photo 5). Photo 6 shows the square added.
I really love this join, both from the front and from the back.
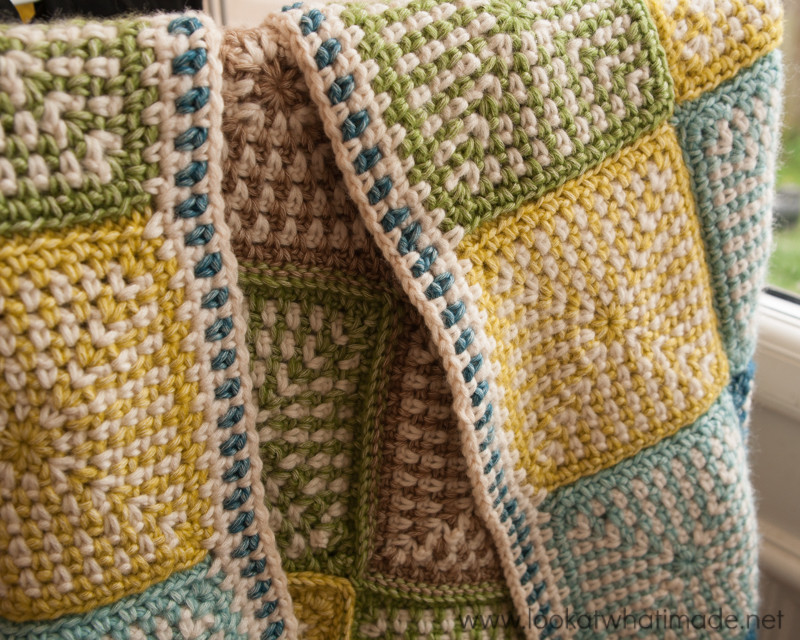
Once you have added all your squares, you will need to add a border.
Border
The border is made using an 8 mm hook.
Round 1
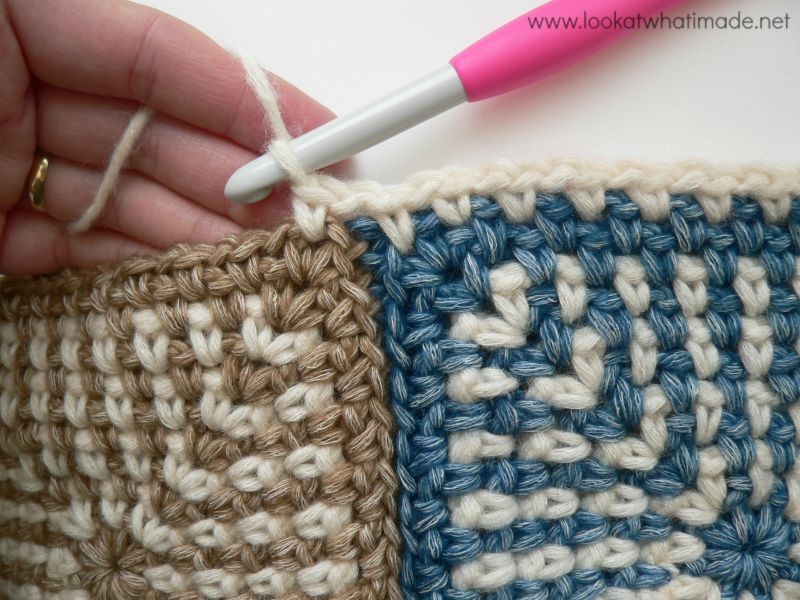
With MC, join your yarn by making a standing single crochet in any ch-1 corner space around. (Ch 1, sc, ch 1) in the same ch-1 corner space. (Sc, ch 1) in each ch-1 space across, including the corner ch-1 spaces of each individual square (see photo below). *(Sc, ch 1) twice into the next ch-1 corner space. (Sc, ch 1) in each ch-1 space across.* Repeat from * to * 2 more times. Join to the first sc with a sl st.
Round 2
Sl st into the next ch-1 corner space. Ch 1 *(Sc, ch 1) twice into the ch-1 corner space. (Sc, ch 1) in each ch-1 space across.* Repeat from * to * 3 more times. Join to the first sc with a sl st. Fasten off and work away your tails of yarn.
Round 3
With CC (Blue Apatite), repeat Round 1 and fasten off at the end of the round.
Round 4
With MC, repeat Round 1 and fasten off at the end of the round. Work away all your tails of yarn.
Blocking
You don’t have to block your blanket when you are done, but I always block my blankets to give them a neat, professional finish (spoiled a little bit by my bumpy grassy photo above, but hey ho).
If you are going to use foam squares to block on, consider buying these Interlocking Foam Exercise Mats. They are similar to these Knitter’s Pride Lace Blocking Mats, but cheaper. You will also need some of these Clover Fork Blocking Pins
.
Sharing
We would love to see some photos of your completed manghans, so feel free to share them on Instagram using #manghan. You can also share them on our Facebook Page.

This blog post contains affiliate links. I only link to products I personally use or would use. All opinions are my own.


Minette says
Hi Dedri
This is beautiful. Your grandma (Erika) loves it too.
Katelyn M says
I am so glad I found this post today. I have been looking for a pattern to make for a friend’s upcoming wedding and this will be PERFECT! Can’t wait to get started!
Judy says
Couldn’t wait to see the finished Manghan because the squares were so beautiful. The finished project is even more beautiful than I anticipated. Like everyone else, I love these colors, but I imagine it would be beautiful in pastels for a baby, or rainbow colors for a child’s room, or fall colors for a cozy winter comforter. I hope your many followers will share some of their photos of their completed projects, too.
Maria Andrade says
Thank you! Love it, love it!
From Portugal, a new friend.
Maria
Renee says
Thank you Dedri for such a great manghan. Can’t wait to get started on it. Also, did your husband finish his crocheting project?
Jenny says
Good question, Renee! I am sure Dedri will be able to answer that soon :)
Terry says
I love this Manghan… But there are no share buttons on your blog or website anymore. And when I try to pin anything like: this pattern or Sophie’s Universe, etc. I get a message that there are no pinnable images.
Is there no way to share or save any of your patterns anymore?
I love your creations but would like to keep my favorites somewhere (preferably pinterest)
Jenny says
Terry, I am still seeing the ‘Pin it’ logo coming up on all the photographs etc. Maybe try clearing your cookies and cache and trying again will help? :)
Sharon Copsey says
Just love this manghan, will definitely be making this. Have never used the Linen stitch before so something new again. Just love finding all these challenges this year.
Thank you Dedri so much for my crocheting this year.
Jenny says
I love the linen stitch and it washes up really well with the blanket I made for my dad :)
Michaela T says
I love this! What a great pattern. You are a very talented designer, this is definitely going in my to do pile and I have the perfect little man to make it for :-D thanks for providing the pattern for free, that’s really kind and generous. God bless your day xxx
Jenny says
Don’t forget to share photos with us when your manghan is finished, Michaela :)
San says
I’m going to use simly one workd: STUNNING! I love love love this Manghan! I def need to make one in the not to far away future! <3 <3 <3
Jill says
Broken-hearted! The blue apatite is sold out already.
Jenny says
Oh no. Not good. Hope it comes back in stock again! :)
Cathleen says
Thank you, Dedri, for sharing this blanket with us. It is beautiful and can be used for so many things. <3
Heather says
This is something I may make for my husband. I don’t usually make crafts for him. They don’t seem to fit. This does. Thank you!!
Maggie says
Thanks Dedri, no dizzy spells while reading this pattern. Loving the simplicity of it. You are a treasure for sharing this, xx
ilg says
Stunning! Thank you so very much for your generous sharing of your talent again and again.
Heike says
absolutely beautiful! I love everything about this project and Linen Stitch is one of my favourites too. xx
Carmen says
Oh my gosh, so manly! And really very beautiful.. Love the stitch, the colour choices, might attempt this one myself! xx
linda says
This is so so pretty. Thank you for sharing.
Tatsiana says
I like everything about this project: the colors, the yarn and the stich. It’s absolutely beautiful in its simplicity! :) I will definitely make one for myself.
Dedri Uys says
Thank you, Tatsiana. It’s been a welcome break from intricate work!
Esther says
Love it!!
Valley Weavers says
You are such an amazing woman! Thank you so much for all your hard work and gorgeous patterns!!!
Valley