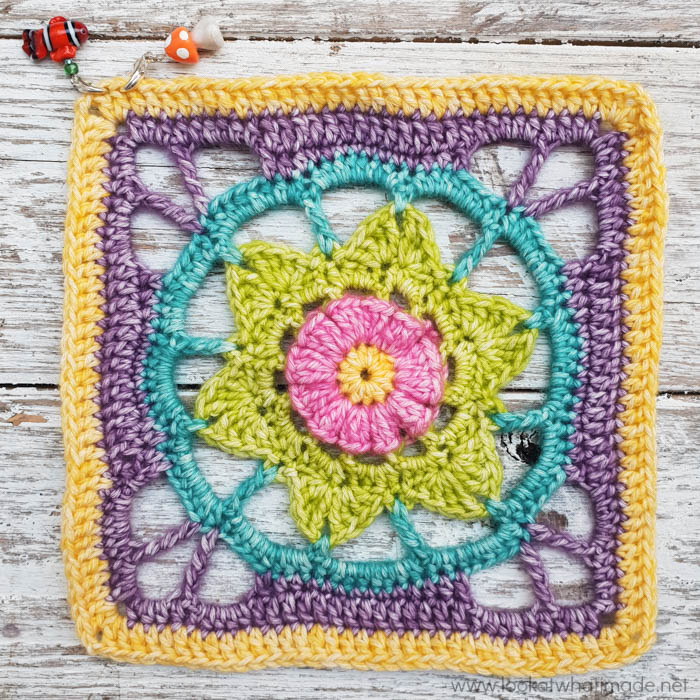
Jeanette is a pretty lacy square that works equally well with a single colour or multiple colours. I designed this square for the Devon Sun Yarns Retreat way back in April 2017, and I think it is high time that I share it with you. I hope you enjoy making this square :)
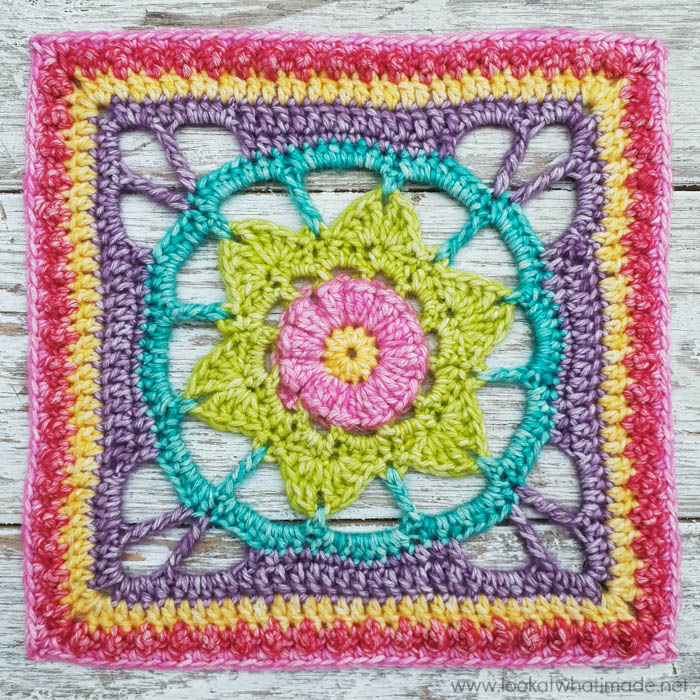
Aunty Jeanette is a very dear friend of mine. When I was sixteen, her son (my boyfriend at the time) and I went on a Prickly-Pear-Picking mission. It was an insanely hot Karoo day, so on the way back (driving in his 1972 Merc with a bucket of prickly pears resting between my feet), I decided to turn down my window. When we got back to his house, I realised that I was completely covered in prickly pear thorns…like head-to-toe covered! The three of us spent the remainder of the afternoon tweezing them all out.
When I was working on the design for this square, the colours and shape of my prototype reminded me of that sweltering laughter-filled day, so I decided to indulge in whimsy and call it Jeanette.
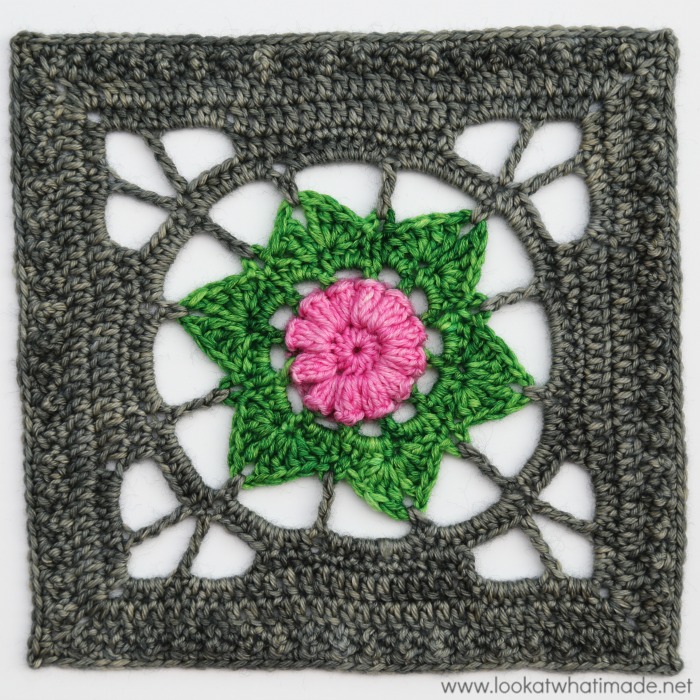
Jeanette Square
© Dedri Uys 2017. All Rights Reserved.
This square was designed for the April 2017 Yarn Retreat with Devon Sun Yarns.
Resources
- Add the Pattern to your Ravelry Queue or buy the ad-free written-only PDF of this pattern in my Ravelry Store (US Terminology). If you do not wish to purchase the formatted PDF, you can use the Print-friendly button at the bottom of this post to save/print the pattern. You will be able to remove the parts you don’t want to print.
- Hashtag: #jeanettecrochetsquare
- More Lacy Square Patterns:
- Emma Crochet Square
- Kay Crochet Square (Coming Soon)
Materials
Small
- 3.5 mm crochet hook
- Stonewashed (80% cotton/20% acrylic), 50g/130m/142yds – 24g total per square
- CC1 – Beryl 833 (Yellow)
- CC2 – Tourmaline 836 (Pink)
- CC3 – Peridot 827 (Green)
- CC4 – Red Jasper 807 (Red)
- CC5 – Turquoise 824 (Blue)
- CC6 – Deep Amethyst 811 (Purple)
Large
- 5.5mm crochet hook
- Stonewashed XL (70% cotton/30% acrylic), 50g/75m/82yds – 64g total per square
- CC1 – Beryl 873 (Yellow)
- CC2 – Tourmaline 876 (Pink)
- CC3 – Peridot 867 (Green)
- CC4 – Red Jasper 847 (Red)
- CC5 – Turquoise 864 (Blue)
- CC6 – Deep Amethyst 851 (Purple)
Abbreviations
US Terminology
- Ch – Chain
- Dc – Double crochet
- Dtr – Double treble crochet
- FPsc – Front post single crochet
- Hdc – Half-double crochet
- RS – Right side
- Sc – Single crochet
- Sl st – Slip stitch
- Sp/sps – Space/spaces
- St/sts – Stitch/stitches
- Tr – Treble crochet
- WS – Wrong side
Punctuation
* An asterisk indicates pattern repeats. You will need to repeat all the instructions between asterisks the number of times specified. This is a hard-core repeat and will consist of multiple instructions.
Parentheses () indicate repeats. You will need to repeat the instructions between parentheses the number of times specified. This is a lower level repeat.
Square Brackets [] are used to indicate a group of stitches to be worked in the same stitch/space.
Special Stitches
- Shell – Make 5 dc in the indicated stitch.
- Standing stitches – Standing stitches are exactly the same as regular stitches, except that they are made ‘in air’, without being attached to a previous stitch. Start with a slip knot already on your hook and complete the stitch as normal.
Gauge
SMALL: At the end of Round 5, your flower should measure 10.5cm/4.1”
LARGE: At the end of Round 5, your flower should measure 16cm/6.3”
Size
SMALL: 18.5cm/7.3”
LARGE: 30.5cm/12”
Notes
For most rounds, I have included instructions for continuing with the same colour or changing to a new colour. Where I have not done so, it is either because you need to fasten off and move starting position, or because using the same colour will make for a slightly neater finish in those particular rounds. You are, of course, welcome to change colours as little or as often as your heart desires.
For this photo tutorial, I have chosen to use the left-overs from my Medium Ubuntu.
Here are the colours I used per round:
| Round 1 | CC1 |
| Round 2 | CC2 |
| Round 3 | CC3 |
| Round 4 | CC3 |
| Round 5 | CC3 |
| Round 6 | CC5 |
| Round 7 | CC5 |
| Round 8 | CC6 |
| Round 9 | CC6 |
| Round 10 | CC1 |
| Round 11 | CC4 |
| Round 12 | CC2 |
Instructions
Round 1
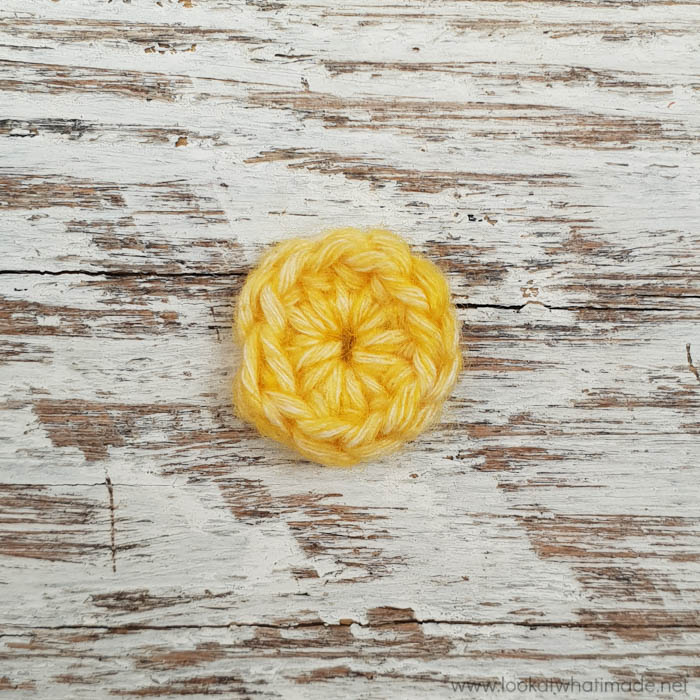
Into a Magic ring, ch 1 (doesn’t count as a st throughout), make 12 hdc. Join to the first hdc with a sl st. {12 hdc}
Note: When I change colours at the end of a round, I always use the Invisible Join instead of a sl st join, working my ends away as I go.
Round 2
- If you are using the same colour: Ch 2 (doesn’t count as a st throughout). Make a Shell in the st at the base of the ch-2.
- If you are using a new colour: Join your yarn by making a standing Shell in any st around.
(Ch 3, make a Shell in the next st) 11 times. Ch 3 and join to the first dc with a sl st. {12 Shells and 12 ch-3 sps}
Note: When making the Shells, they will hide the next st to be worked into. Make very sure that you don’t accidentally skip any stitches and check that you have 12 Shells before you go on to the next round. This round will look all kinds of wrong. Don’t worry about it :)
Round 3
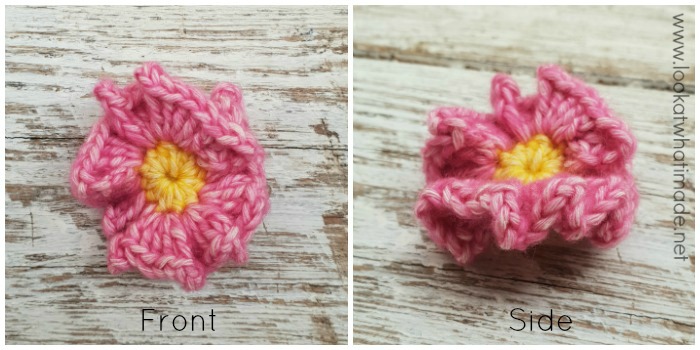
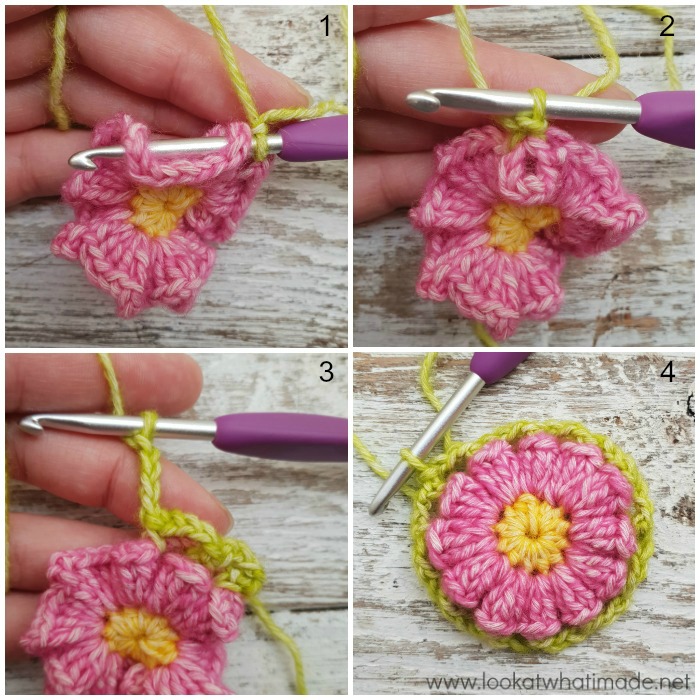
To make a FPsc around a Shell to turn it into a Popcorn, insert your hook from front to back into the ch sp before the Shell. Then insert it from back to front into the ch sp after the Shell {Photo 1}. Complete your sc as normal, making sure to pull on your yarn so that the Popcorn is nice and neat {Photo 2}.
- If you are using the same colour: Ch 1, make a FPsc around the first Shell.
- If you are using a new colour: Join your yarn by making a standing FPsc around the first Shell.
Ch 4. (FPsc around the next Shell, ch 4) 11 times. Join to the first sc with a sl st {Photo 4}. {12 FPsc and 12 ch-4 sps}
Round 4
Sl st into the next ch-4 sp. Ch 1, make 4 hdc in the same ch-4 sp. Make 4 hdc in each remaining ch-4 sp. Join to the first hdc with a sl st. {48 hdc}
Round 5
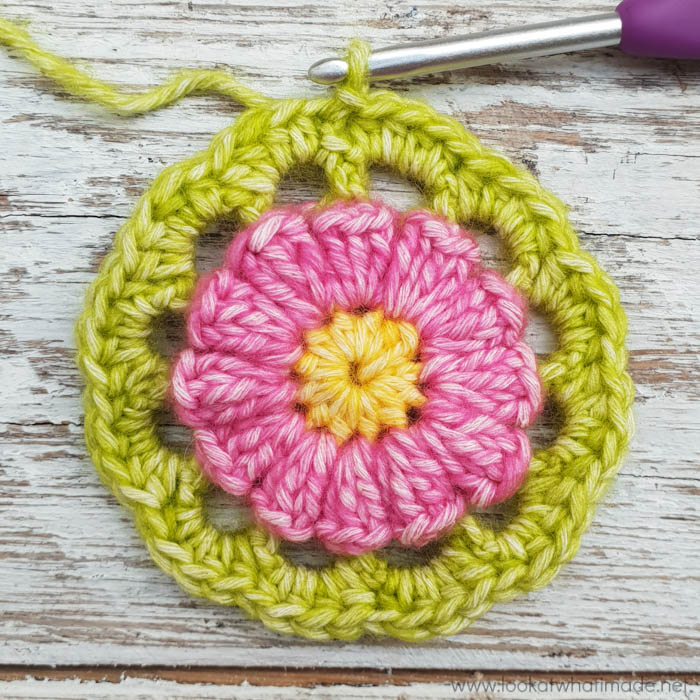
*Skip the next 2 sts. [2 dc, 2 tr] in the next st, which should be the last hdc of the 4-hdc group. Ch 2, [2 tr, 2 dc] in the next st, which should be the first st of the next 4-hdc group. Skip the next 2 sts, sl st in the next st, ch 3, sl st in the next st.*
Repeat from * to * 5 more times. The last sl st should fall in the st that already contains the joining sl st from the previous round. Fasten off and work away your ends. {24 dc, 24 tr, 24 ch-2 sps, and 24 ch-3 sps – not including sl sts}
Round 6
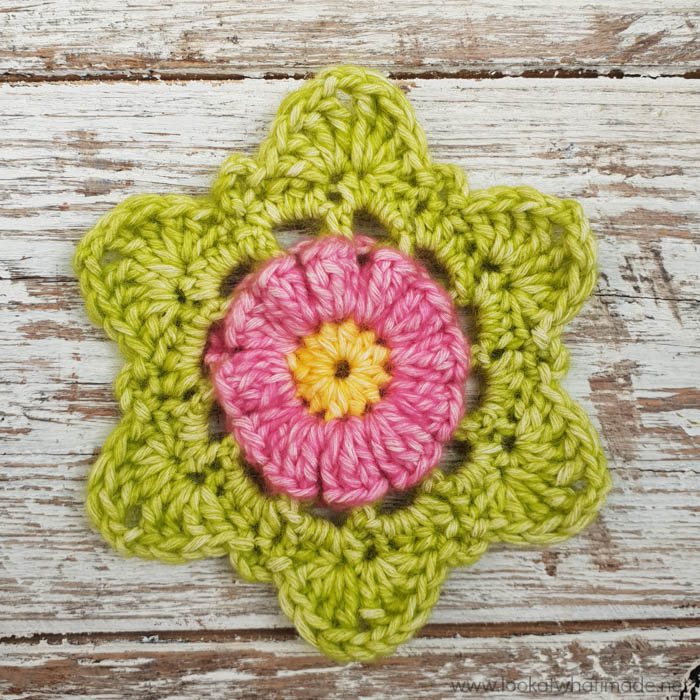
Join your yarn by making a standing sc in any ch-2 sp. (Ch 6, tr in the next ch-3 sp, ch 6, sc in the next ch-2 sp) 6 times, omitting the last sc on the last repeat. Join to the first sc with a sl st. {6 sc, 6 tr, and 12 ch-6 sps}
Round 7
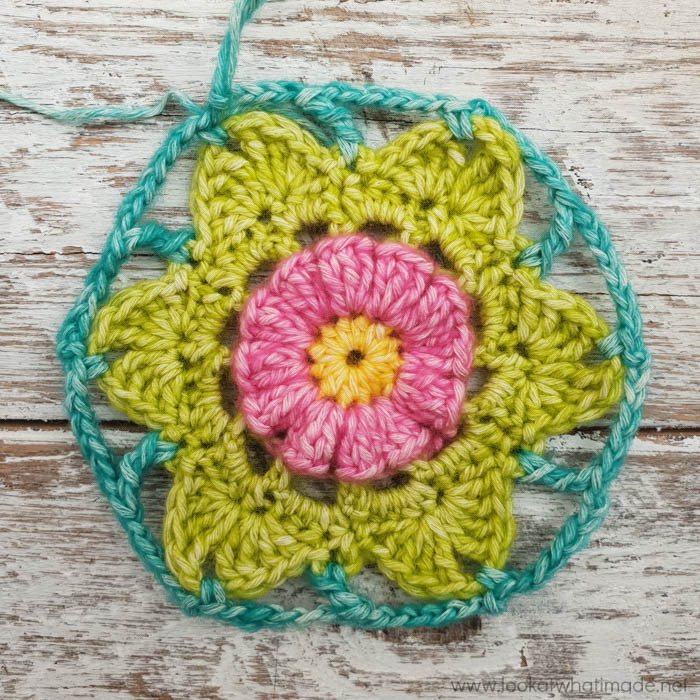
Sl st into the next ch-6 sp. Ch 1, make 8 hdc in the same ch-6 sp. Mark the third hdc with a SM. Make 8 hdc in each remaining ch-6 sp. Join to the first hdc with a sl st. {96 hdc}
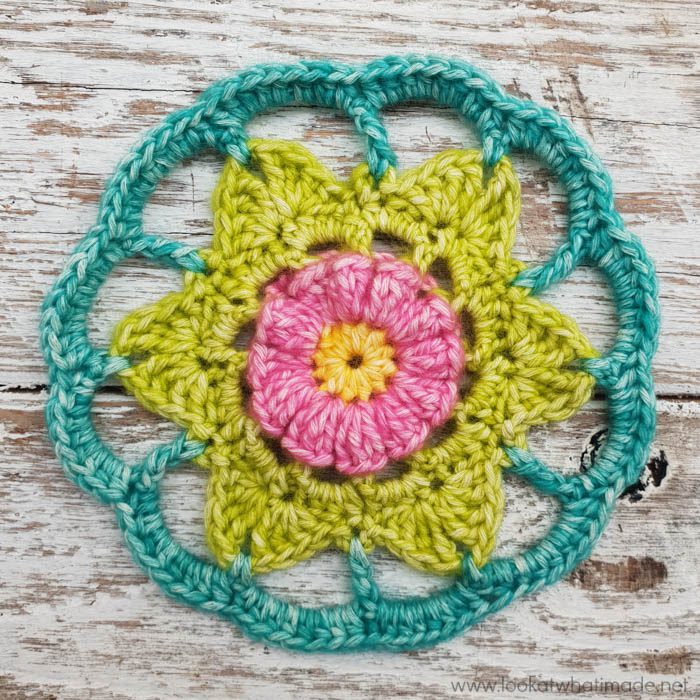
Round 8
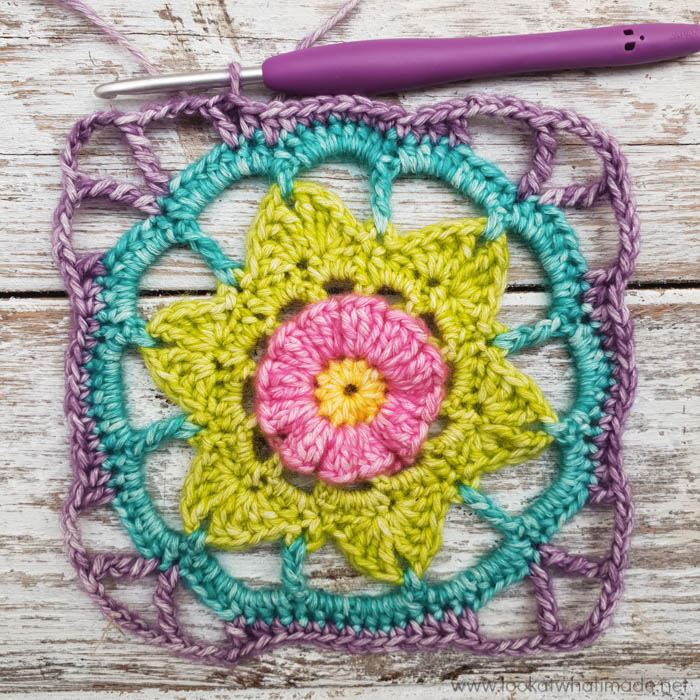
- If you are using the same colour: Sl st in the next 2 sts. The last sl st should fall in the st that contains the SM. Ch 7 (counts as dc + ch-4 sp).
- If you are using a new colour: Join your yarn by making a standing dc in the third (marked) st of the previous round. Ch 4.
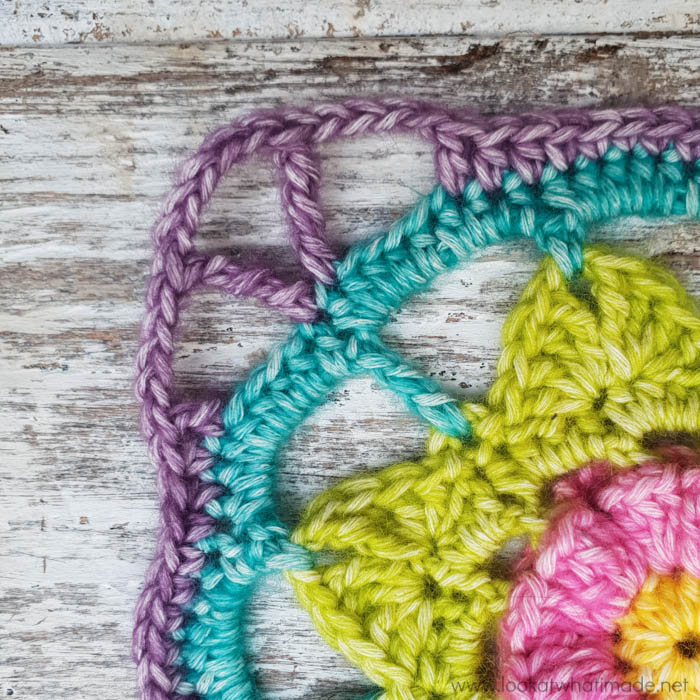
Skip the next 4 sts and dtr in the next st, which should be the last hdc of the first 8-hdc group. Ch 5 and dtr in the next st, which should be the first hdc of the next 8-hdc group. This (dtr, ch-5, dtr) will form your corner. Ch 4 and skip the next 4 sts. Dc in the next st. Hdc in the next 2 sts. Sc in the next 8 sts. Hdc in the next 2 sts.
*Dc in the next st. Ch 4 and skip the next 4 sts. Dtr in the next st, ch 5, dtr in the next st (see placement references above). Ch 4 and skip the next 4 sts. Dc in the next st. Hdc in the next 2 sts. Sc in the next 8 sts. Hdc in the next 2 sts.*
Repeat from * to * 2 more times. If you used the same colour, the last 2 hdc will fall in the stitches that already contain sl sts. Join to the third ch of the beginning ch-7 (or the standing dc) with a sl st. {8 sc, 4 hdc, 2 dc, 2 dtr, and 2 ch-4 sps per side – not including ch-5 corner sps}
Below you will find a close-up of the corner so that you can better see stitch placement.
Round 9
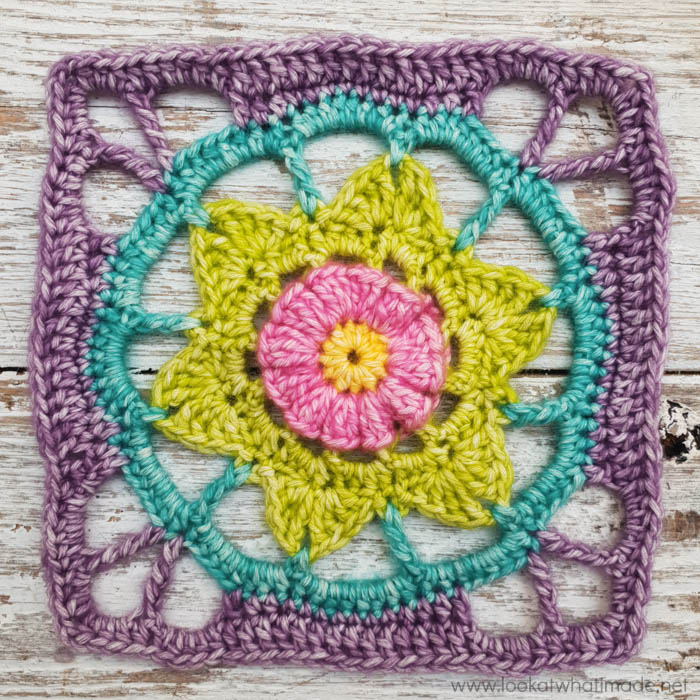
Sl st into the next ch-4 sp. Ch 1, make 5 hdc in the same ch-4 sp. Hdc in the next st. *[3 hdc, ch 2, 3 hdc] in the next ch-5 sp. Hdc in the next st. Make 5 hdc in the next ch-4 sp. Dc in the next 14 sts. Make 5 hdc in the next ch-4 sp. Hdc in the next st.*
Repeat from * to * 3 more times, omitting the last 6 hdc on the last repeat. Join to the first hdc with a sl st. Fasten off and work away your ends. {18 hdc and 14 dc per side – not including ch-2 corner sps}
Round 10
I suggest that you mark the first two corner stitches of each side with st markers so that you can identify them in the next round.
Join your yarn by making a standing dc in any ch-2 corner sp. [Dc, ch 2, 2 dc] in the same ch-2 sp. This is your corner made. *Skip the first (hidden) st. Dc in each remaining st across. [2dc, ch 2, 2dc] in the next ch-2 corner sp.*
Repeat from * to * 3 more times, omitting the last corner on the last repeat. Join to the first dc with a sl st. This stitch will contain a stitch marker. Do not remove the stitch marker yet. {35 dc per side}
- If you are going to use the same colour for the next round: Sl st into the next st, which will also contain a stitch marker.
- If you are going to use a new colour for the next round: Fasten off and work away your ends.
Round 11
Turn your work before you start this round so that the wrong side of your square is facing you. Bubble stitches pop to the back of your work and won’t be visible on the front if you don’t turn!
The first tr of each side will fall in the dc from Round 10 marked by the first stitch marker {Photos 1 and 2}. The first sc of each side will fall in the dc from Round 10 marked by the second stitch marker {Photo 3}. You can remove the stitch markers once you have made those first two stitches of every side.
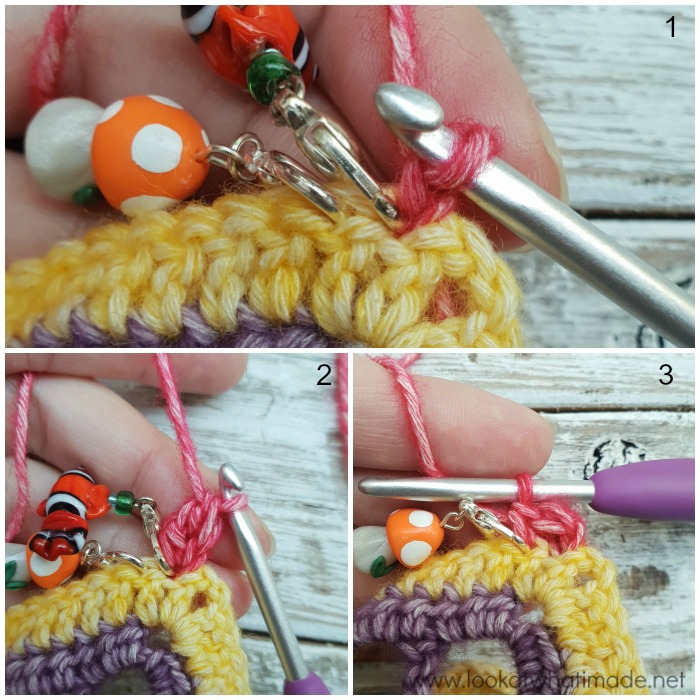
When working with the WS of the previous row/round facing you, the loops of each stitch will be AFTER each post, not before (so left if you are right-handed and right if you are left-handed). Marking these first two stitches on each side helps you identify the first two, making subsequent ones easier to identify.
- If you are using the same colour: With WS facing, ch 1, tr in the st at the base of the ch-1, which should contain the first SM. See Photos 1 and 2 above.
- If you are using a new colour: With WS facing, join your yarn by making a sl st in the first (marked) dc. Ch 1, tr in the same st. See Photos 1 and 2 above.
(Sc in the next st, tr in the next st) until you have worked into each st across. [Sc, ch 2, sc] in the ch-2 corner sp. This is your corner made. If you feel that you will need help identifying the first st of each round when you make the next round, mark the first sc of each corner with a SM.
*Tr in the first st. (Sc in the next st, tr in the next st) until you have worked into each st across. [Sc, ch 2, sc] in the ch-2 corner sp.*
Repeat from * to * 2 more times. Join to the first tr with a sl st. {19 sc and 18 tr per side}
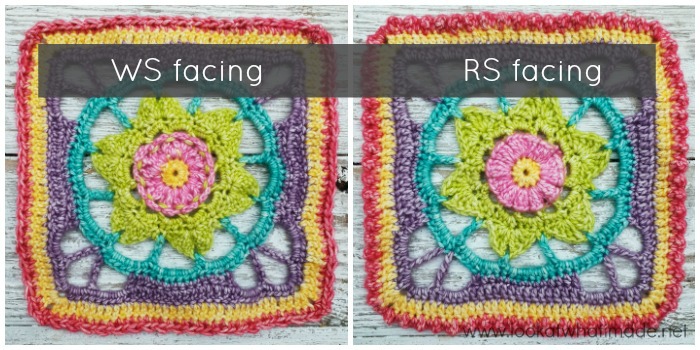
- If you are going to use the same colour for the next round: TURN so that the RS is once again facing you. Sl st in the next sc and in the ch-2 sp.
- If you are going to use a new colour for the next round: Fasten off and work away your ends. TURN your work so that the RS is once again facing you.
Round 12
When making this round, you might find it easier to tilt your work towards you so that you can better see the loops for each stitch. The loops have a natural tendency to point away from you, due to the sc stitches pulling the tr stitches down. If you do this, you will notice that there are big loops (tr) and small loops (sc).
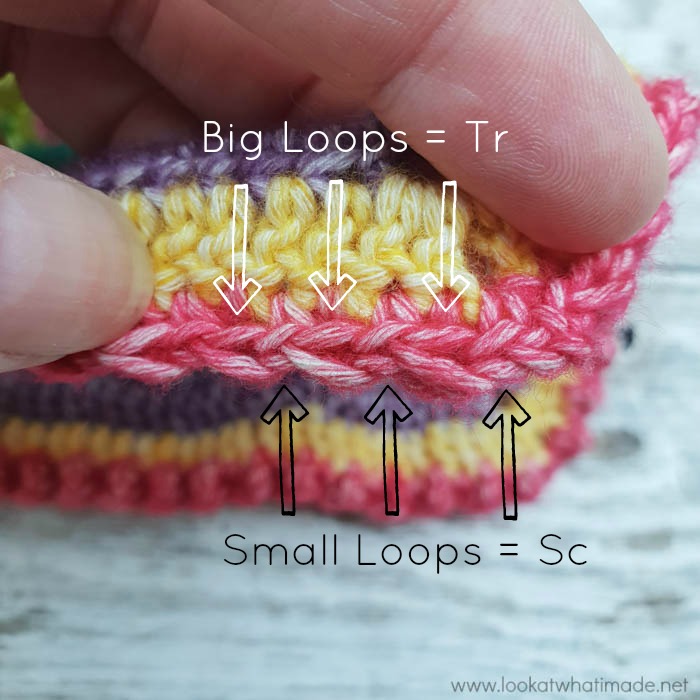
- If you are using the same colour: With RS facing, ch 1, [sc, ch 2, sc] in the ch-2 corner sp. This is your corner made.
- If you are using a new colour: With RS facing, join your yarn by making a standing sc in any ch-2 corner sp. [Ch 1, sc] in the same ch-2 sp. This is your corner made.
*Sc in each st across. Every second st will fall in a tr (big loops) from the previous round. [Sc, ch 2, sc] in the ch-2 corner sp.*
Repeat from * to * 3 more times, omitting the last corner on the last repeat. Join to the first sc with a sl st. Fasten off and work away your ends. {39 sc per side}

Blocking
I suggest blocking this square to make it nice and crisp. Before blocking, the square will wobble slightly.
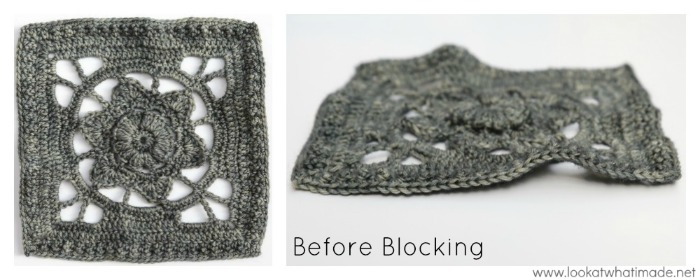
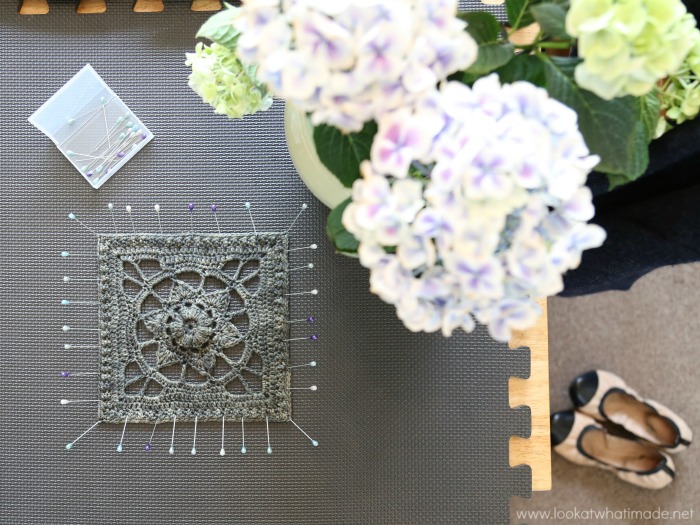
For blocking, I use foam squares like these Interlocking Foam Exercise Mats. They are similar to the Knitter’s Pride Lace Blocking Mats, but cheaper. I also usually use Clover Fork Blocking Pins
, but I have lent my pins to a friend, so regular pins it was.
After blocking, the corner flowers will open up and the square will look much neater.
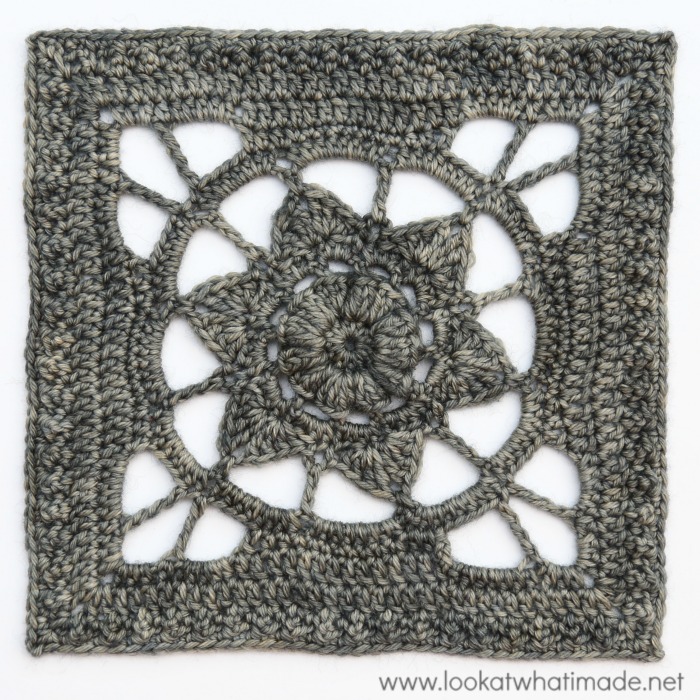
The square in these blocking photos is the original I made for the April 2017 Devon Sun Yarns Retreat. You can find the details for it HERE as a Ravelry Project.

This blog post contains affiliate links. I only link to products I personally use or would use. All opinions are my own.


Jeannette says
Thank you for this beautiful square. I plan to use it for part of a blanket for my great granddaughter incorporating this one (for myself), a Delilah square for my great granddaughter. Now I must search for squares named Josephine, Jeannine and Hannah! Slowly, slowly grows the repertoire!
Dedri Uys says
What a lovely idea to put everyone’s names in the blanket!
Cindy Van de Velde says
Heel mooi patroon!
Dedri Uys says
Dankie :)
Barbara Farquharson says
I love your Jeanette Crochet Square. The colours are perfect, bright and cheery looking. The square also looks good in a single colour.
I will have to have another go at crochet, I usually knit.
Jenny says
We are happy to hear that you are encouraged to have another go at crochet thanks to this lovely square, Barbara!
Enjoy!
Jenny :)