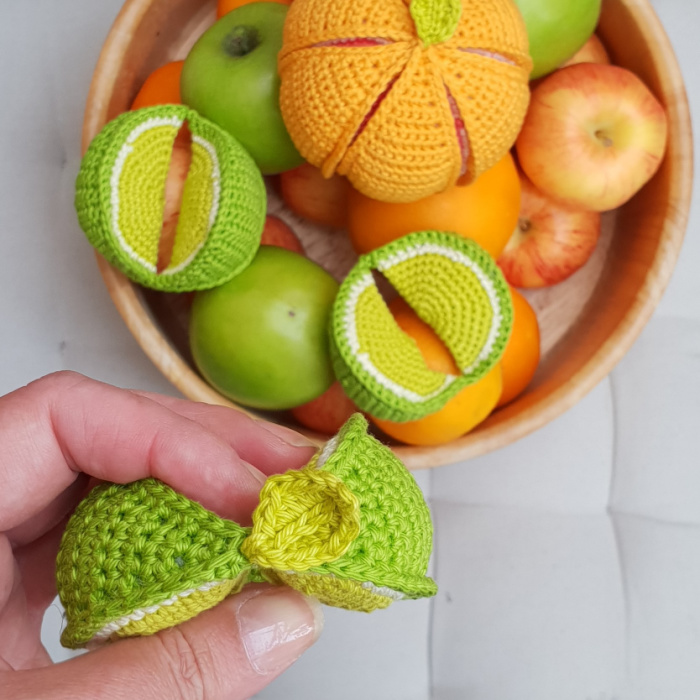
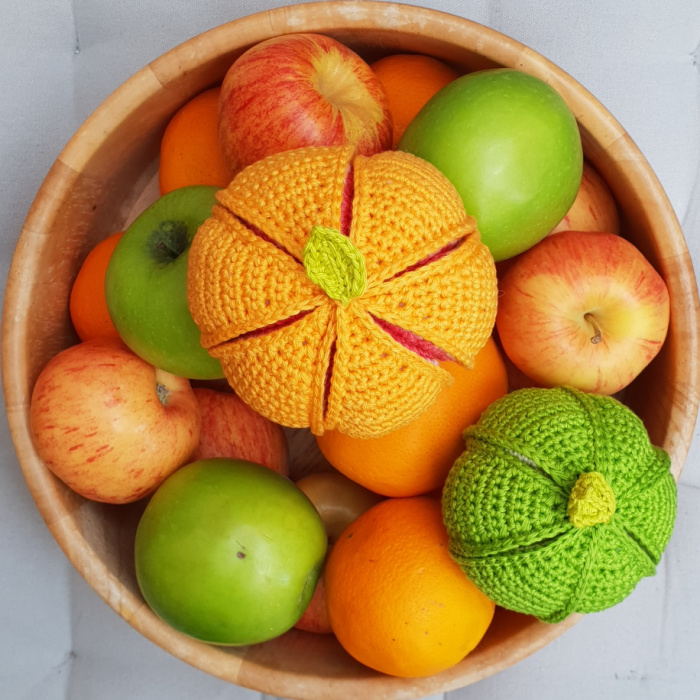
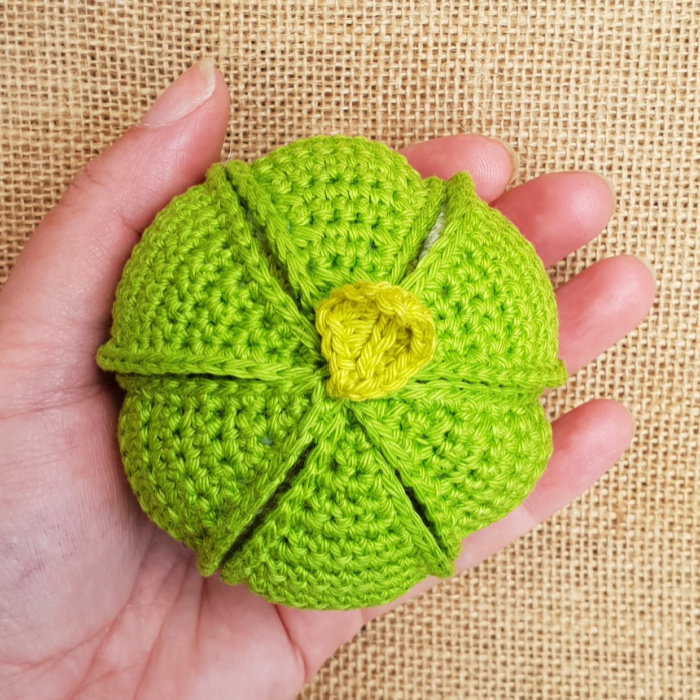
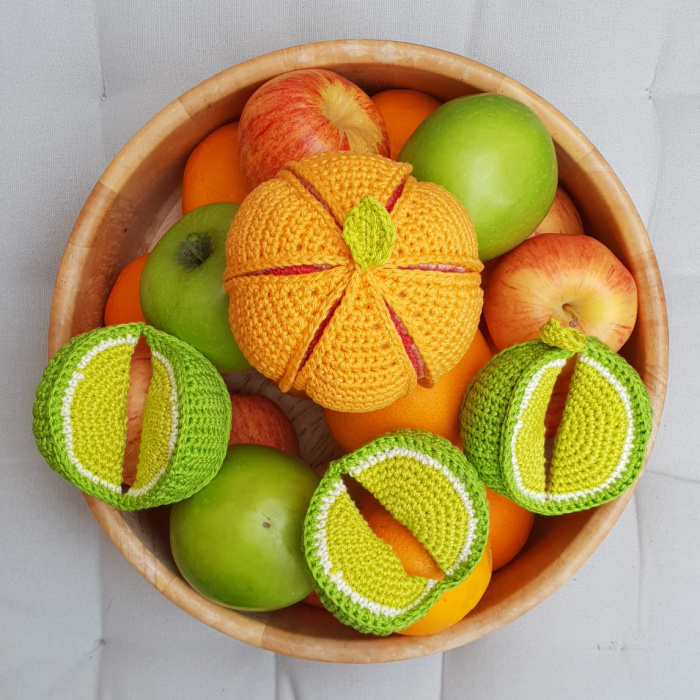
These segment balls are perfect for little hands. They come apart into three segments that have to be ‘built’ to form the fruit. I’ve made a lime and a grapefruit (slightly larger), but you can easily use this pattern to make apples and pumpkins as well. Think embroidered seeds!
If you feel like having a cup of tea with me as I waffle on, you are more than welcome to settle down and read ‘Forty Plants for my 40th’ and ‘The Original Column’. If, however, you are too eager to get to the pattern, you can skip to the ‘Fruity Segment Balls Pattern‘ below.
Index
- Forty Plants for my 40th
- The Original Column in Inside Crochet (January 2019)
- Fruity Sement Balls Pattern
Forty Plants for my 40th
I cannot believe that it has already been three years since I designed these fun little fruit. So much has happened in that time, and yet it feels like I have barely blinked!
As you may know, June is my birthday month. This year is special because a) it’s my double crown birthday* and b) I’m turning 40!!
*Ok, I don’t think double crown birthday is technically a thing, but crown birthday definitely is (although it may be a South African thing).
Your crown birthday is the birthday on which the numeral of your age matches that of the day of the month.
To celebrate, I have something quite exciting planned for the 20th. Oooh, SO exciting!!!
In the meantime, I have decided to buy myself 40 plants for my garden to celebrate 40 years of highs and lows and all the people I love. That last one may need a bit of explanation.
Two weeks ago, I had a proper moment. There were tears. Many tears. The silent, non-stop-leaking kind. I was sad about the fact that we live so far away from our parents and siblings and friends (thank you for the lovely birthday letters, Mom and Dad – I wanted to hug you so much). I was sad about having neglected a dream project, and angry at the world for not having ‘made things happen’, when I had made no effort whatsoever to even make their realisation a goal. I was sad about being far away from the people I grew to love when we lived in London. I was sad about lockdown. I was sad about how it affected my boys and Christiaan – and myself (and everyone we know, really). I was sad about not being able to have the moments of connection that replenish my creative batteries.
I didn’t want to be positive. I didn’t want to make plans. I just wanted to cry and moan. So that is what I did (oh, the drama!). And as I did so, I heard myself say this thing that I didn’t even know was a thing: “I had always imagined that, at this age, I would have a garden full of love plants.”
I would walk around my garden and there would be the Pelargonium from my mom’s garden and the Lavender from my parents-in-law’s farm. There would be the Bay tree that came from the MASSIVE Bay tree on our family farm, and here is the Jasmine from my great granny’s house. Vine from the house I grew up in, Physalis (Appelliefie) from my Aunty’s yard, Rosemary from the neighbour down the road. There would be a tree planted for every birth and death…
You get the picture. A proper nostalgic garden with people connected to every plant. Love Plants!
I cannot do anything about how far away my loved ones are, or when life will return to a semblance of normalcy. BUT… I can make plans to breathe life into my neglected dream project (total hint, hint for the 20th), and I can certainly fill my garden with plants and MAKE them love plants by getting the boys and Christiaan involved. These things won’t ‘fix’ a year that has been hard on every single one of us. But it will give me joy and moments of peace.
To fund this endeavour, I’ve created a 40% off coupon code on Ravelry when you buy 2 or more of my patterns (valid until the 20th of June 2021). Please keep in mind, though, that the majority of those patterns are available for free on my website (like the one below). The paid versions are edited, ad-free PDFs (US terminology).
You can find my paid patterns HERE on Ravelry. The coupon code is: DU40. Remember to add it before checking out!
The Original Column in Inside Crochet (June 2018)
When I picked my hook back up again almost nine years ago, the decision was informed by the 1-year-old ruling our house and the baby blossoming in my belly.
My first two projects were the linen stitch blanket I spoke about in Issue 91 and a smaller version of the same blanket, made with yarn salvaged from an unsuccessful attempt at knitting. The small blanket lives on my lap at work, where the air conditioning is on year-round and even the most glorious of summer days can sometimes feel like the dead of winter. It is scruffy and pilled, but in the hours I spend away from my hook, it is a tangible reminder of the way that designing has changed my life.
This change didn’t start with those two blankets, though. It didn’t even start with the crochet vehicles I made for my boys right after that.
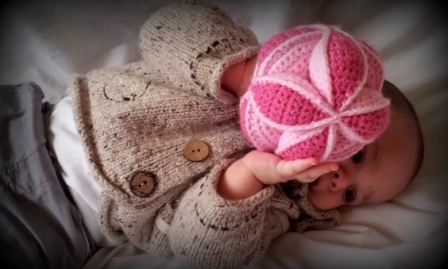
It started with an Amish puzzle ball – a three-segment toy that can be assembled to form a ball, traditionally made with scraps of quilting fabric. One of my mother’s friends sent me a sewing pattern for an Amish puzzle ball. I was too lazy to get my sewing machine out, so I decided to crochet one instead. It was one of the first patterns I shared online and remains one of my most popular patterns.
One day, someone happened to mention her puzzle ball and her grandson’s love of dinosaurs in the same sentence, and I thought: “I could make the puzzle ball INTO a dinosaur”.
When I assembled the three segments of the resulting pattern and saw my little dinosaur for the first time, I was smitten… and immediately obsessed. I couldn’t stop making puzzle animals!
I also started working on fruit patterns using a similar technique but a different construction.
And then a publisher contacted me asking if I would like to do a book full of puzzle animals. I cannot tell you how excited I was! In that whirlwind year before Amamani Puzzle Balls was finally published, I had stopped thinking about the fruit balls altogether. The book was swiftly followed by the Block A Week CAL 2014, Sophie’s Universe 2015, and a whole host of other patterns and opportunities. Four years later, I have finally found the time to revisit these fruity segment balls.
Unfortunately, the ‘babies’ I started designing these toys for are now ‘boys’, with attitude and surprisingly logical opinions.

Even so, they still love everything I make. My youngest will no doubt take these to bed with him, along with the 20 other crochet items that have become part of his bedtime routine (including the Draft Excluder from Issue 88, which he has affectionately dubbed ‘Snakey’).
Dedri
Fruity Segment Balls Pattern
© Dedri Uys 2018. All Rights Reserved.
Resources
- Add to Your Ravelry Queue
- Print-friendly Version: You can find an ad-free PDF version of this pattern in my Ravelry Store HERE. Alternatively, you can use the print-friendly button at the bottom of this post to save the pattern to PDF.
- UK Version: A UK version of this pattern is available in Issue 103 of Inside Crochet HERE. The pattern below is the US version.
- Hashtag: If you share photos, please use #crochetfruitpuzzle so that we can find your projects and have a gleeful look.
- You can buy Scheepjes Catona from the following retailers:
Difficulty
Intermediate.
Materials
- 2.75mm hook*
- Scheepjes Catona (100% Cotton), 50g/125m/136yds
- Yarn A – 252 (Watermelon) x 1 ball
- Yarn B – 263 (Petal Peach) x 1 ball
- Yarn C – 411 (Sweet Orange) x 1 ball
- Yarn D – 245 (Green Yellow) x 1 ball
- Yarn E – 101 (Candle Light) x 1 ball
- Yarn F – 205 (Kiwi) x 1 ball
- Fibre Filling
*I am a very tight crocheter. If you find it hard to match the gauge (or you know that you have a loose tension), you might want to go down to a 2.5mm hook.
Gauge
Wedges should measure 6.3cm/2.5” at end of Round 9.
Size
Lime: 24cm/9.5” circumference, 7.5cm/3” diameter
Grapefruit: 28cm/11” circumference, 9cm/3.5” diameter
Abbreviations
US Terminology
- Ch – Chain
- Dc – Double crochet
- Hdc – Half-double crochet
- Sc – Single crochet
- Sl st – Slip stitch
- SM – Stitch marker
- Sp/sps – Space/spaces
- St/sts – Stitch/stitches
- WS – Wrong Side
Punctuation
- Parentheses ()indicate repeats. You will need to repeat the instructions between parentheses the number of times specified.
Special Stitches
Sc2tog
Insert your hook into the indicated st/sp. Yarn over and pull up a loop. Insert your hook into the next st/sp. Yarn over and pull up a loop {3 loops on your hook}. Yarn over and pull through all 3 loops.
Surface Sl st
Holding the working yarn to the back of your work, insert your hook into the indicated st/sp. Yarn over and pull up a loop. Pull the loop through the st on your hook.
Notes
A large part of this pattern is worked in amigurumi style, which means that rounds are worked in a spiral without joining at the end of each round – unless you are specifically instructed to do so. You might find stitch markers helpful to identify the start of each round.
When joining, make sure that you work tightly. Also, make sure that you work your ends away very well so that your segments are secure.
Lime
Lime Wedges
(Make 6)
With Yarn D, make a magic ring.
Round 1: Into the ring, 1ch (doesn’t count as st throughout), 6 sc. {6 sc}
Round 2: Make 2 sc in each st. {12 sc}
Round 3: (Make 2 sc in the next st, sc in the next st) 6 times. {18 sc}
Round 4: (Make 2 sc in the next st, sc in the next 2 sts) 6 times. {24 sc}
Round 5: (Make 2 sc in the next st, sc in the next 3 sts) 6 times. {30 sc}
Round 6: (Make 2 sc in the next st, sc in the next 4 sts) 6 times. {36 sc}
Round 7: (Make 2 sc in the next st, sc in the next 5 sts) 6 times. {42 sc}
Round 8: (Make 2 sc in the next st, sc in the next 6 sts) 6 times, sl st in the next st. {48 sc}
Round 9: Change to Yarn E. Ch 1, sc in the st at the base of the ch-1. Mark this st with a SM. Sc in the next 3 sts. (Make 2 sc in the next st, sc in the next 7 sts) 5 times. Make 2 sc in the next st, sc in the next 3 sts. Join to the first sc with a sl st. Do not remove the SM. Fasten off and work away your ends. {54 sc}
Lime Segments
(Make 3)
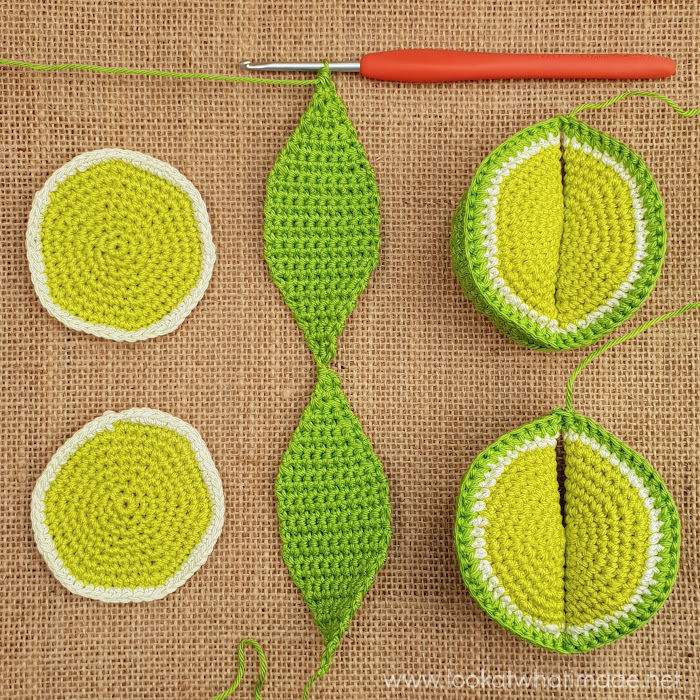
Lime Peel
Row 1: With Yarn F, ch 2 (first ch will count as a row when it comes to joining the wedges to the peel). {2 ch sts}
Row 2: Make 2 sc in the second ch from the hook and TURN. {2 sc}
Row 3: Ch 1 (doesn’t count as a st throughout), sc in each of the next 2 sts, TURN. {2 sc}
Row 4: Ch 1, make 2 sc in each of the 2 sts, TURN. {4 sc}
Row 5: Ch 1, sc in each of the next 4 sts, TURN. {4 sc}
Row 6: Ch 1, make 2 sc in the first st, sc in the next 2 sts, make 2 sc in the last st, TURN. {6 sc}
Row 7: Ch 1, sc in each of the next 6 sts, TURN. {6 sc}
Row 8: Ch 1, make 2 sc in the first st, sc in the next 4 sts, make 2 sc in the last st, TURN. {8 sc}
Row 9: Ch 1, sc in each of the next 8 sts, TURN. {8 sc}
Row 10: Ch 1, make 2 sc in the first st, sc in the next 6 sts, make 2 sc in the last st, TURN. {10 sc}
Row 11: Ch 1, sc in each of the next 10 sts, TURN. {10 sc}
Rows 12 – 18: as Row 11.
Row 19: Ch 1, sc2tog, sc in the next 6 sts, sc2tog, TURN. {8 sc}
Row 20: Ch 1, sc in each of the next 8 sts, TURN. {8 sc}
Row 21: Ch 1, sc2tog, sc in the next 4 sts, sc2tog, TURN. {6 sc}
Row 22: Ch 1, sc in each of the next 6 sts, TURN. {6 sc}
Row 23: Ch 1, sc2tog, sc in the next 2 sts, sc2tog, TURN. {4 sc}
Row 24: Ch 1, sc in each of the next 4 sts, TURN. {4 sc}
Row 25: Ch 1, sc2tog twice, TURN. {2 sc}.
Row 26: Ch 1, sc in each of the next 2 sts, TURN. {2 sc}
Row 27: Ch 1, sc2tog, TURN. {1 sc}
Repeat Rows 1 – 27 once, giving you a ‘chain’ of 2 lids. Do not fasten off.
Joining Lime Peel to Wedges to Create Segments
Place one wedge behind the lid closest to your hook, with the WS of the wedge facing you and the stitch containing SM aligned with last st of the peel {Photo 1}.
Working into each row of the lid and each st of the wedge (starting in marked st), make 27 sc through both layers {Photos 2 – 5}. The last sc should fall in the beginning chain of the peel {Photo 6}.
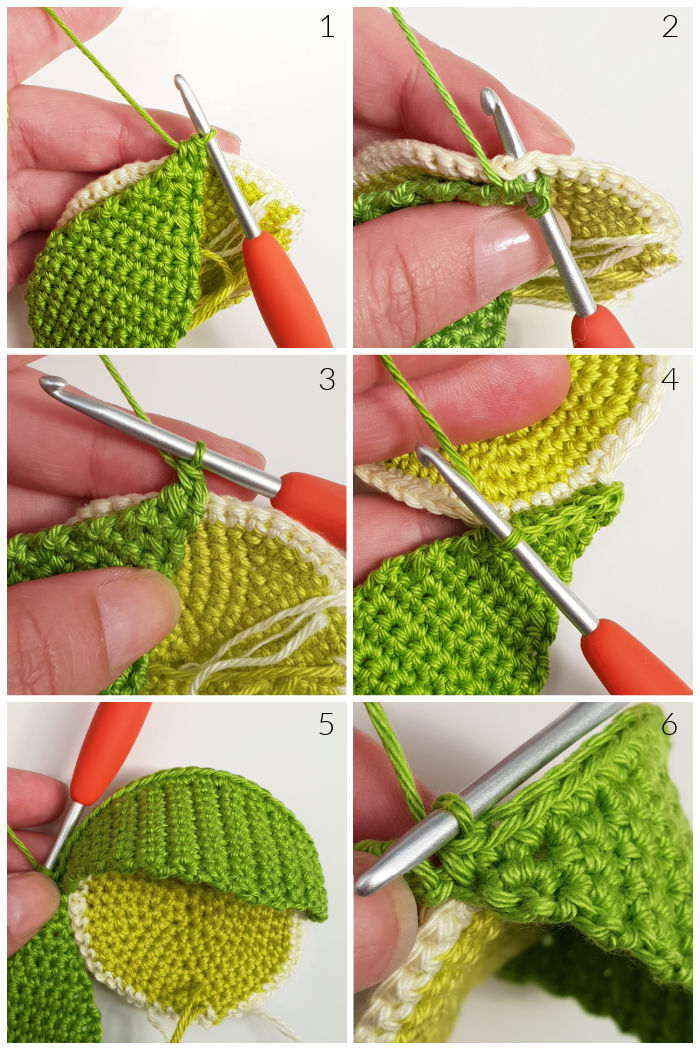
Place a wedge behind the next lid (as before) and make 27 sc through both layers {Photos 7 and 8}.

Ch 2 and mark this ch-2 sp with a SM {Photo 9}. Working into the other side of the lids and the remaining sts of the wedges, close each wedge by making 27 sc, again working through both layers and into every st/row. Stuff as you go {Photos 10 – 14}.
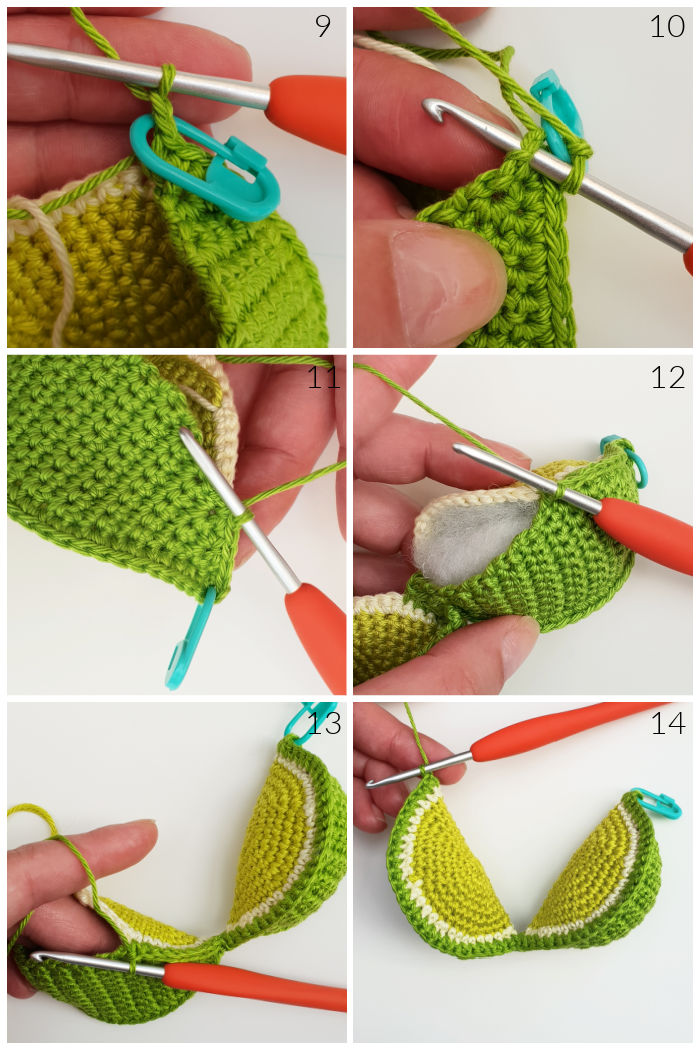
Sl st in the marked ch-2 sp to join wedges to each other {Photos 15 and 16}. Sl st in first joining sc to complete {Photos 17 and 18}. Fasten off and work away ends very well!
Lime Leaf
(Make 1)
Ch 6, leaving a 15cm/6” yarn end.
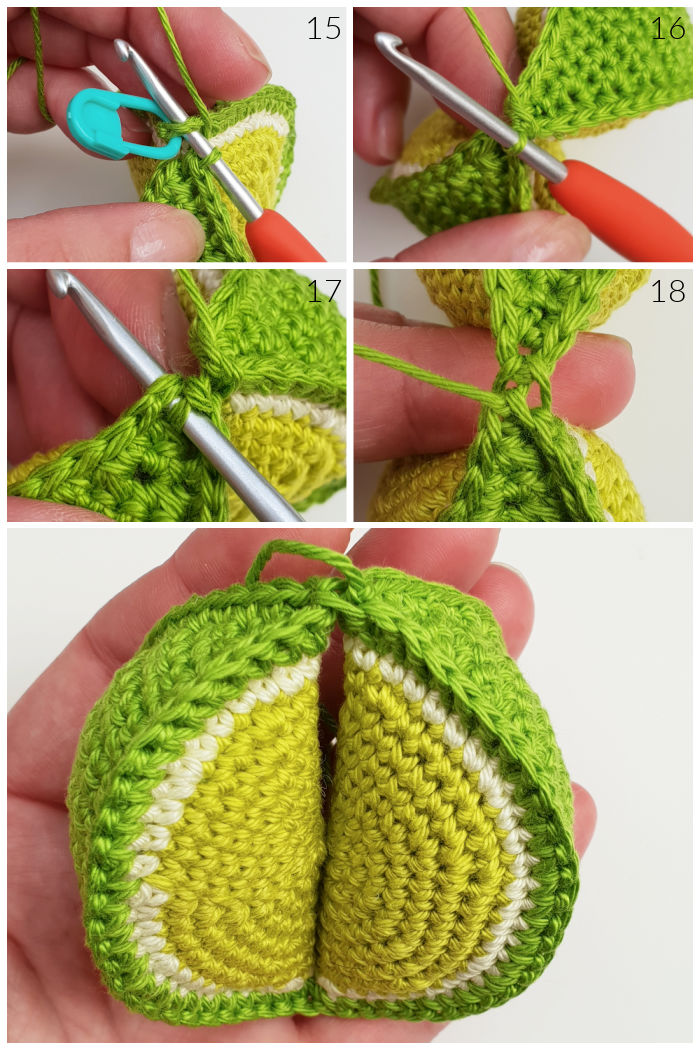
Round 1: With Yarn D and working into one loop only, sc in the second ch from the hook, make 2 hdc in the next ch, dc in the next ch, make 2 hdc in the next ch, sc in the last ch. Ch 2, sl st in the second ch from the hook.
Working into the remaining loops of the foundation ch and OVER initial yarn end, sc in the next ch, make 2 hdc in the next ch, dc in the next ch, make 2 hdc in the next ch, sc in the last ch. Join to the first sc with a sl st.
Working into the holes in the foundation ch, make 5 surface sl sts along the centre of the leaf. Fasten off and work yarn end away to back of the leaf. {4 sc, 4 hdc, 2 dc, 1 ch-2 picot, and 5 surface sl st}
Use the initial yarn end to sew the leaf onto the sl st join of one of the segments.
Building the Lime
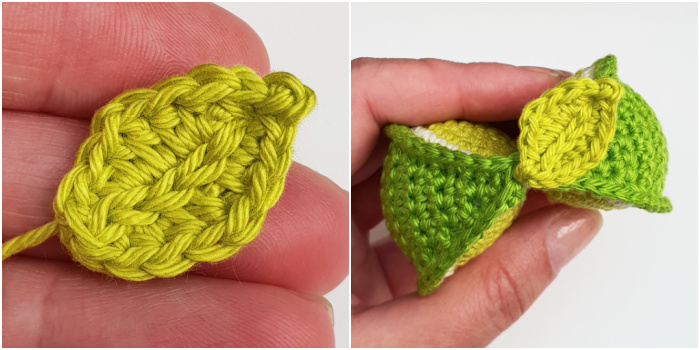
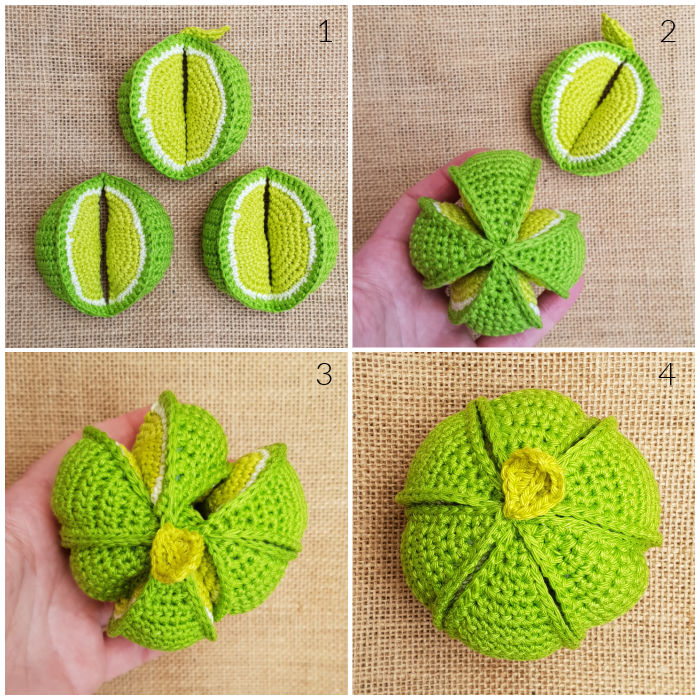
Slip the three segments over each other one by one, keeping the one with the leaf for last. Tug and squish the wedges into place until they form a neat ball.
Grapefruit
Grapefruit Wedges
(Make 6)
With Yarn A, make an adjustable ring.
Rounds 1 – 7: As Rounds 1 – 7 of Lime Wedges above.
Round 8: (Make 2 sc in the next st, sc in the next 6 sts) 6 times. {48 sc}
Round 9: (Make 2 sc in the next st, sc in the next 7 sts) 6 times. {54 sc}
Round 10: (Make 2 sc in the next st, sc in the next 8 sts) 6 times. {60 sc}
Round 11: Change to Yarn B, Ch 1, sc in the st at the base of the ch-1 Mark this st with a SM. Sc in the next 5 sts. (Make 2 sc in the next st, sc in the next 9 sts) 5 times. Make 2 sc in the next st, sc in the next 3 sts. Join to the first sc with a sl st. Do not remove the SM. Fasten off and work away your ends. {66 sc}
Grapefruit Segments
(Make 3)
Grapefruit Peel
Row 1: With Yarn C, ch 2 (first ch will count as a row when it comes to joining the wedges to the peel). {2 ch sts}
Rows 2 – 11: As Rows 2 – 11 of Lime Peel.
Row 12: Ch 1, make 2 sc in the first st, sc in the next 8 sts, make 2 sc in the last st, TURN. {12 sc}
Row 13: Ch 1, sc in each of the next 12 sts, TURN. {12 sc}
Rows 14 – 22: As Row 13.
Row 23: Ch 1, sc2tog, sc in the next 8 sts, sc2tog, TURN. {10 sc}
Row 24: Ch 1, sc in each of the next 10 sts, TURN. {8 sc}
Rows 25 – 33: As Rows 19 – 27 of Lime Peel.
Repeat Rows 1 – 33 once, giving you a ‘chain’ of 2 lids. Do not fasten off.
Joining Grapefruit Peel to Wedges to Create Segments
Place one wedge behind the lid closest to your hook, with the WS of the wedge facing you and the stitch containing SM aligned with last st of the peel.
Working into each row of the lid and each st of the wedge (starting in marked st), make 33 sc through both layers. The last sc should fall in the beginning chain of the peel.
Place a wedge behind the next lid (as before) and make 33 sc through both layers.
Ch 2 and mark this ch-2 sp with a SM. Working into the other side of the lids and the remaining sts of the wedges, close each wedge by making 33 sc, again working through both layers and into every st/row. Stuff as you go!
Sl st in the marked ch-2 sp to join wedges to each other, sl st in first joining sc to complete. Fasten off and work away ends very well!
Grapefruit Leaf
As Lime Leaf
Building Grapefruit
As Building Lime

This blog post contains affiliate links. I only link to products I personally use or would use. All opinions are my own.


