The Buddy Wrist Warmers pattern is a companion pattern to my Diversion scarf and uses yarn left over from that project. (If you would like to read more about the Terrazzo yarn I used, please see last week’s blog post HERE.) I’ve also used the same offset linen stitch (because I LOVE IT).
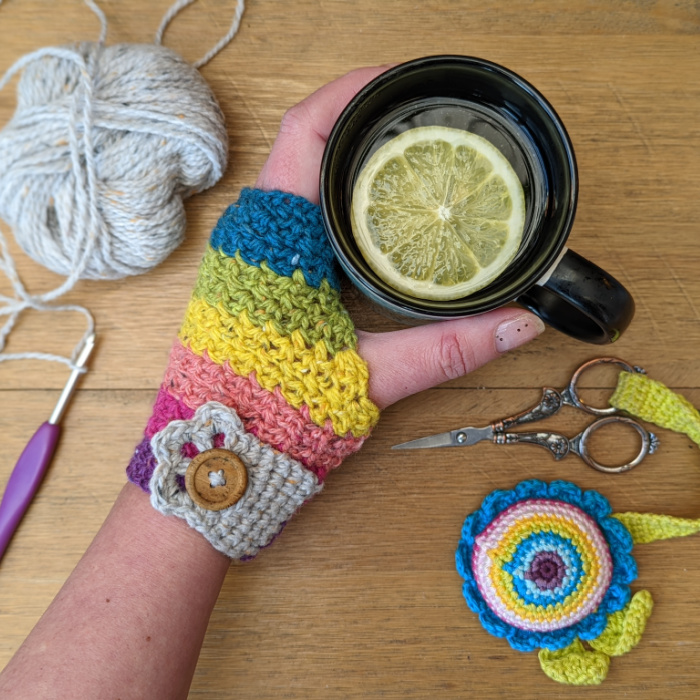
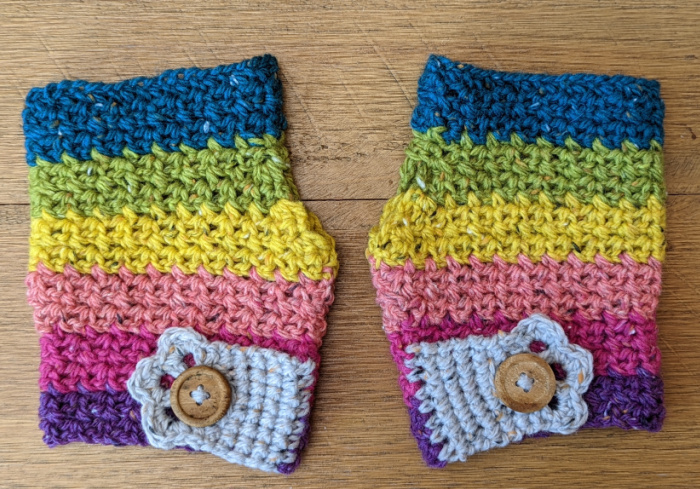
These colourful wrist warmers work up very quickly – especially if you decide to make them in a single colour and omit the closure. The little closure is my favourite part though, borrowed from my Mighty Fine Day bag. It looks like a little cat paw (or dog paw). I know a lot of us have a furry friend in our lives, and my sentimental heart liked the thought of carrying a nod to this love around on my wrists as I go out and about.
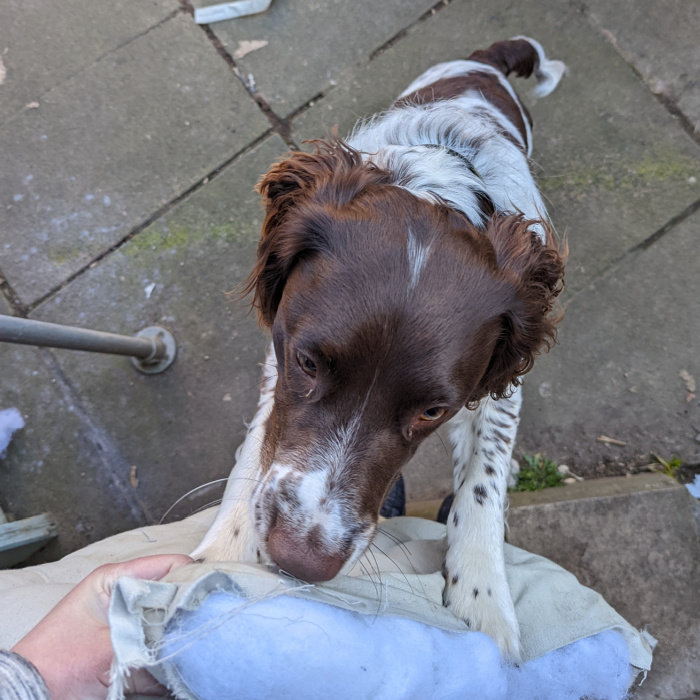
The buttons were salvaged from a cushion our dog Buddy kindly tore to pieces yesterday, and they are the perfect sentimental addition 😊
You can just imagine this photo with a speech bubble saying: “Mum! Give it back!! I had it first!!!)
Buddy Wrist Warmers Pattern
© Dedri Uys and Scheepjes 2022. All Rights Reserved.
Resources
- Add to your Ravelry Queue
- Hashtag: If you share photos, please use #buddywristwarmers so that we can find your projects and have a gleeful look.
- You can buy Scheepjes Terrazzo from the following retailers:
- Caro’s Atelier (Netherlands)
- Wool Warehouse (International)
- More Retailers
Abbreviations
US Terminology (US/UK Conversion Chart)
- Ch– Chain
- Dc – Double crochet
- Hdc– Half-double crochet
- RS – Right side
- Sc– Single crochet
- Sc2tog– Single crochet 2 together
- Sl st – slip stitch
- Sp/sps– Space/spaces
- St/sts– Stitch/stitches
- WS – Wrong side
Punctuation
- () – Repeat instructions between parentheses the number of times specified
- [] – Square brackets are used to indicate stitches made into the same st/sp
Materials
- Scheepjes Terrazzo(70% recycled mulesing free wool,30% recycled viscose; 50g/175m/191yds)
- Yarn A – 751 x 1 ball (Blue)
- Yarn B – 707 x 1 ball (Green)
- Yarn C – 702 x 1 ball (Yellow)
- Yarn D – 714 x 1 ball (Light Pink)
- Yarn E – 721 x 1 ball (Dark Pink)
- Yarn F – 729 x 1 ball (Purple)
- Yarn G – 740 x 1 ball (Grey)
- 5mm hook
- 4mm hook
- 2 x Buttons that fit through the hole in the closure – I used 17mm buttons
Useful Information: I used roughly 2g of each colour for these wrist warmers, making them perfect for using up scrap yarn.
Gauge
Per 10cm/4” square, using textured stitch as in pattern:
- 11 (sc, ch-1) pairs
- 19 rows
Size
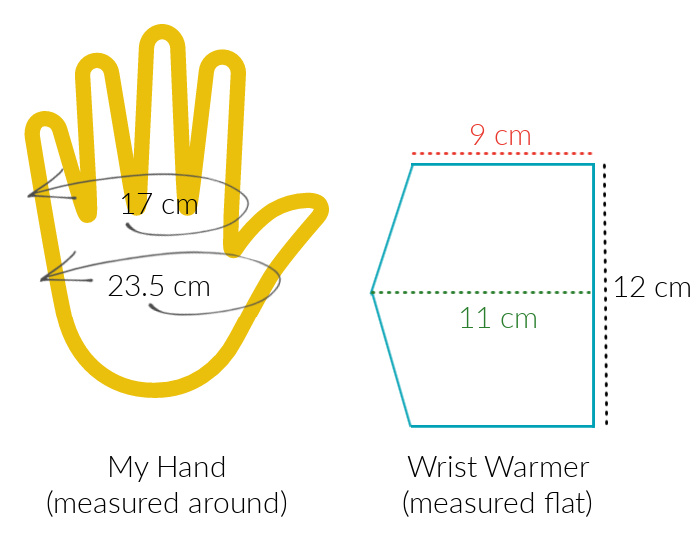
12.5cm/5″ long by 9cm/3.5” wide (along top and bottom) and 11cm/4.3” wide across widest part –measured flat.
Notes
Texture/Stitch Anatomy
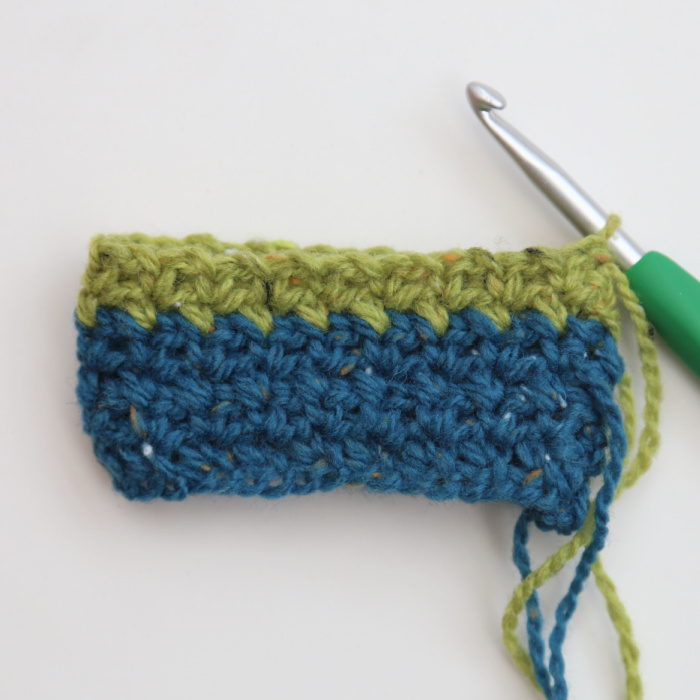
When making these wrist warmers, you will ONLY be working into the sc sts, not into the ch-1 sps. Make sure that you are identifying your stitches correctly. You should end up with a woven/block texture. See Diversion Scarf for photographic help.
Working in the Round
When working in the round, you will omit the last ch-1 sp. Instead, the sl st at the end of the round will count as the first ch-1 sp of the next round. Omitting that last ch will make for a neater join with this particular stitch combination.
Omitting the Closure
I have supplied instructions for if you don’t want to make the closure and would rather have the wrist part of the wrist warmers be tubular as well.
Changing Colours
When changing colours, you will do so when making the slip stitch at the end of the row/round before the colour change as follows:
Insert your hook into the indicated st. Yarn over with the new colour and complete your slip stitch as normal.
Colour Chart

Instructions
With Yarn A and a 5mm hook: Ch 38, join to the first ch with a sl st to form a ring, making sure that your chain isn’t twisted. {38 ch}
Round 1: Ch 1 (doesn’t count as a st throughout). Sc in the same st as the sl st join. (Ch 1, skip the next ch, sc in the next ch) until 1 st remains. Skip the last st and join to the first sc with a sl st. TURN. {19 sc and 19 ch-1 sps}
Slip your work over your fingers until it abuts your thumb. If it is too tight, consider restarting with a larger hook. If it is too loose, consider going down a hook size (or two).
Round 2: Ch 1, sc in the same st as the sl st join. (Ch 1, skip the next ch-1 sp, sc in the next sc) until 1 st remains. Skip the last st and join to the first sc with a sl st. TURN. {19 sc and 19 ch-1 sps}
Rounds 3 – 6: As Round 2.
From this point, you will be working in rows.
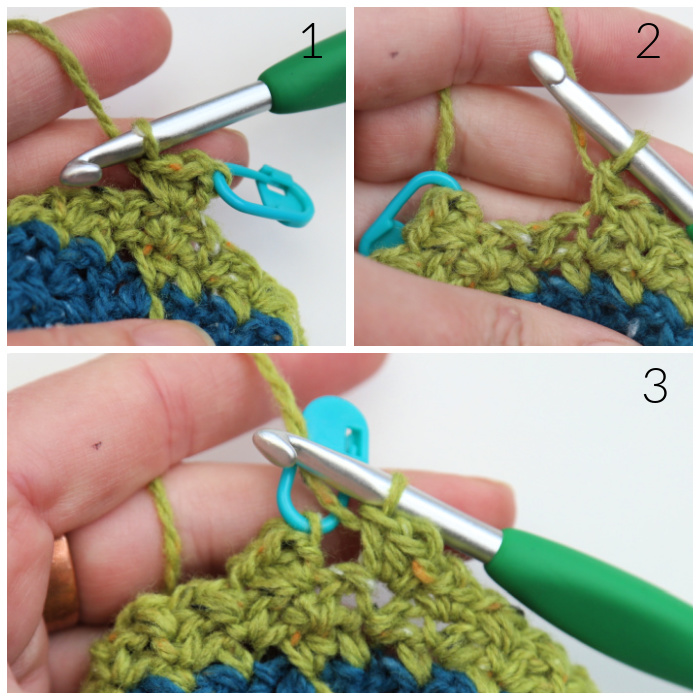
Row 7: Ch 2 (counts as hdc throughout). Put a SM in the second ch if you think you will struggle to identify it in the next round. [Hdc, sc] in the same st as the sl st join {Photo 1}. (Ch 1, skip the next ch-1 sp, sc in the next st) until 1 sc and 2 ch-1 sps remain {Photo 2}. Ch 1, skip the next ch-1 sp, [sc, 2hdc] in the next st {Photo 3}. Ignore the last ch-1 sp. TURN. {19 sc, 4 hdc, and 18 ch-1sps}
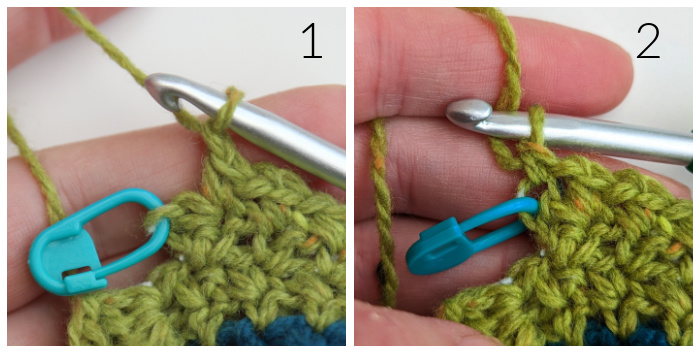
Row 8: Ch 1, sc in the first st. Ch 1, skip the next st. (Sc in the next st, ch 1, skip the next ch-1 sp) until 3 sts remain. Sc in the next st, ch 1, skip the next st. Sc in the last st, which will be the ch-2 at the start of the previous row {Photos 1 and 2}. TURN. {21 sc and 20 ch-1sps}
Row 9: Ch 2. Put a SM in the second ch if you think you will struggle to identify it in the next round. [Hdc, sc] in the st at the base of the ch-2. Ch 1, skip the next ch-1 sp. (Sc in the next sc, ch 1, skip the next ch-1 sp) until one st remains. [Sc, 2 hdc] in the last st. TURN. {21 sc, 4 hdc, and 20 ch-1sps}
Row10: As Row 8. {23 sc and 22 ch-1sps}
Row 11: As Rows 9. {23 sc, 4 hdc and 22 ch-1sps}
Row 12: As Row 8. {25 sc and 24 ch-1sps}
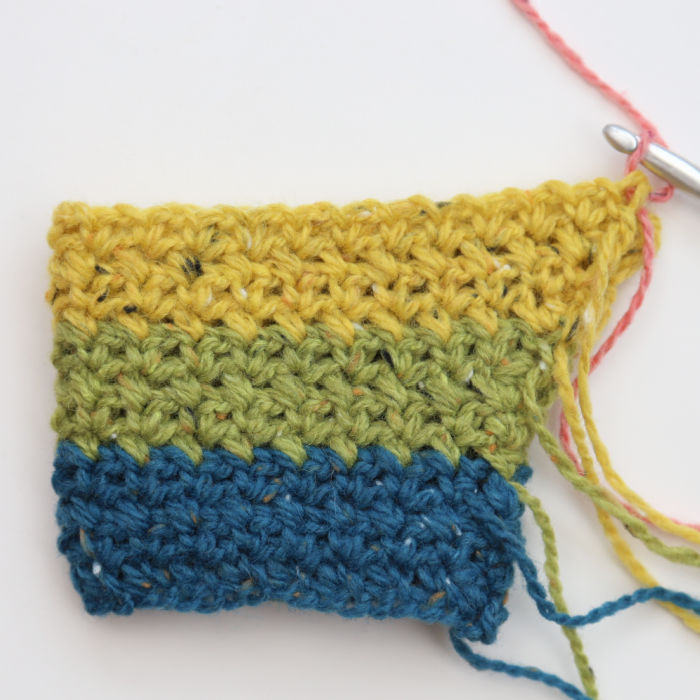
From this point on, you will be working in rounds again.
Round 13: Ch 1. Place the first st of Row 12 behind the last st of Row 12, forming a circle. Insert your hook into the last st and then into the first st {Photo 2}. Make a sc through both layers {Photo 3}. (Ch 1, skip the next ch-1 sp, sc in the next sc) until 1 ch-1 sp remains. Skip the last ch-1 sp and join to the first sc wih a sl st. TURN. {24 sc and 24 ch-1 sps}
Round 14: Ch 1, sc in the same st as the sl st join. (Ch 1, skip the next ch-1 sp, sc in the next sc) until 1 ch-1 sp remains. Skip the last ch-1 sp and join to the first sc wih a sl st. TURN. {24 sc and 24 ch-1 sps}
Round 15: Ch 1. Sc2tog, working into the same st as the sl st join and the next sc {Photos 1 and 2}. (Ch 1, skip the next ch-1 sp, sc in the next sc) 10 times. Ch 1, skip the next ch-1 sp, sc2tog over the next 2 sc. (Ch 1, skip the next ch-1 sp, sc in the next sc) 10 times. Skip the last ch-1 sp and join to the first sc wih a sl st. TURN. {22 sc and 22 ch-1 sps}
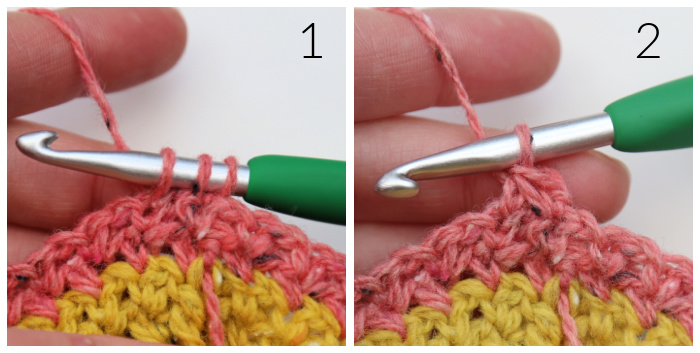
Round 16: As Round 14. {22 sc and 22 ch-1 sps}
Round 17: Ch 1. Sc2tog, working into the same st as the sl st join and the next sc. (Ch 1, skip the next ch-1 sp, sc in the next sc) 9 times. Ch 1, skip the next ch-1 sp, sc2tog over the next 2 sc. (Ch 1, skip the next ch-1 sp, sc in the next sc) 9 times. Skip the last ch-1 sp and join to the first sc wih a sl st. TURN. {20 sc and 20 ch-1 sps}
At this point, you can decide if you want to add the little cat-paw closure I added to my wrist-warmers, or if you want the wrist part to be tubular all the way. If you want to add the closure, continue on with the pattern. If you want the wrist part to be closed, please scroll down to Optional: Tubular Wrist-warmer.
Round 18: As Round 14, marking the first ch-1 sp with a SM {See Row 20 photos}. {20 sc and 20 ch-1 sps}
From this point on, we will be working in rows again.
Row 19: Ch 1, sc in the same st as the sl st join. (Ch 1, skip the next ch-1 sp, sc in the next sc) until 1 (marked) ch-1 sp remains. TURN. {20 sc and 19 ch-1 sps}
Row 20: Ch 1, sc in the first st. (Ch 1, skip the next ch-1 sp, sc in the next sc) until no more sts remain. TURN. {20 sc and 19 ch-1 sps}
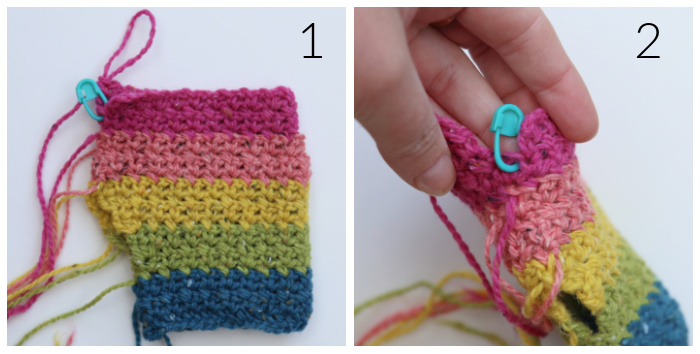
Rows 21 – 23: As Row 19.
Row 24: As Row 19, marking the first sc on the first wrist-warmer and the last sc on the second wrist-warmer with a SM. Fasten off and work away your ends.
Make sure that the RS of each wrist warmer is facing out. To identify the RS, look at the first row/round after each colour change. If the stitches are slanted to the left (right, if you are left-handed), the RS is facing out. If the stitches form ‘V’s, the WS is facing out.
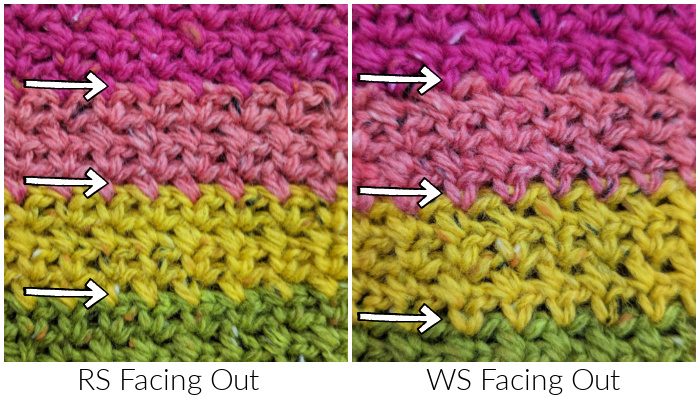
Closure
We will now be adding the little cat-paw closure to each wrist-warmer. You will notice that there is a little slit created by Rows 19 – 24. We will be working into the side of that slit.
Use a 4mm hook and Yarn G for both closures.
First Wrist Warmer
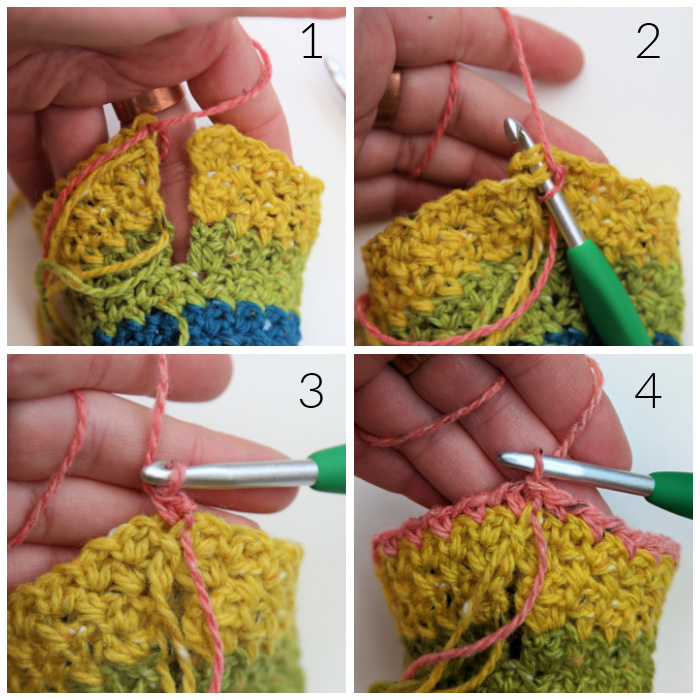
Row 1: With RS facing and working into the ‘slit’ on the side of the wrist-warmer, join your yarn by making a standing sc in the first (marked) st of Row 24. Sc in the side of the next 5 rows. Sc in the second sc from Round 18, which will already contain the last sc of Row 19*. Sc in the marked ch-1 sp from Round 18 {Photo 2}. Turn. {8 sc}
*If you have trouble identifying the sc to work into, you will notice a ‘hole’ between the last sc made and the SM from Round 18 {Photo 1}. Aim for that hole and you’ll be fine. This is one you can fudge 😊
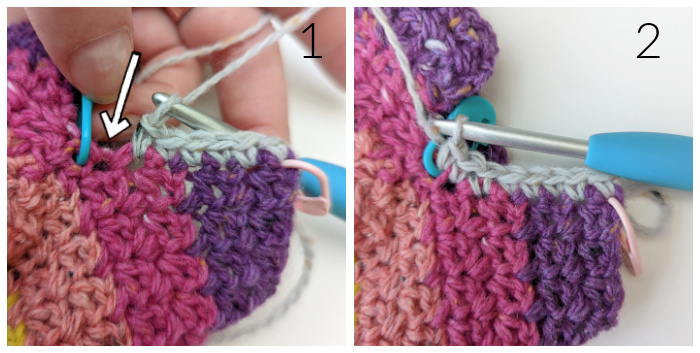
Row 2: With WS facing, sl st in each st across. Ch 1 and TURN. Don’t accidentally skip the first st, which will be hidden by the working yarn. {8 sl st}
Row 3: With RS facing and working over the sl sts from the previous row, sc in each sc from the row before that. TURN. {8 sc}
Rows 4 – 9: Repeat Rows 2 and 3.
Row 10: With WS facing, sl st in the first 2 sts. Ch 5 and skip the next 4 sts. Sl st in the last 2 sts. Ch 1 and TURN. {4 sl sts and 1 ch-5 sp}
Row 11: With RS facing and working over the sl sts from the previous row, sc in the first 2 sts, make 4 sc in the next ch-5 sp, sc in the last 2 sts. TURN. {8 sc}
Row 12: With WS facing, sl st in the first 3 sts. (Ch 3, sc in the next st) twice. Ch 3. Sl st in the last 3 sts. Ch 1 and TURN. {6 sl sts, 2 sc, and 3 ch-3 sps}
Row 13: With RS facing, ([sc, hdc, dc, hdc ,sc] in the next ch-3 sp) 3 times. Sl st in the last sc from Row 37. Fasten off and work away your ends. {6 sc, 6 hdc, and 3 dc – not including sl st}
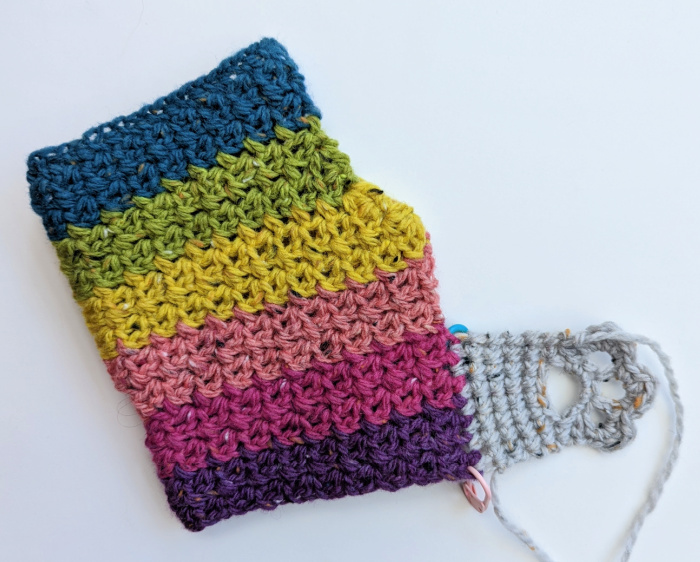
Second Wrist Warmer
Row 1: With RS facing and working into the ‘slit’ on the side of the wrist-warmer, join your yarn by making a standing sc in the marked ch-1 sp from Round 18. Sc in the first sc from Round 18, which will already contain the last sc of Row 19 {indicated with an arrow in Photo 1 and illustrated in Photo 2}. Sc in the side of the next 5 rows. Sc in the last (marked) st of Row 24 {Photo 3}. Turn. {8 sc}
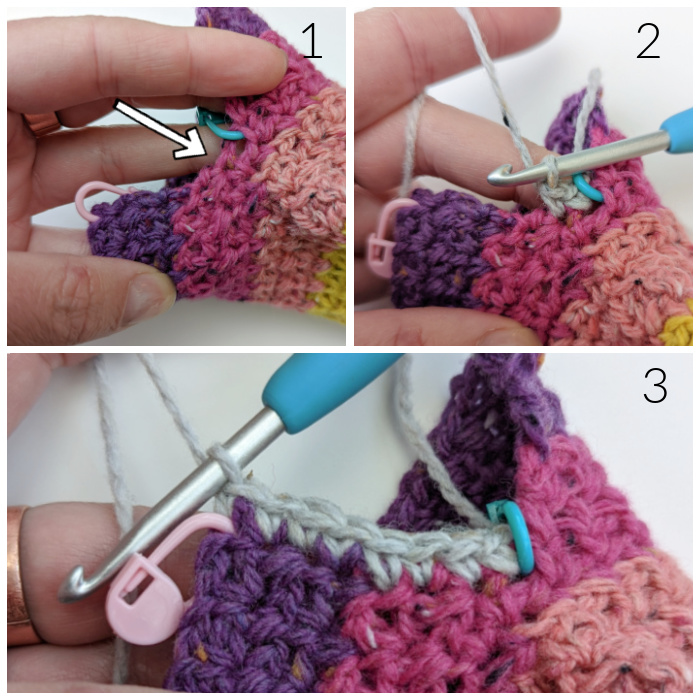
Rows 2 – 13: As Rows 2 – 13 above.
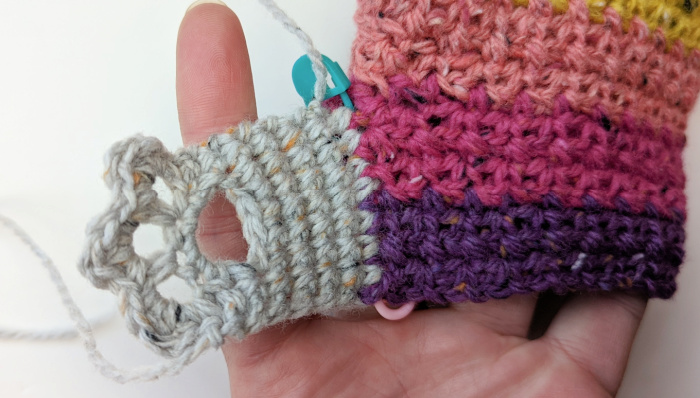
Buttons
Place the wrist warmers on your hands and decide where you need to attach your buttons. It might be handy to ask a friend to help you do this as it can be a bit fiddly on your own. For me, the buttons worked best when placed over the fourth ch-1 sp of Row 20.
Attach the buttons with Yarn G and slip them through the large central hole in the cat-paw to close.
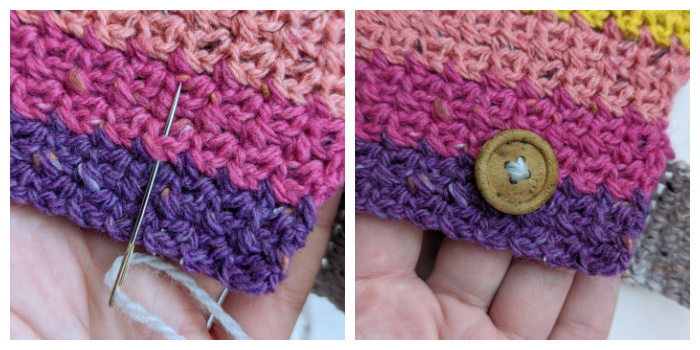
And there you have it :) Two colourful little Buddy Wrist Warmers!
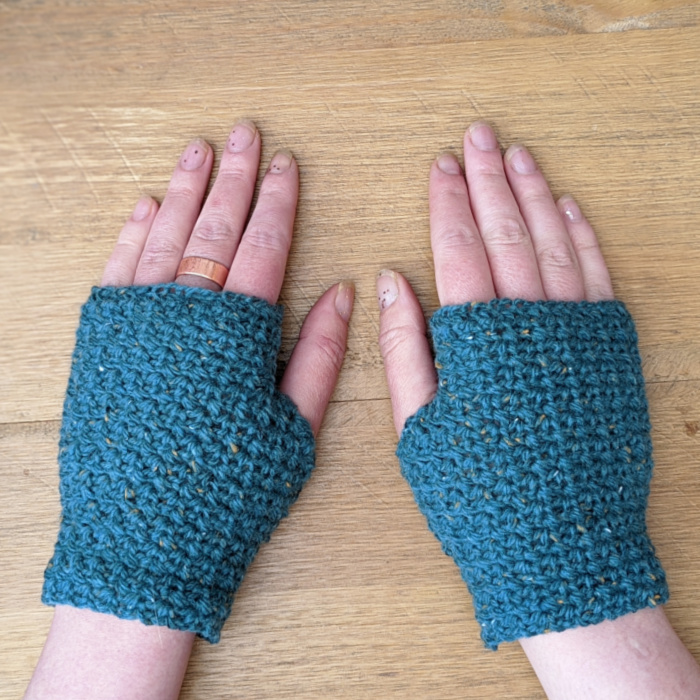
Optional: Tubular Wrist-warmer
Rounds 18 – 24: As Round 14, fastening off at the end of Round 24. Refer to the RS/WS photos at the end of Row 24 above and work away your ends. {20 sc and 20 ch-1 sps}

This blog post contains affiliate links. I only link to products I personally use or would use. All opinions are my own.


Chiklet says
A tip that I did with this handwarmer is that I added one completed finger. For me when I crochet my left pointer finger is the one that I use as my yarn guide so it gets ‘the burn’. So just complete whichever finger that gets burned.
alexander says
i love the hand warmers