This bag is a nod to our camping trip in Cornwall a few months ago, and specifically the Mighty Fine Day we spent at Tintagel (King Arthur!!!) with our closest friends (more like family, really) and their boys.
The colours are also reminiscent of my daily commute during Covid – the pigeons that took over the platform at Acton Town as soon as the majority of people stopped using public transport, the gorgeous yellow flowers I walk past every day and never noticed, and the day I had a whole Piccadilly line carriage to myself.
Marrying these everyday moments with the ones that make my heart sing will hopefully serve as a reminder that the best days are not the only mighty fine days there are. Sometimes the regular days are mighty fine too!
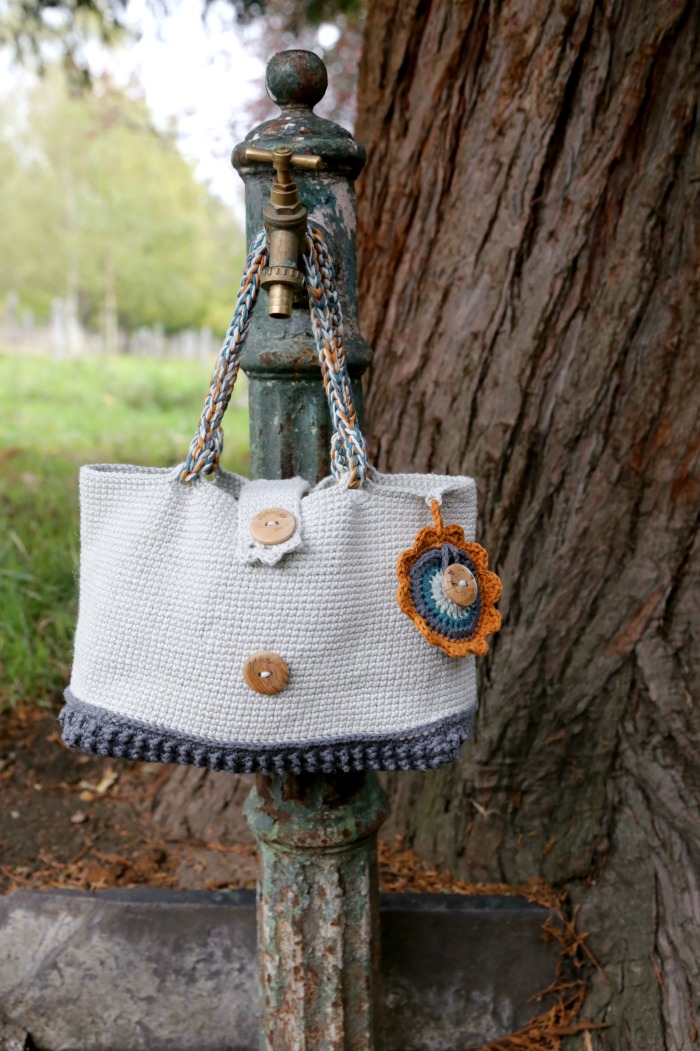
A Mighty Fine Day Bag
© Dedri Uys and Scheepjes 2020. All Rights Reserved.
Information
Resources
- Hashtag: If you share photos, please use #mightyfinedaybag so that we can find your projects and have a gleeful look.
- You can buy Scheepjes Mighty and Cahlista from the following retailers:
- Add This Pattern to your Ravelry Queue
Want to see more of our A Mighty Fine Day Bag journey?
- A Mighty Fine Day Bag: The Yarn
- A Mighty Fine Day Bag: Work in Progress
- A Mighty Fine Day Bag: Reveal
Photo Tutorials
Due to the length of this tutorial, I have broken it up into two parts. You can find Part 2 HERE:
If you prefer a formatted ad-free US PDF version of this pattern (Photo Tutorial), you can buy it HERE in my Ravelry Store.
Difficulty
Intermediate.
Materials
- 4mm hook*
- 6mm hook (for the straps only)
- Scheepjes Mighty (32% Jute, 68% Cotton), 50g/80m/87yds
- Yarn A – Mountain 755 (Dark Grey) x 2
- Yarn B – Canyon 759 (Light Grey) x 4
- Scheepjes Cahlista (100% Double Gassed Cotton), 15g/25.5m/28yds
- Yarn C – 172 (Light Grey) x 1
- Yarn D – 402 (Light Teal) x 1
- Yarn E – 391 (Teal) x 1
- Yarn F – 501 (Dark Grey) x 1
- Yarn G – 383 (Dark Mustard) x 1
- 3cm/1.2” wooden button x 3
*I am a very tight crocheter, so I used a 4.5mm hook for the bag.
Gauge
19 sts and 22 rows of Crossed Single Crochet in 10cm/4”.
Size
Bag: 10cm/4” x 28cm/11” x 20cm/8” (depth)
Straps: 40cm/15.8”
Abbreviations
US Terminology
- Ch – Chain
- Dc – Double crochet
- Hdc – Half-double crochet
- Rem – Remaining/remains
- RS – Right Side
- Sc – Single crochet
- Sl st – Slip stitch
- SM – Stitch marker
- Sp/sps – Space/spaces
- St/sts – Stitch/stitches
- Tr – Treble crochet
- WS – Wrong Side
Punctuation
- *An asterisk indicates pattern repeats. You will need to repeat all the instructions between asterisks the number of times specified. This is a hard-core repeat and will consist of multiple instructions.
- Parentheses ()indicate repeats. You will need to repeat the instructions between parentheses the number of times specified. This is a lower level repeat.
- Square Brackets [] are used to indicate a group of stitches to be worked in the same stitch/space.
Special Stitches
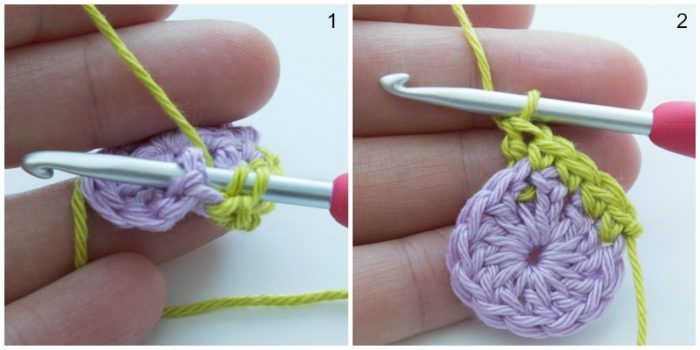
Back Post (BP)
Identify the post of the stitch you want to work around. Insert your hook from the back to the front and then from the front to the back around the post of the stitch so that the post lies behind your hook {Photo 1}. Complete your stitch as normal {Photo 2}. You might find it easier to twist your work forward so that you can see what you are doing.
Crossed Single Crochet (XSC)
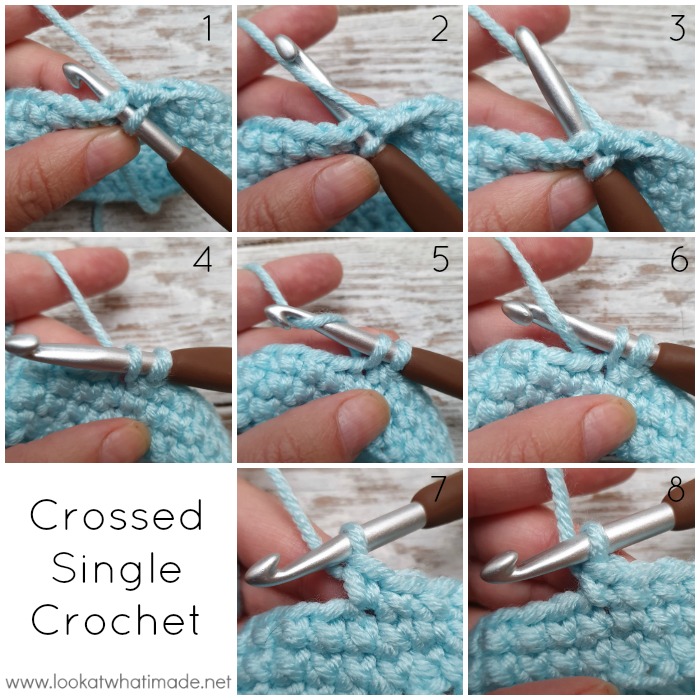
Insert your hook into the indicated st {Photo 1}.
Usually, when making a single crochet, you would yarn over so that your hook is under the yarn {Photo 2}, but for a Crossed Single Crochet, you will need to yarn UNDER, which means that your hook should be above the yarn when you grab it {Photo 3}. Pull up a loop {Photo 4}.
Again, when making a regular single crochet, you would yarn over at this point {Photo 5}, but to create the Crossed Single Crochet, you will need to yarn UNDER, which means that your hook should be behind the yarn when you grab it {Photo 6}. Pull through both loops on hook.
With a regular single crochet, the ‘legs’ of the single crochet would form a V that is easily visible on the front of your work {Photo 7}. When making a Crossed Single Crochet, the legs of the V ‘cross’ each other to form an X {Photo 8}.
Do these stitches slowly and mindfully. They are quite meditative once you get into the swing of them.
Standing Stitches
Standing stitches are the same as regular stitches, except that they are made ‘in air’, without being attached to a previous stitch. Start with a slip knot already on your hook and complete the stitch as normal. As an example, you can see a tutorial for a standing single crochet HERE.
Notes
Running Stitch Marker (RSM)
When making the sides of the bag, which are worked in a spiral, I suggest using a piece of scrap yarn to mark the start of each round. To do this, simply flip the yarn backwards/forward over your work before making the first st of each round. This will create a running stitch that creeps steadily right (left, if you are left-handed) as it travels up your work. To remove this, simply pull on one end when you are done with your bag.
Photo Tutorial
I am using Cahlista and different colours for the photo tutorial to make it easier to see the stitches.
Instructions
Base
With Yarn A, ch 19.
Row 1: Sc in the second ch from the hook and each rem ch across. TURN. {18 sc}
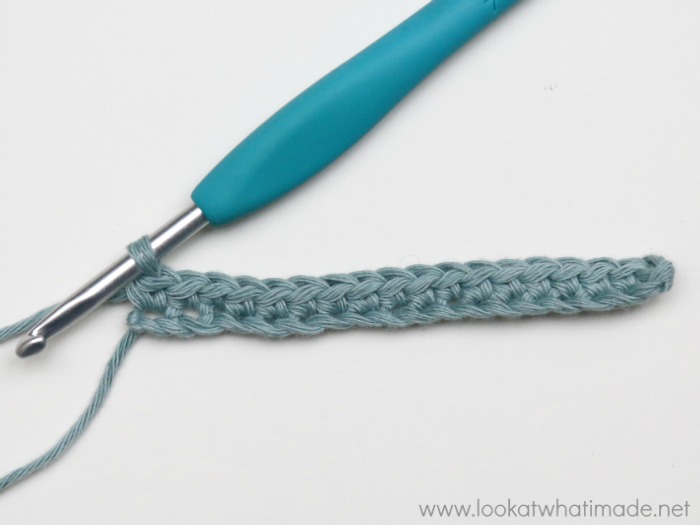
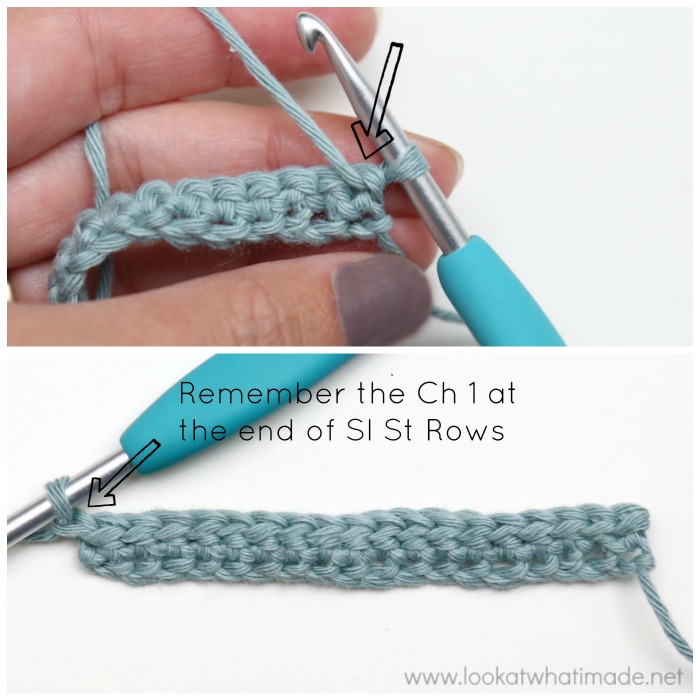
Row 2: With WS facing, sl st in each st across. Ch 1 and TURN. Don’t accidentally skip the first st, which will be hidden by the working yarn – see photo below. {18 sl st}
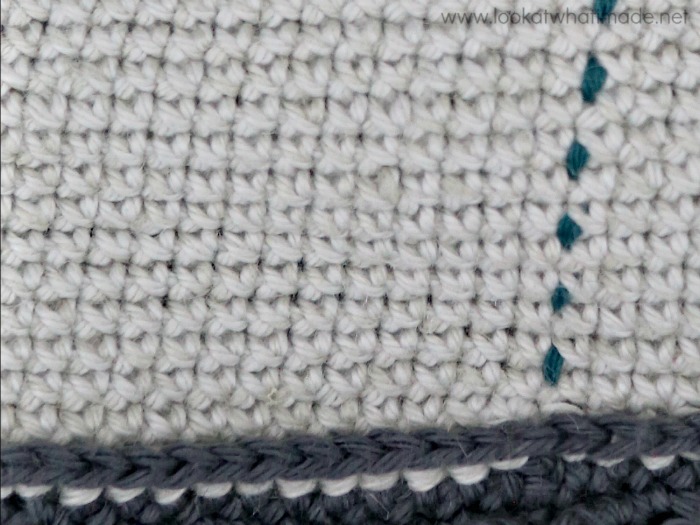
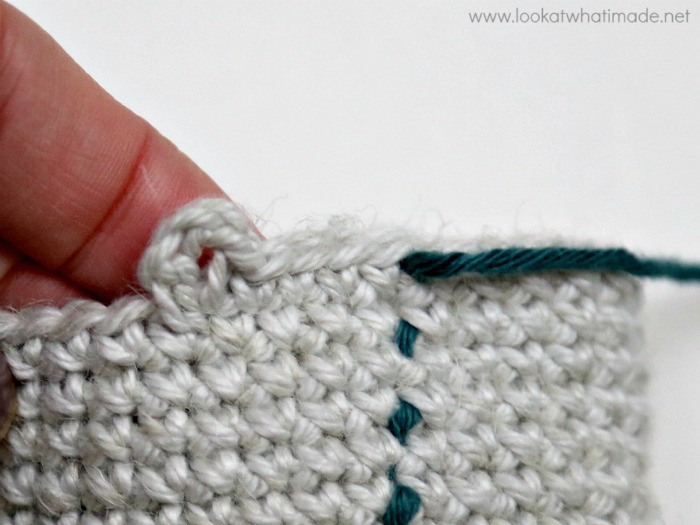
Note About Row 3: If you look at your work after turning, you will see that the sl sts from the previous row form a dotted line {arrows in Photo 1}. You will be working OVER the sl sts and into the sc sts that contain them. The arrows in Photo 2 indicate where you will insert your hook. This creates a dense texture suitable for bag bases {Photo 3}.
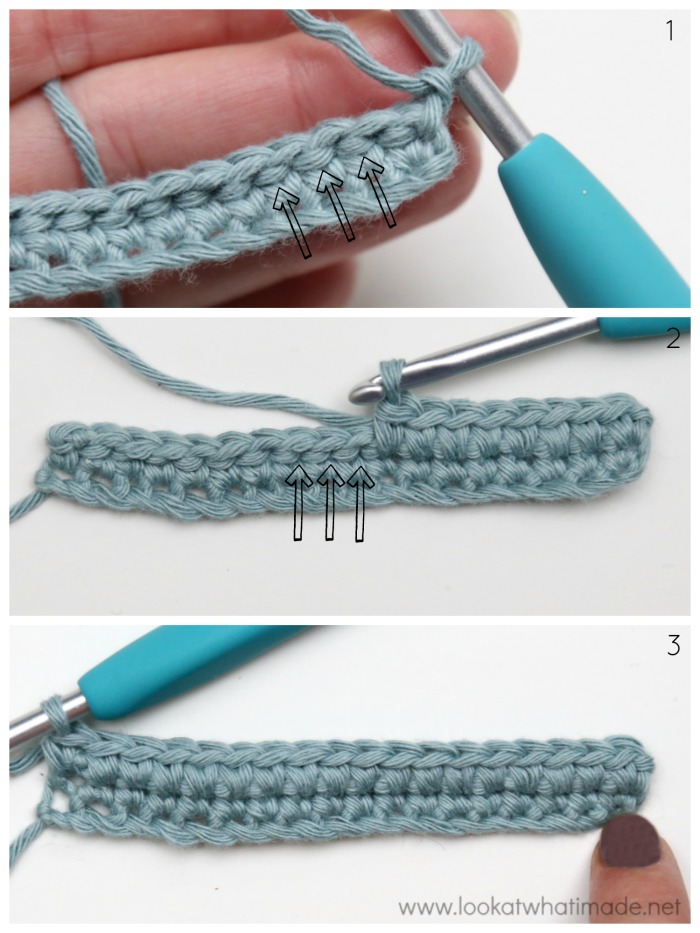
Row 3: With RS facing and working over the sl sts from the previous row, sc in each sc from the row before that. TURN. {18 sc}
Rows 4 – 89: Repeat Rows 2 and 3.
Note: As you work, you will notice that the first rows are a bit looser than the rest of the work. Don’t worry about this. It won’t be noticeable when we have completed the base. The base will also curl. Don’t worry about that either.
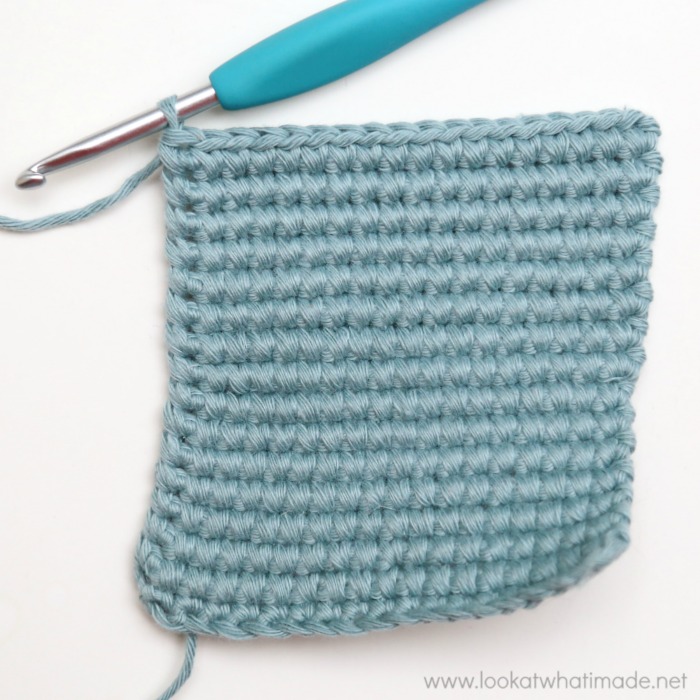
Row 90: Repeat Row 2.
Row 91: With RS facing and working over the sl sts from the previous row, sc in each sc from the row before that. Ch 1 and TURN. {18 sc}
Note: When working into the sides of the base, you will notice that there are small holes at the start and end of each sc row. You will be working into these holes when making the next round.
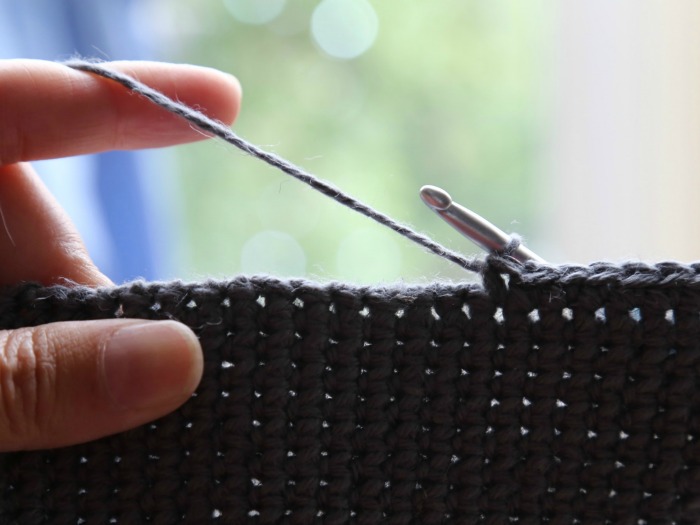
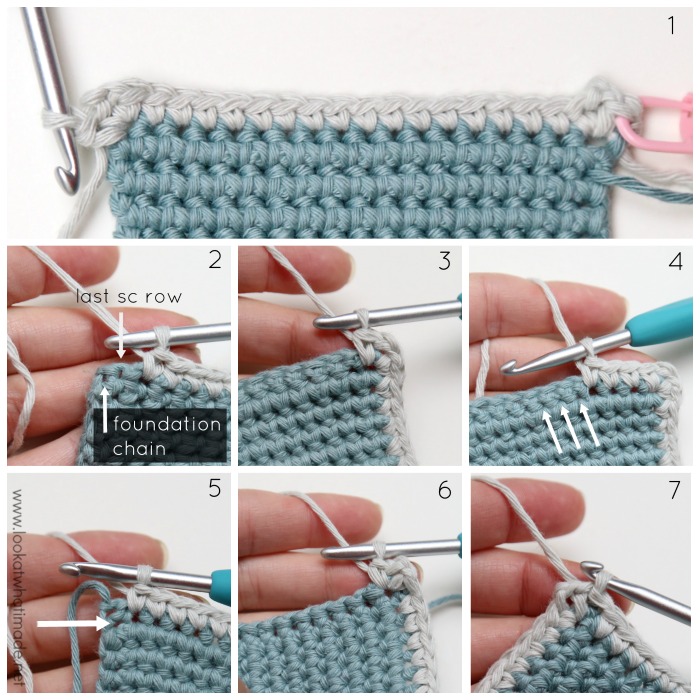
Round 92: With WS facing, [sc, ch 2, sc] in the first sc. Sc in each of the next 16 sc. [Sc, ch 2, sc] in the last sc {Photo 1}. Turn 90 degrees. Working into the first sc of each second row (holes), make 44 sc. There should now be 2 ‘holes’ left {Photo 2}. [Sc, ch 2, sc] in the next hole, which should be the last sc row. Turn 90 degrees {Photo 3}. Working OVER the foundation chain, sc in the next 16 sc of Row 1 {indicated with arrows in Photo 4}. [Sc, ch 2, sc] in the last sc {indicated with an arrow in Photo 5 and illustrated in Photo 6}. Turn 90 degrees. Working into the last sc of each second row (holes), make 44 sc. Join to the first sc with a sl st {Photo 7}. {18 sc per short side and 46 sc per long side – not including ch-2 corner sps}
Sides
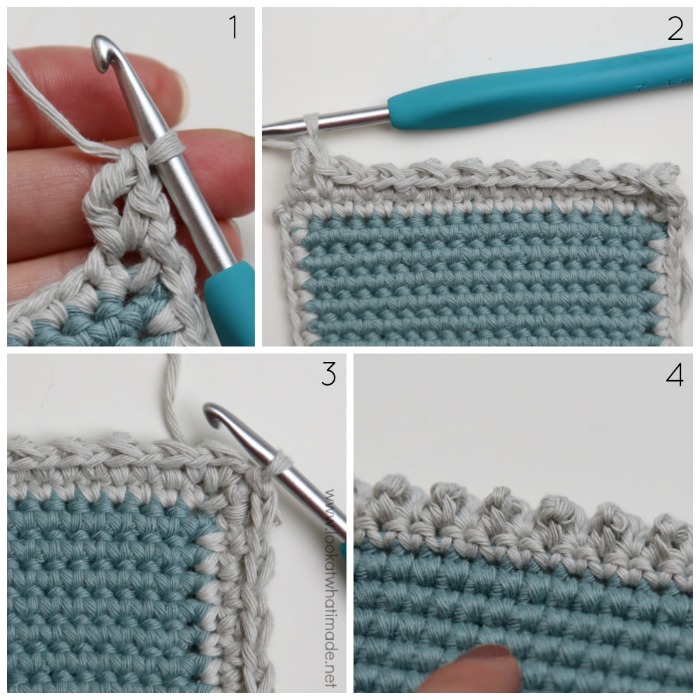
Round 1: With WS still facing, sl st into the ch-2 corner sp. Ch 1 (doesn’t count as a st throughout). *[Sc, tr] in the ch-2 sp {Photo 1}. (Sc in the next st, tr in the next st) until you get to the next corner {Photo 2}.* Repeat from * to * 3 more times. Join to the first sc with a sl st {Photo 3}. TURN. {68 sc and 68 tr}
You will see that the tr sts from Round 1 pop to the RS of your work {Photo 4}.
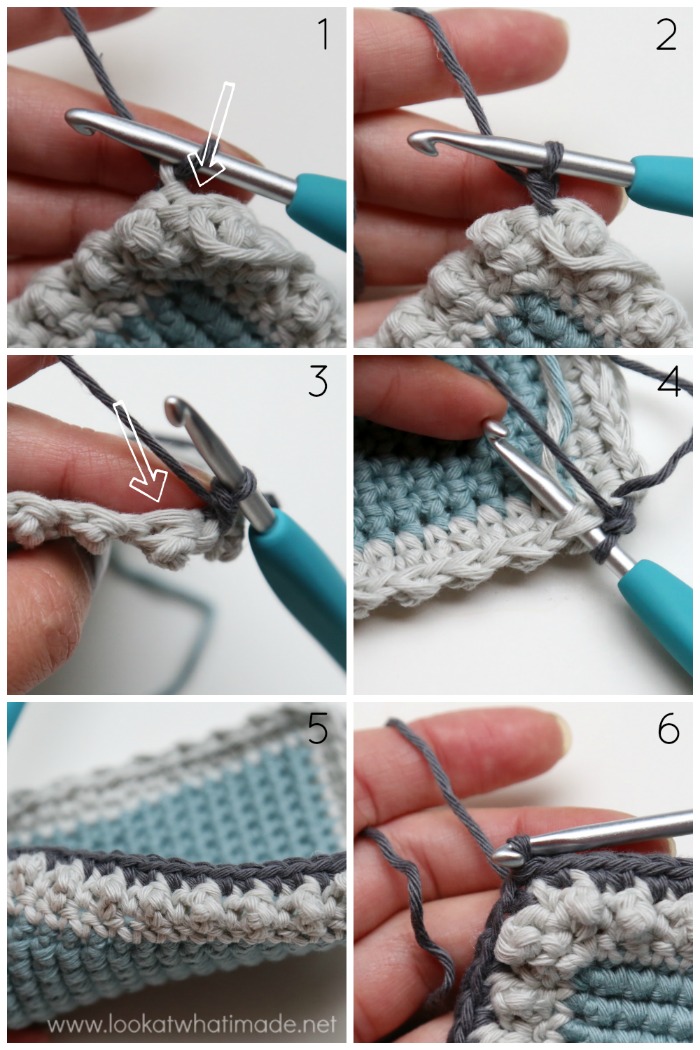
Round 2: With RS facing, ch 1, sc in the same st as the sl st join. This st will be slightly to the right of your hook (left, if you are left-handed) – indicated with an arrow in Photo 1 and illustrated in Photo 2. Skip the sl st join and make a sc in the next tr {indicated with an arrow in Photo 3 and illustrated in Photo 4}. Sc in each of the rem 134 sts {Photo 5}. Join to the first sc with a sl st {Photo 6}. TURN. {136 sc}
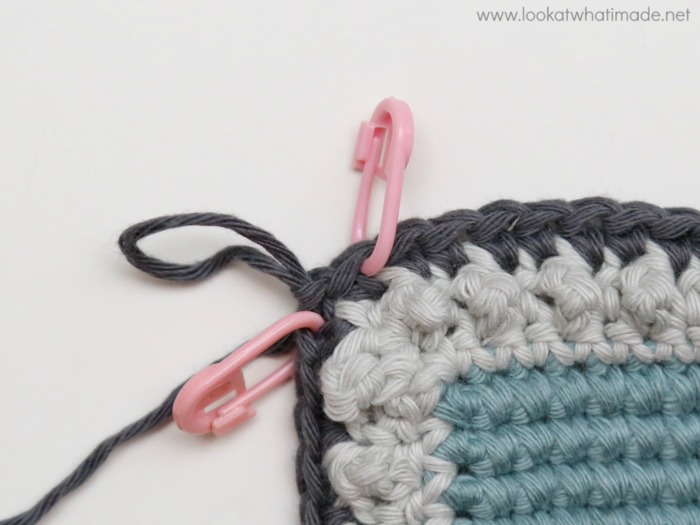
Mark the first and last sc of the round with a SM so that you can identify them in the next round.
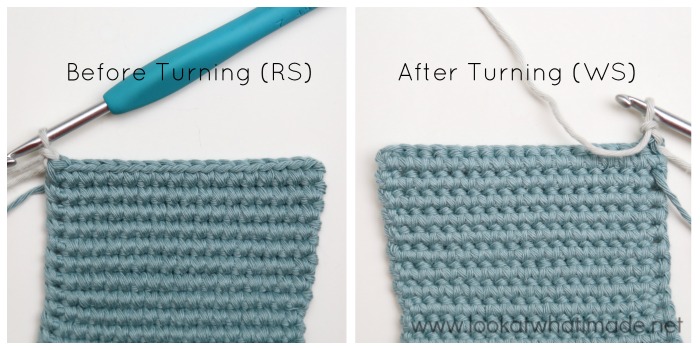
Round 3: With WS facing, ch 1, sc in the same st as the sl st join. Skip the sl st and tr in the next st {see photo}. (Sc in the next st, tr in the next st) until no more sts rem. Join to the first sc with a sl st. TURN. {68 sc and 68 tr}
Round 4: With RS facing, ch 1, sc in the same st as the sl st join. Skip the sl st join and make a sc in the next tr. Sc in each of the rem 134 sts. Join to the first sc with a sl st. DO NOT TURN. {136 sc}
Round 5: With RS facing, ch 1, hdc in the same st as the sl st join. Hdc in each of the rem 135 sts. Join to the first hdc with a sl st. Fasten off and work away your ends. {136 hdc}
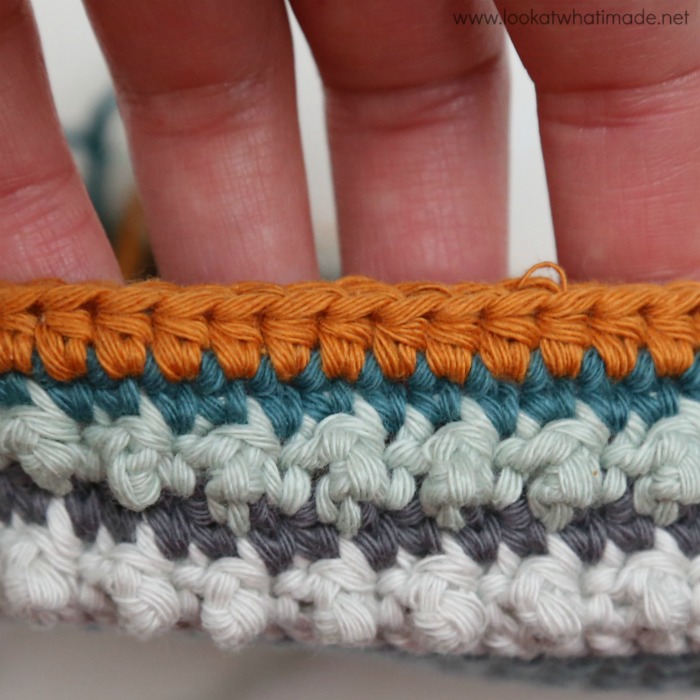
Note: Worked in a spiral from this point forward. If you need help with working in a spiral, please see the post I did about Joining in the Round.
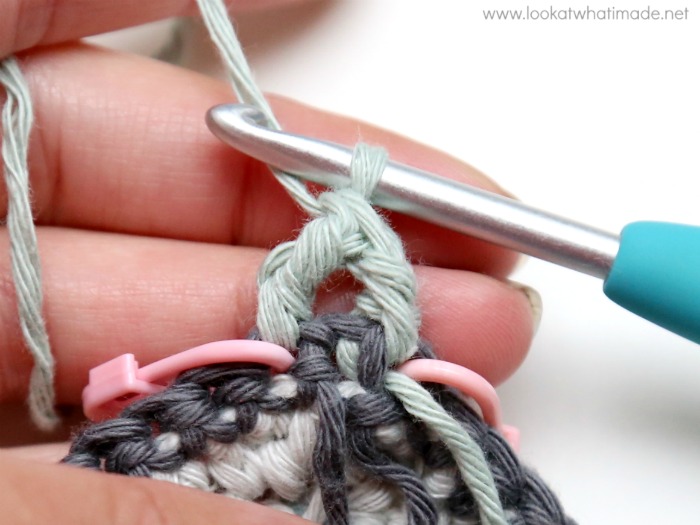
Round 6: Join Yarn B by making a standing BPsc in the first st of the previous round. BPsc in each of the rem 135 sts. {136 BPsc}
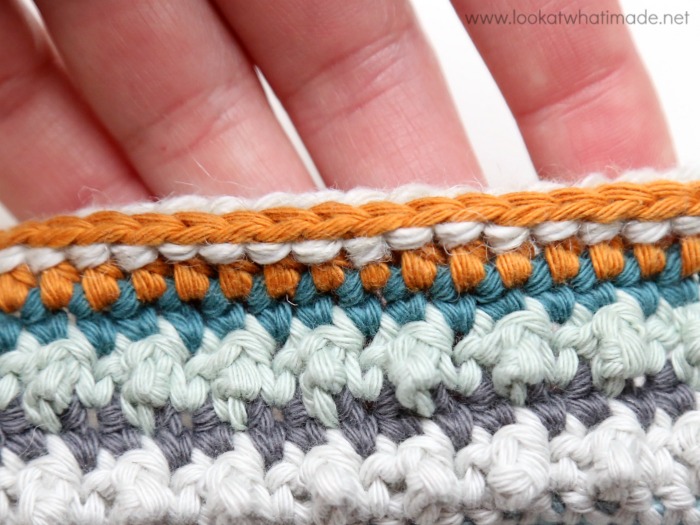
Round 7: Make a XSC in each st around, marking the first XSC with a RSM. {136 XSC}
Rounds 8 – 41: As Round 7.
Round 42: XSC in each of the next 13 sts. Ch 5, skip the next 5 sts, XSC in the next 24 sts. Ch 5, skip the next 5 sts, XSC in the next 34 sts. Ch 5, skip the next 5 sts, XSC in the next 24 sts. Ch 5, skip the next 5 sts, XSC in the next 21 sts.
Round 43: XSC in each of the next 13 sts. Ch 5, skip the next ch-5 sp. XSC in the next 24 sts. Ch 5, skip the next ch-5 sp. XSC in the next 34 sts. Ch 5, skip the next ch-5 sp. XSC in the next 24 sts, marking the 9th st with a SM. Ch 5, skip the next ch-5 sp. XSC in the next 21 sts.
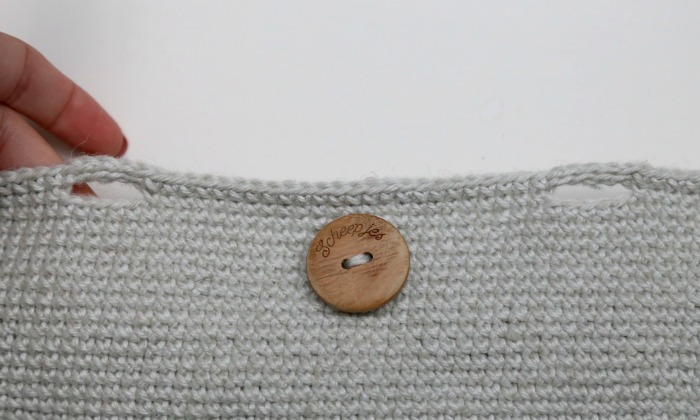
Round 44: XSC in each of the next 5 sts. Ch 3, sl st in the same st as the last XSC. Fasten off and work away your ends.

This blog post contains affiliate links. I only link to products I personally use or would use. All opinions are my own.


JANE V. OLDENBURG says
While trying to find the pattern for the Ten Stitch Blanket Crochet pattern, Your Look at What I Made showed up. Been following your blogs for quite some time and like everything you create. Have Made 2 of your blankets for the Great Nieces, so far. The illustration for the Ten Stitch is O.K. But I don’t seem to be able to get the stitch pattern. Got another Great coming and wanted to do it this winter. Can you help? If not, that is alright, maybe the library has something.
Jenny Lowman says
Hi Jane.
Have you tried this 10 stitch pattern link
Or this 10 stitch blanket pattern ?
I can see both patterns fully displayed.
Kimberly says
Could you please give a suggestion for a comparable yarn? I am in the US and looked online for the colors you chose and some are sold out. Thank you!
Dedri Uys says
You can use any Worsted Weight Yarn. Cotton or Jute is recommended because they are hard-wearing, don’t stretch, and don’t pill. Scheepjes Skies Heavy would look amazing (blues), or hand-dyed worsted weight wool would also look great.