Joining Crochet Squares Part 1: Preparing to Join Afghan Squares
This is part 1 of a 5-part series I will be doing over the next two weeks. In this first part of Joining Crochet Squares we will be looking at all the things to consider before joining your squares. It is quite a lengthy post and doesn’t include my usual 5 million photos, so grab a cuppa or a glass of wine and settle down for a long (hopefully useful) read.
So, you have made your squares…now what? How are you going to get from a pile of gorgeous squares to a beautiful blanket? Maybe you are thinking: “I’ll just put them away until I figure out what to do…” Don’t you dare! It honestly isn’t that daunting and what is the point of putting all that work in a closet for a year or seven?
Although there are many methods to sew squares together, I am not going to focus on those in this post. We will only be looking at crochet joins.
Deciding on Layout
The first thing you need to decide is what your layout is going to be. The usual way of doing this is to lay all the squares out on the floor and fiddle around with them until you are happy with colour/design placement. In the meantime your toddler will run all over you squares (and probably run off with a few), your other half will trip himself/herself up in an effort to avoid stepping on your squares, your cat will lie down right in the middle of everything, and your dog will use your squares as chew-toys.
A much easier method is to take photos of each square and then create a collage using your photo editor of choice. This can be printed out for future reference and is much, much easier than crawling around on the floor. THIS TUTORIAL by Tamara from Moogly tells you exactly how to go about creating a photo collage using PicMonkey, which is free and totally fabulous!
Think Outside the Box (or Square, as the Case May Be)
Although placement is usually the only thing you would have to think about when pondering your layout, I would like to bring something else to the table.
Instead of just joining your squares in a grid, have you ever considered joining your squares to each other in lots of 4 and then bordering them to create even bigger squares?
Curious? Have a look at THIS POST if you would like to read more about my 4-squares and have a little look-see. In Part 5 of this series I will be telling you exactly how I made them.
Deciding on Colour
This is a very personal choice and I cannot guide you in that, I’m afraid. But THIS POST from Craftyminx is all about colours and she has some excellent links to help you choose colours if don’t trust your own colour-picking skills. Lucy from Attic24 is well-known for her beautiful colour combinations and you can find some great colour inspiration from her HERE.
Deciding on Hook Size
When joining crochet squares (or knit squares for that matter) it is very easy to crochet too tightly. Your joins need to be elastic to accommodate the stretching that will naturally occur from using your finished blanket lots and lots (and LOTS)!
If you decide to block your squares before joining them, you might also find that the “seams”, once joined, are too tight.
To combat this I suggest going up a hook size (or half a millimetre). If you have used a 4 mm hook to make your squares, for example, try using a 4.5 mm for joining.
How Much Yarn?!
This will depend on a lot of factors. What kind of yarn are you using? What is your hook size? How many squares will you be joining and what kind of join will you be using? So this is a question only you can answer. But I am happy to tell you how to figure out.
- Decide on my hook/yarn/joining method.
- Join 4 squares using your preferred method.
- Then, and this is painful even saying, frog the join, measure the yarn you used, and jot down the number. Alternatively you can weight the yarn before and after joining, and then multiply the difference by the amount of yards in a gram/ounce. To find out the amount of yards in a gram/ounce for your specific yarn, have look on the ball band. Find the weight of the ball/skein. Then find the total estimated yardage. Divide the yardage by the weight and you will know how many yards there are in a gram/ounce.
This yardage is how much yarn you will need for joining PER SQUARE. So if you have 52 squares, you will need 52 times that amount of yarn. Technically this is an overestimate as the outside squares of your blanket won’t be joined on all sides, but it is always better to err on the side of caution.
Please note that this will ONLY tell you how much yarn you will need for joining squares. You will have to do additional maths to figure out how much yarn to get for the border, but I will cover that in another post.
To Block or Not To Block
You do not HAVE to block your squares. I am sure millions of perfectly good afghans have been made without blocking.
But sometimes squares do require blocking. This could be due to a variety of reasons: change in tension, inherent differences in yarns (when using more than one yarn per square), and design, to name but a few.
If you do decide to block your work you can block each square individually before joining, or block the whole blanket once complete. The choice is yours.
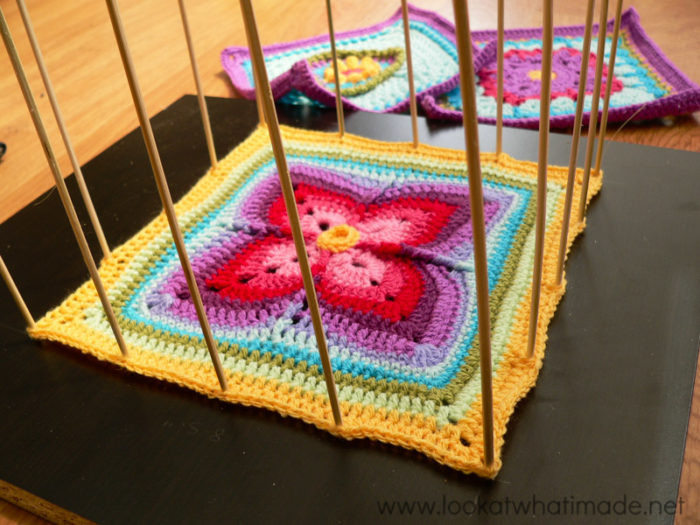
For blocking individual squares, have a look at my DIY Blocking Station if you want a space-saving way to block multiple squares at the same time. The tutorial includes other useful blocking links.
Joining Squares With Different Stitch Counts
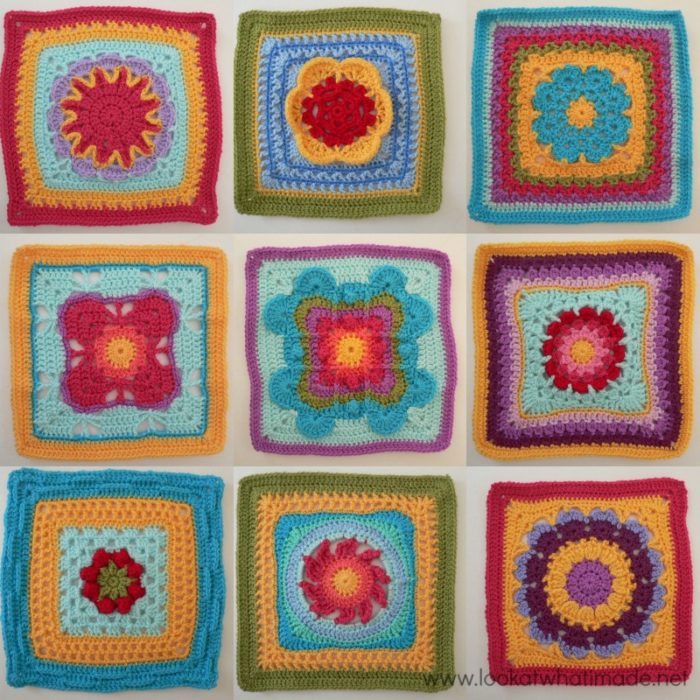
Although it is preferable that your squares all have the same final-round stitch count, it is not essential. If you have made your squares using different patterns from different designers (the Block a Week CAL 2014 being a classic example), you might find that you end up with a bunch of odd-numbered squares.
What is important, though, is that your squares are all the same size (within 1/4″). So if you need to add a round or two to some of them, do it now before you start the joining process. For the Block a Week CAL I have done a list of the Optional Additional Rounds I used to get my squares to the same final-round stitch count. This is a personal preference and depending on personal gauge/tension you might have to adjust stitch heights.
I will repeat that having the same stitch count is not essential. Part 4 of this series will focus on joining squares with different stitch counts.
Which Joining Method to Use
The first thing you need to decide is if you want to join your squares as you go (often referred to as JAYGO), or join them all at the end with some sort of seam. Then you need to decide if you want a “lacy” look or a more solid look, because this will affect which of the 2 methods you can actually use.
Join as you go, for example, is almost always lacy. Joining using sl st’s, single crochets, or chains will give a more solid, seamed look.
Join As You Go
When you join as you go you are basically attaching each square to one, two, or three other squares when making the last round of the square (or an additional decorative round). A lot of people prefer this method because there are less tails of yarn to sew in at the end and once you have made the last square your blanket is basically done.
I am not going to go into detail about this method because it is not a method I have used a lot, but Lucy from Attic24 has a great tutorial for a Join As You Go Granny Square, which will give you a good idea of the what and the how. Tamara from Moogly also has a great tutorial for the Tight Braid Join.
The downside to joining as you go is that your blanket will very soon be too big to comfortably lug around as a take-along project.
However, there is a way to work around this (a semi-join-as-you-go, if you will). You can always complete all your squares up to the second to last round and then attach them to each other at a later date by adding the last round using the JAYGO method. This Lacy Blanket Join by Cherry Heart is a case in point. She takes completed squares and joins them with a 2-round JAYGO design that is just beautiful. The tutorial is extremely thorough and easy to follow, even if the join is slightly more advanced than some of the others I will be linking to.
Joining With a Seam
With this method you make all of your squares first and then attach them to each other as and when you want (usually at the end) using some sort of seam. The upside of this is that the squares are the perfect take-along project. The downside is that there will be many tails to sew away (but this can be minimised if you are savvy…more about that later).
Another thing to consider before deciding on a joining method is what you want your joins to look like. There are 2 main “looks”: lacy and solid.
Lacy Joins
Lacy joins are exactly what they sound like. They yield a lace-like join that can have as few or as many “holes” as you want them to have. This method looks really great when you are attaching elaborate lacy squares to each other. And as an added bonus, it is extremely forgiving and “elastic”.
Again this is not a method that I use often, so instead of giving you my 2 cents’ worth, I am going to point you in the direction of some good tutorials:
- Granny Join – Carina’s Craft Blog
- Simple Lace Join – Aurelia’s Little Room (JAYGO)
- Celtic Lace Join – Babylove Brand (JAYGO)
Solid Joins (Seams)
Solid joins do not have “holes”. They are less elastic than lacy joins and work well for solid squares and geometric designs.
Part 3 of this series will focus on the different types of solid (seamed) joins.
Direction of Joining
(for lack of a better name)
There are a couple of ways to approach the actual joining. I am going to look at the 3 most common methods.
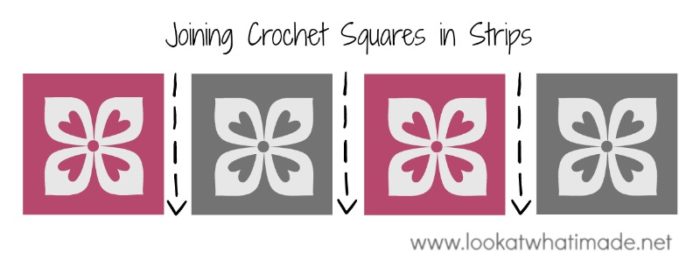
Some people prefer attaching their squares in strips, almost like scarves. These strips can then be attached along their lengths to form the blanket. This Groovyghan by Zelna Oliver from Zooty Owl is a perfect example of this.
The upside to this method is that it is still fairly portable while joining, because you only ever need to carry enough squares for one strip. The downside is A LOT of tails of yarn to sew away, unless you leave a loooong tail at the end of each square and use this to crochet each square to the next.
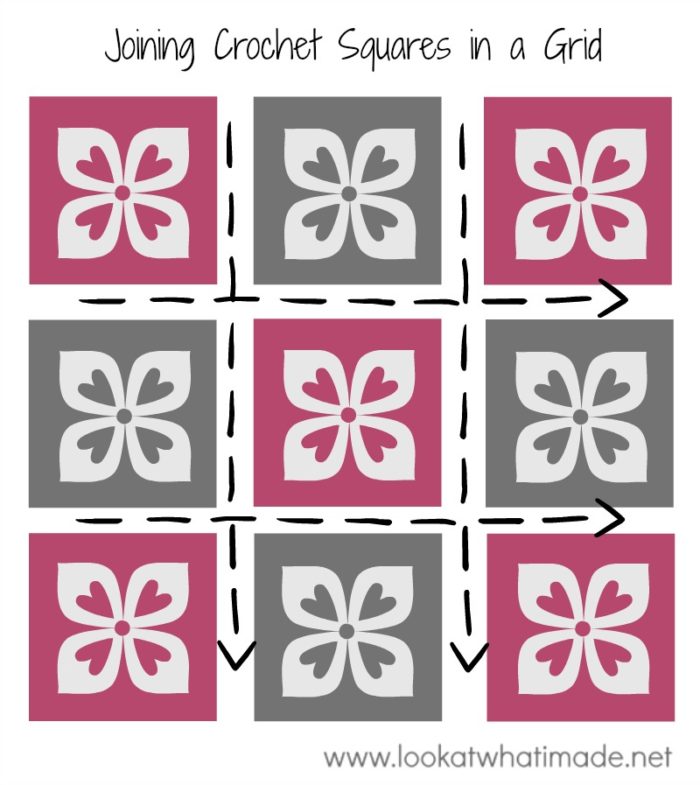
Alternatively you can attach your squares to each other in a grid. THIS TUTORIAL by Kara from Petals to Picots takes a detailed look at joining squares in a grid.
The upside to this is that there are a lot less tails of yarn to sew away at the end. There is a down-side, but I honestly don’t know how to explain it in words because it has to do with holding the blanket when doing the second half of the joining. Once you use it, you will know what I’m talking about.
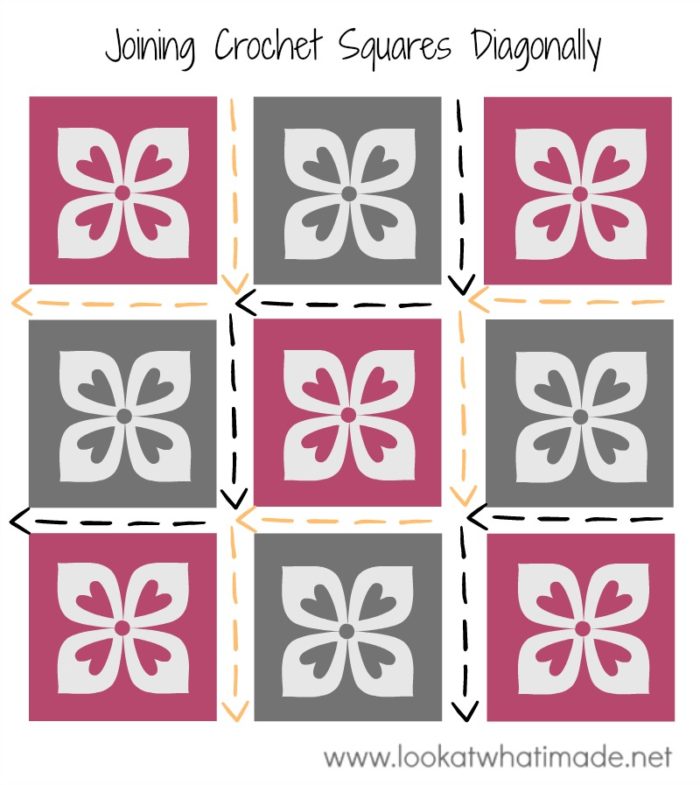
Joining diagonally is now my favourite method. I find attaching the squares in a zig-zag pattern (diagonally) yields the least amount of yarn tails. Bonus. Plus, this is the way my granny (on my dad’s side) joins her blankets.
I couldn’t find any tutorials for this method, so I will be covering it in Part 2 of this series when I discuss the joining method my granny uses.
Phew!
Lots of words today. I hope that you have found something useful in there somewhere and that you will be back to see what else I have to say about joining.
Just to remind you what I have in store for the next fortnight:
- Part 2: (Sc, ch 1, skip1) Join – covering diagonal joining
- Part 3: Different ways to Join – a comprehensive list of joining techniques
- Part 4: Joining Squares With Different Stitch Counts
- Part 5: Making Foursquares
- Bonus: Betty’s Beautiful Border
If you have anything you would like to add, or think that I have missed out something crucial, please leave me a comment :)

This blog post contains affiliate links. I only link to products I personally use or would use. All opinions are my own.


Amy says
You didn’t include a continuous join! That one is my absolute favourite, because I’m _far_ too lazy to weave in a million ends.
Wanda Rhiner says
Thank you so much for these instructions & info. I crocheted a bunch of squares several years ago as you mentioned for the portability of a small project but then I didn’t have a clue how to put them together. I will be assembling my squares & now complete that Afghan or blanket. Thanks again!
Dedri Uys says
Oh good. Who will you give it to when it is done?
Johanna says
Hello Dedri,
Thank you for these instructions. Where I am challenged is determining how much yarn to purchase to join my squares. My local store doesn’t carry this yarn so I’m ordering online and want to be sure I purchase enough skeins. The yarn used for the outside row will be the same yarn to join. I’ve already calculated the yardage for the outside rows. A single square is 3 & 3/4″. I have figured out that I’ll have 192 squares on my blanket or 12 x 16 squares. How do I determine number of skeins to purchase for joining the squares? Thanks very much. Johanna
Jenny says
Hopefully Dedri will be able to help you soon, Johanna :)
Leone Bergman says
Dedri would it be inadvisable to sew the squares together from the back, slipping the back post of the last rows together – do you think this would be strong enough for a large blanket ?? just a thought Leone
Dedri Uys says
Hi Leone. Do you mean the back loops or the actual posts and do you mean sew or crochet, just so that I know what exactly I am answering :)
LEONE BERGMAN says
Hi Dedri – sorry I meant to sew with right sides together and slip the two back loops together – from the right side of the square it would be with the front loops lying together –
Dedri Uys says
You mean the way Lucy from Attic24 does it. You can def do that!
Diana Anderson says
I second all that Carolyn stated in her comment! I had such a learning curve for the first few months of the CAL, and I was so excited to make the next one, that I didn’t really give much thought to the finished stitch count among other things. As my skill and confidence grew I have since made all the blocks again, most three times in different colors and some four times. When I see them I am amazed that I know each by name! Your patience and generosity along this journey as well as the collective wisdom and encouragement from the CAL group has been a wonderful, amazing blessing! I too, Thank You from the deepest part of my heart! :-)
Dedri Uys says
Diana, I thought I had replied to your comment, I am so sorry. You are most welcome and I am pleased that you were as blessed by this whole experience as I was. Thank you for your great comment xxx dedri
Carolyn says
Well, you are still amazing, Dedri! When I began the 2014 CCC CAL journey, I had so little crochet knowledge. You have led me the entire way! From reading patterns, learning helpful hints (“watch for the elusive hidden stitch” still resonates in my head), new stitches (standing stitches, magic circles, popcorns, k-stitches….and the yet to learn – invisible join),…..and all the way to the most painful – color choices. I did not know the way, so I did not plan the journey. Now I am at joining and wanting to pack the squares away. Each square is my sweet little baby, but all together thy look like a big mess. I am still focusing on naming it “My year of Learning” afghan. That way it will be a wonderful snuggle and comfort blanket ,,,not necessarily for display. I am truly not complaining now,,,just ranting my insecurities. I am saving every link! Next year will be even better! Thank you from the deepest part of my heart!
Dedri Uys says
Carolyn, it honestly has been just my pleasure and I think your squares are some of the prettiest I have seen. Each one of them IS special and your finished blanket is going to be glorious, I just know it! So don’t you dare put them away. You won’t remember all the fun we’ve had half as much if they are in a cupboard than if you are sitting under them!