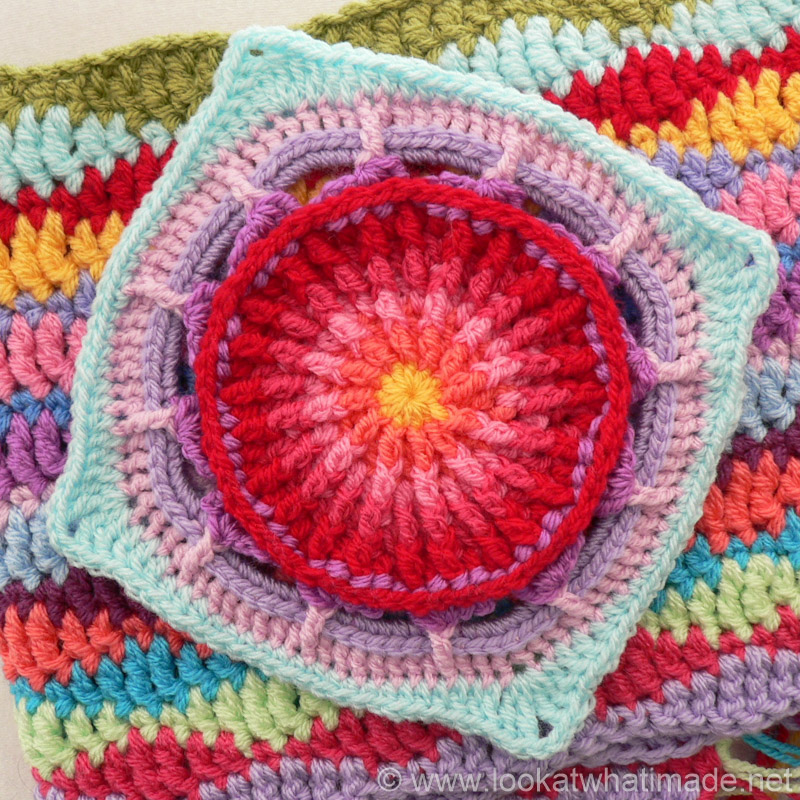
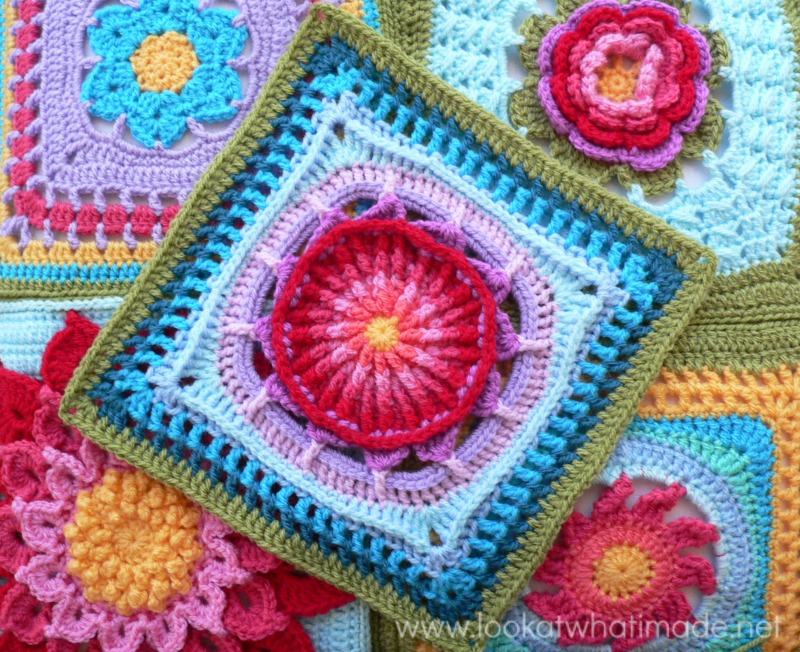
Block 37 of the Block a Week CAL (hosted by Kimberly Slifer) is very special. This square is a collaboration between one of our CAL participants, Virginia Burrow, and my little old self. Based on my King Protea Mandala, this square is striking and surprisingly easy (once you get past the front post trebles).
Update 2/10/2014: This square has also been chosen as the October 12″ Filler Square for the Crochet Block a Month CAL Group on Ravelry. Feel free to hop on over and have a look!
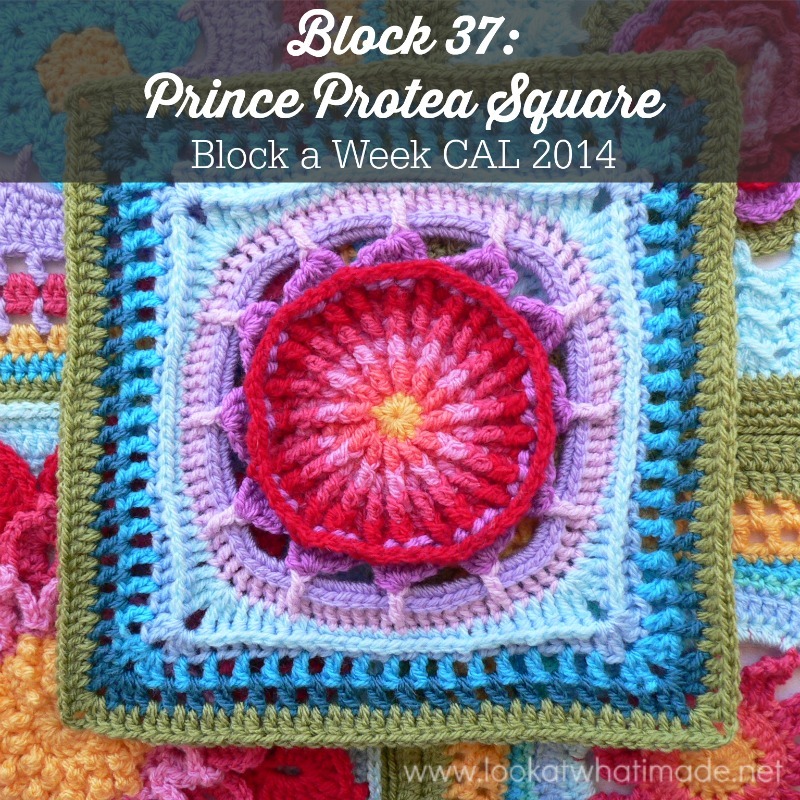
When apportioning credit, I feel it necessary to tell you that Virginia did the designing and I did the grunt-work. Why am I telling you that? Because I LOVE this square and when you are making it, I want you to remember that it was born in Virginia’s pretty head.
I hope you really enjoy this week’s square!
While I was making it, I was also baking a cake for a friend’s daughter’s birthday. I thought you might enjoy seeing what happens if you tell a 3-year old he can lick the bowl. And in case you were wondering, 3-year olds, melted chocolate, and crochet do NOT mix!

Righto. Back to our scheduled post. If you haven’t already joined the crochet-along, you can find all the relevant information (as well as links to all the previous squares) by clicking on the “Join the CAL” button below.

If you are using the same hook and yarn for all your squares, they will not all come out the same size. I have now added a post outlining the extra rounds I added to each square to get them to the size of Block 1, which was the biggest. You can find that here.
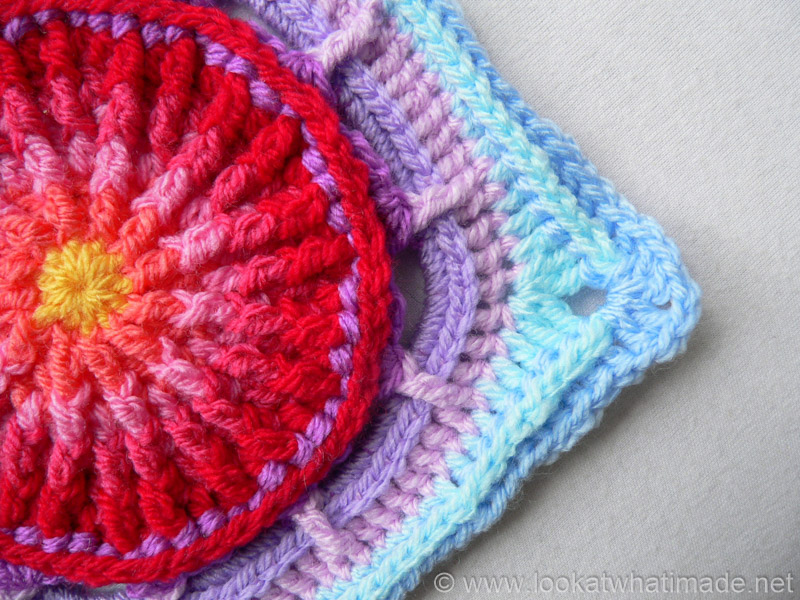
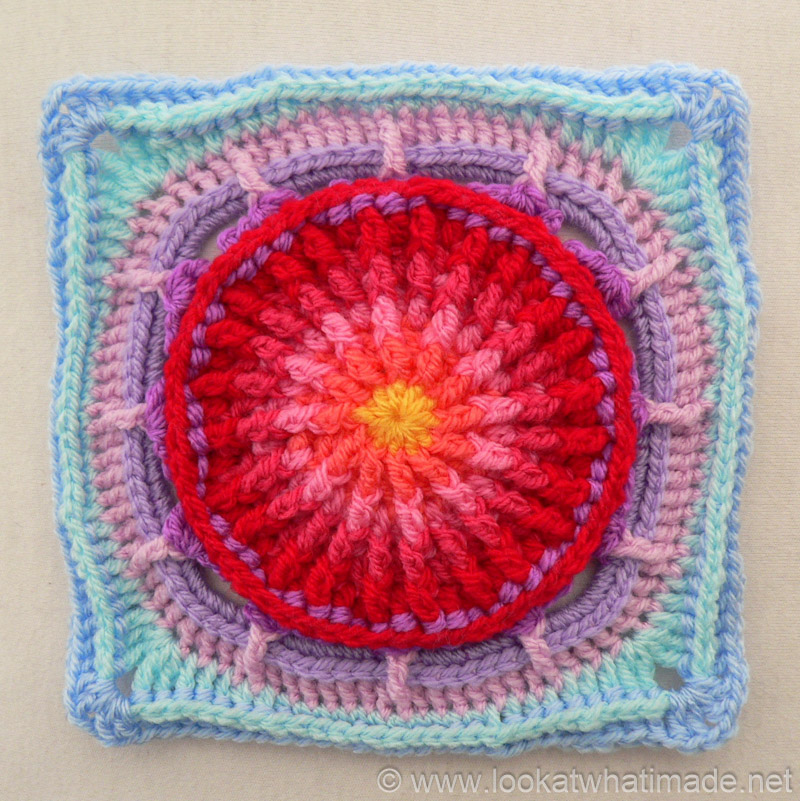
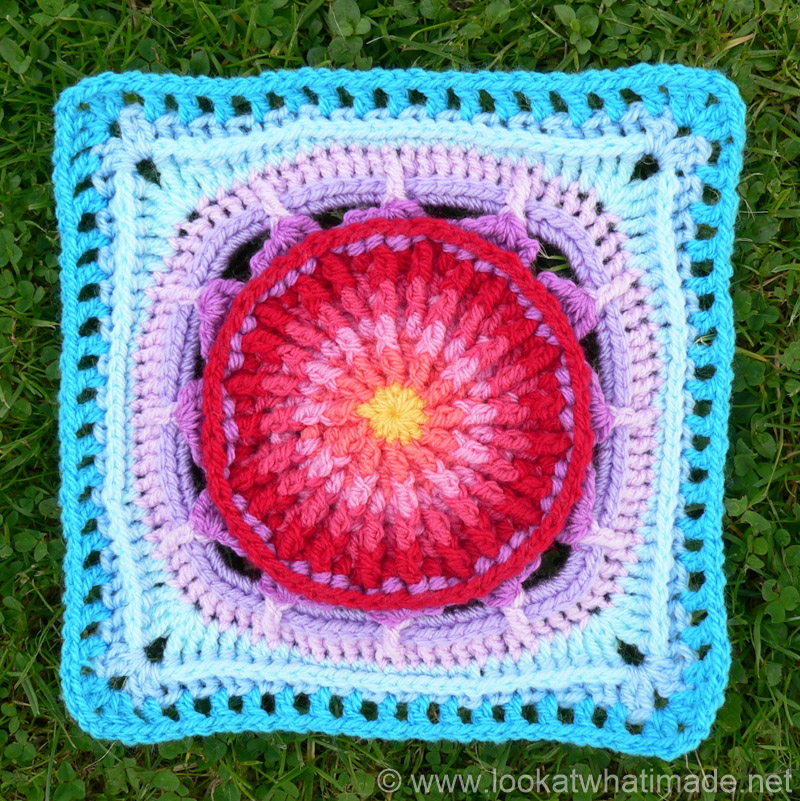
Prince Protea Crochet Square
{Pattern © 2014 Virginia Burrow and Dedri Uys}
Pattern
Suggested Materials
- 5 mm Clover Amour Crochet Hook (US H/8 UK 6)
- Worsted weight yarn
Size
- Using the hook and yarn specified, your square should be a nice even 12″ when you are done.
- Using a 4 mm crochet hook (US G/6 UK 8) and double knit yarn, as I have done, your finished square will be about 8.5″ big.
My Yarn and Colour Choices
I am using Stylecraft Special DK.
- Saffron (Round 1)
- Shrimp (Round 2)
- Fondant (Round 3)
- Pomegranate (Round 4)
- Lipstick (Round 5)
- Magenta (Round 6)
- Lavender (Round 7)
- Clematis (Round 8)
- Sherbet (Round 9)
- Cloud (Round 10)
- Turquoise (Round 11)
- Petrol (Round 12)
- Meadow (Round 13)
Notes
- US Crochet Terminology used. (See this comparative chart if you need help transcribing from US to UK)
Special Stitches
5-tr cluster (tr5tog) – see this Photo Tutorial
These clusters are worked around the back post.
Beginning 5-tr cluster: Ch 3 (counts as first partial tr). *Yarn over twice and insert hook around the post of the next stitch (from back to front). Yarn over and pull up a loop. (Yarn over and pull through 2 loops) twice. There should now be one loop of this treble left on your hook.* Repeat from * to * 3 more times. There should now be 5 loops on your hook. Yarn over and pull through all 5 loops.
5-tr clusters: *Yarn over twice and insert hook around the post of the next stitch (from back to front). Yarn over and pull up a loop. (Yarn over and pull through 2 loops) twice. There should now be one loop of this treble left on your hook.* Repeat from * to * 4 more times. There should now be 6 loops on your hook. Yarn over and pull through all 6 loops.
Prince Protea Square Photo Tutorial
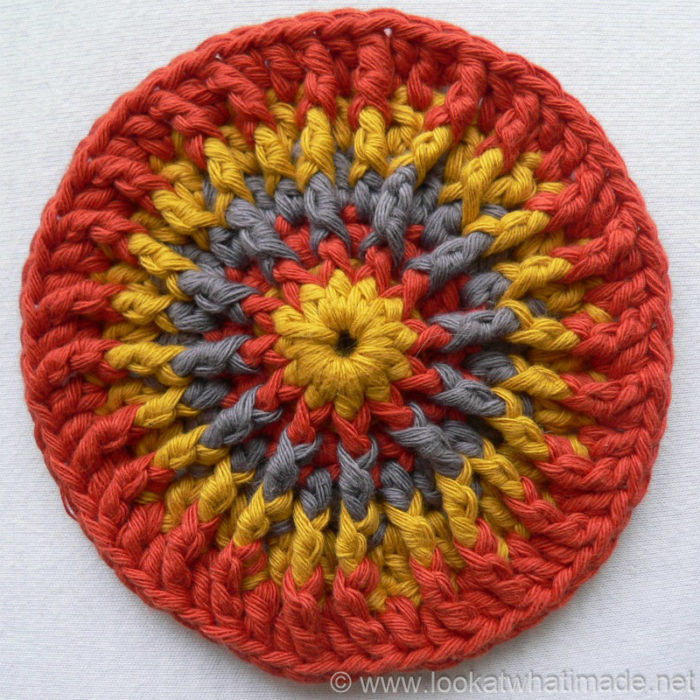
Rounds 1 – 5
Rounds 1 – 5 are the same as for the King Protea Mandala. You can find a photo tutorial for the first 5 rounds here.
The first 5 rounds aren’t tricky, but keeping count of your stitches in Round 5 IS tricky. Make sure that you take it slow and follow the instructions for the repeats meticulously.
Round 6
Remember that all the clusters are made around the back posts of the stitches, not into the top of the stitches.
- If you are using the same colour, ch 1 and make a sl st around the back post of the same st as the sl st join.
- If you are using a new colour, join your new yarn by making a sl st around the back post of any stitch around.
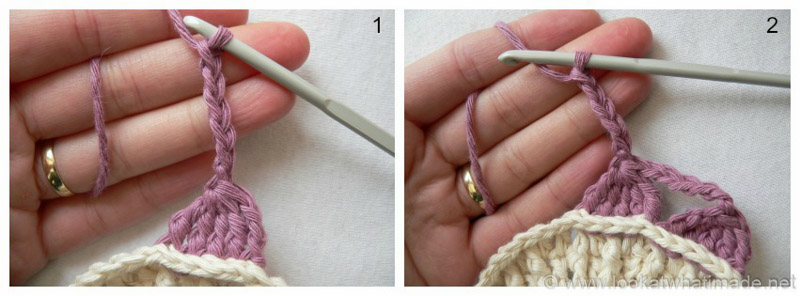
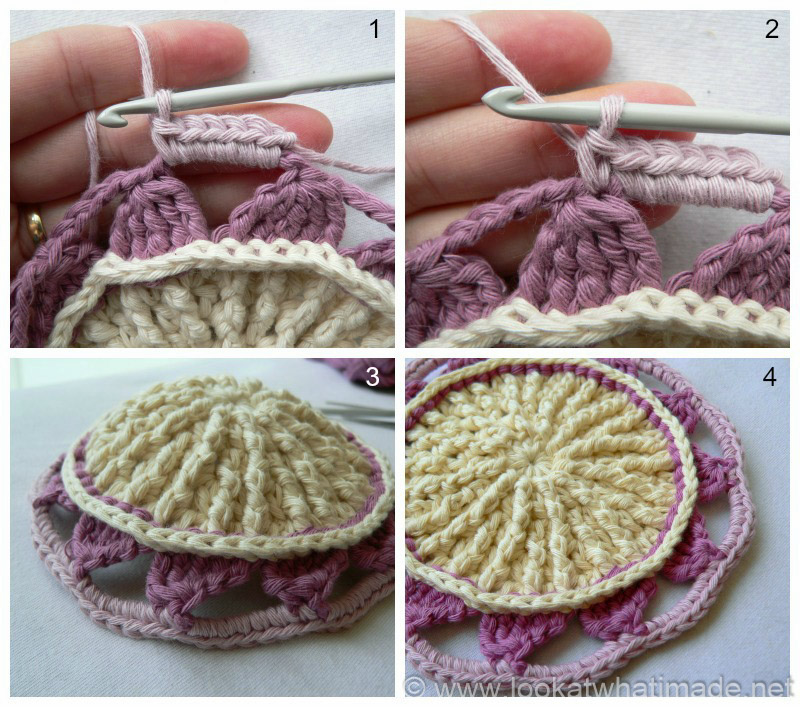
Make a beginning 5-tr cluster. Ch 6 – see Photo 1. (Make a 5-tr cluster, ch 6 – see Photo 2) 11 times. Join to the top of the first 5-tr cluster with a sl st.
Stitch count: 12 5-tr clusters and 12 ch-6 spaces
When this round is completed, it will have a tendency to pull up into a bowl a teensy bit. This will correct itself in the next few rounds.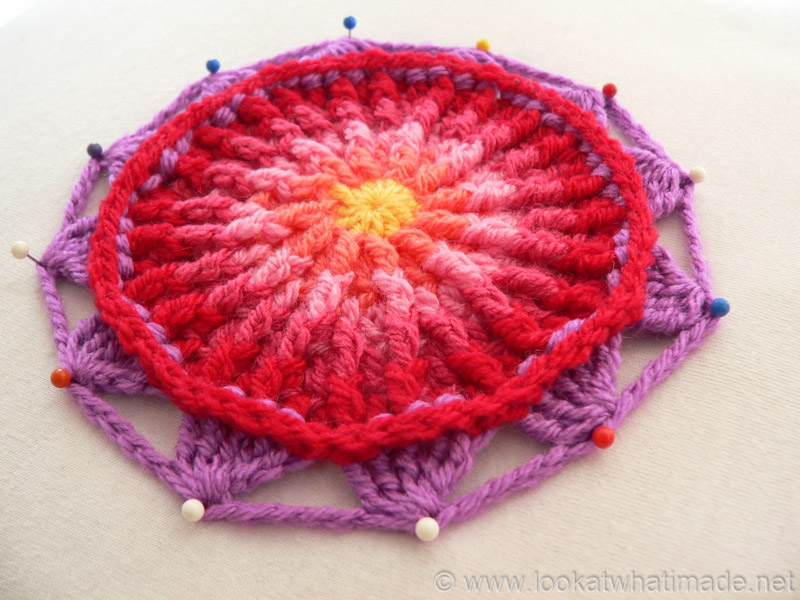
Round 7
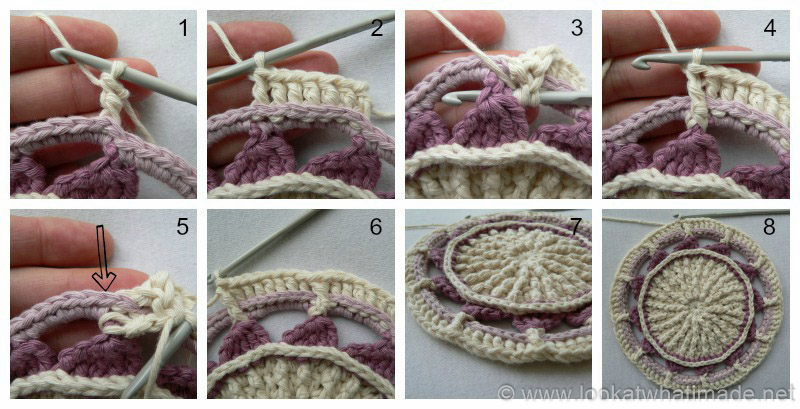
- If you are going to use the same colour, sl st into the next ch-6 space. Ch 1. Make 6 sc’s into the same ch-6 space.
- If you are using a new colour, join your yarn by making a standing single crochet in any ch-6 space around. Make 5 more sc’s into the same ch-6 space (Photo 1).
Sc in the top of the next cluster (Photo 2). (Make 6 sc’s in the next ch-6 space, sc in the top of the next cluster) 11 times. Join to the top of the first sc with a sl st.
If your “square” looks a little bit like a yarmulke at the end of this round (see Photo 3), don’t be too alarmed. The front post trebles from the first 5 rounds are very elastic and easily manipulated. Just squish it a bit and it will be fine (see Photo 4).
Stitch count: 84 sc’s
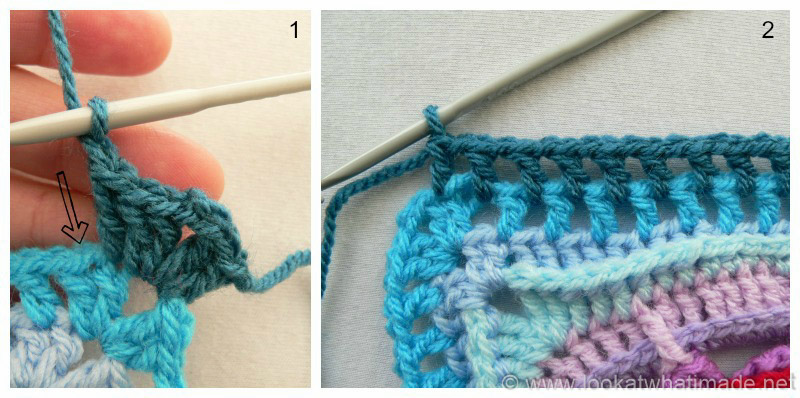
Round 8
Note: The increases in this round are made by working around the back post of each st from Round 7 AND around the top of the 12 clusters from Round 6.
In this round it is easy to accidentally skip the stitch after the fptr. Make sure that you don’t skip the next st of Round 7 after making the fptr (indicated with an arrow in Photo 5).
- If you are going to use the same colour, make a sl st around the back of the same st as the sl st join. To do this, insert your hook from back to front around the post of the sc that contains the sl st and complete a sl st. Ch 3 (this counts as your first bpdc)
- If you are using a new colour, join your yarn by making a standing double crochet around the back post of the same st as the sl st join. This counts as your first bpdc (Photo 1).
Make a bpdc around the post of the next 6 st’s. The last bpdc should fall in the sc you made into the top of the cluster (Photo 2). Make a fptr around the top of the cluster from Round 6 (Photos 3 and 4).
*Bpdc around the post of the next 7 sc’s. The last bpdc should fall in the sc you made into the top of the cluster. Make a fptr around the top of the cluster from Round 6.* Repeat from * to * 10 more times. Join to the top of the beginning ch-3 (or the standing double crochet) with a sl st.
Stitch count: 96 st’s {84 bpdc’s and 12 fptr’s}
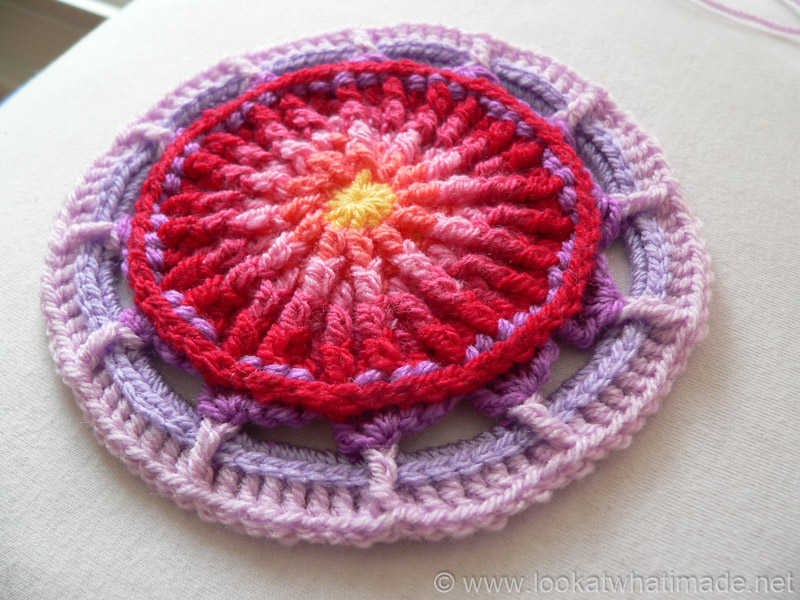
What a feel-good piece of colourfulness!
Round 9
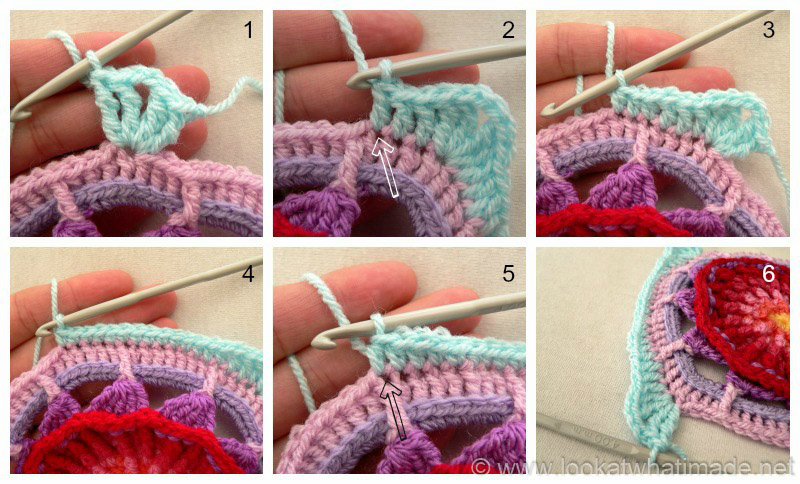
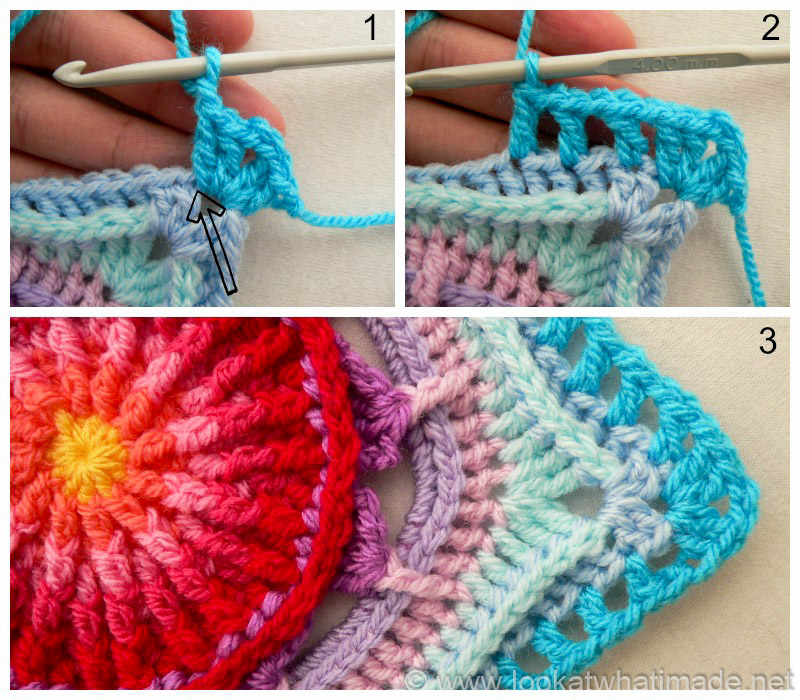
- If you are using the same colour, sl st into the next 3 st’s. You want to end up in the fourth bpdc after the fptr. Ch 4 (counts as your first tr) and then (tr, ch 2, 2 tr) into the same stitch. This is your first corner made.
- If you are using a new colour, join your yarn by making a standing treble crochet (which is the same as a standing double crochet, but with one more yarn over) in the fourth bpdc after any fptr around. (Tr, ch 2, 2 tr) in the same stitch. This is your first corner made (Photo 1).
*Dc in the next 3 st’s. The last dc should fall in the last bpdc before the fptr – see Photo 2. Hdc in the next 3 st’s (Photo 3) and sc in the next 11 st’s (Photo 4). Hdc in the next 3 st’s. The last hdc should fall in the fptr – see Photo 5. Dc in the next 3 st’s. The last st should fall in the third bpdc after the fptr. (2 tr, ch 2, 2 tr) in the next st. This is your corner made – see Photo 6.* Repeat from * to * 3 more times, omitting the last corner on the last repeat. Join to the top of the beginning ch-4 (or the standing treble crochet) with a sl st.
Stitch counts:
- Total: 108 st’s and 4 ch-2 corner spaces {16 tr’s, 24 dc’s, 24 hdc’s, and 44 sc’s}
- Per Side: 27 st’s {4 tr’s, 6 dc’s, 6 hdc’s, and 11 sc’s}
It’s becoming square, but not quite there…yet.
Round 10
- If you are using the same colour, sl st into the next st and into the ch-2 corner space. Ch 3 (counts as your first dc) and then (dc, ch 2, 2 dc) into the same space. This is your first corner made.
- If you are using a new colour, join your yarn by making a standing double crochet in any corner space around. (Dc, ch 2, 2 dc) in the same space. This is your first corner made.
*Bpdc in the next 5 st’s. Bphdc in the next 3 hdc’s. Bpsc in the next 11 sc’s. Bphdc in the next 3 hdc’s. Bpdc in the next 5 st’s. (2 dc, ch 2, 2 dc) in the ch-2 corner space. This is your corner made.* Repeat from * to * 3 more times, omitting the last corner on the last repeat. Join to the top of the beginning ch-3 (or the standing double crochet) with a sl st.
Stitch counts:
- Total: 124 st’s and 4 ch-2 corner spaces {16 dc’s, 40 bpdc’s, 24 bphdc’s, and 44 bpsc’s}
- Per Side: 31 st’s {4 dc’s, 10 bpdc’s, 6 bphdc’s, and 11 bpsc’s}
Round 11
- If you are using the same colour, sl st into the next st and into the ch-2 corner space. Ch 3 (counts as your first dc) and then (dc, ch 2, 2 dc) into the same space. This is your first corner made.
- If you are using a new colour, join your yarn by making a standing double crochet in any corner space around. (Dc, ch 2, 2 dc) in the same space. This is your first corner made.
*(Ch 1, skip the next st and dc in the next st) 15 times (see Photo 2 below). Ch 1 and skip the last stitch. (2 dc, ch 2, 2 dc) in the ch-2 corner space. This is your corner made.* Repeat from * to * 3 times, omitting the last corner on the last repeat. Join to the top of the beginning ch-3 (or the standing double crochet) with a sl st.
Please Note: The first stitch on each side will be slightly hidden by the corner stitches. Make sure that you don’t accidentally skip this stitch AND the next stitch. You should only be skipping this “hidden” stitch (indicated with an arrow in Photo 1 and illustrated in Photo 2).
Stitch count: 76 dc’s, 64 ch-1 spaces, and 4 ch-2 corner spaces {19 dc’s and 16 ch-1 spaces per side}
Round 12
- If you are using the same colour, sl st into the next st and into the ch-2 corner space. Ch 3 (counts as your first dc) and then (dc, ch 2, 2 dc) into the same space. This is your first corner made.
- If you are using a new colour, join your yarn by making a standing double crochet in any corner space around. (Dc, ch 2, 2 dc) in the same space. This is your first corner made.
*Dc in the next stitch. This stitch will be slightly hidden. (Ch 1 and skip the next dc – indicated with an arrow in Photo 1. Dc in the next ch-1 space) 16 times. Ch 1 and skip the next dc. Dc in the next dc, which will be the last dc before the ch-2 corner space – see Photo 2. (2 dc, ch 2, 2 dc) in the corner ch-2 space. This is your corner made.* Repeat from * to * 3 more times, omitting the last corner on the last repeat. Join to the top of the beginning ch-3 (or the standing double crochet) with a sl st.
Stitch count: 88 dc’s, 68 ch-1 spaces, and 4 ch-2 corner spaces {22 dc’s and 17 ch-1 spaces per side}

Round 13
- If you are using the same colour, sl st into the next st and into the ch-2 corner space. Ch 3 (counts as your first dc) and then (dc, ch 2, 2 dc) into the same space. This is your first corner made.
- If you are using a new colour, join your yarn by making a standing double crochet in any corner space around. (Dc, ch 2, 2 dc) in the same space. This is your first corner made.
*Skip the first stitch (the hidden stitch). Dc in the next 2 st’s. (Dc in the next ch-1 space, dc in the next dc) 17 times. Dc in the last 2 dc’s. (2 dc, ch 2, 2 dc) in the corner ch-2 space. This is your corner made.* Repeat from * to * 3 more times, omitting the last corner on the last repeat. Join to the top of the beginning ch-3 (or the standing double crochet) with a sl st.
Stitch count: 168 dc’s and 4 ch-2 corner spaces {42 dc’s per side}
Join the Block a Week CAL
If you would like to be part of the Block a week CAL on Facebook, please join the Official CCC Social Group (you must be logged into Facebook to do so) so that you can access and utilize the support and encouragement of all the lovely ladies on there.
You can also join the Block a Week CAL Flickr Group so that you can inspire others and be inspired yourself.
For those of you who do not like Facebook, you can always follow along with me here. I will be posting the blocks every week.
Remember to subscribe to my Weekly Newsletter if you would like to be kept in the loop. You can also like my Facebook page or follow me on Bloglovin, Google+, Pinterest, Twitter, or Instagram.

More Blogs Following the CAL
- Lou Mander from Tea, Crochet and Me – using Stylecraft in White, Mocha and Raspberry
- Wendy from Little Wendy Crochet (Dutch photo tutorials)
Please feel free to share your photos using #blockaweekcal2014.

This blog post contains affiliate links. I only link to products I personally use or would use. All opinions are my own.


joyce angi says
can you send mee all the squares in that afghan with a list of colours and designs please
Jenny Lowman says
Look at the Block a Week CAL Joyce. The blocks are all mostly detailed in that blog post.
Gail says
Good Morning,
I am brand new to crocheting different squares, and would like to inquire, please, how I can get ahold of all the patterns for the various squares that are crocheted here? Is there a club or an organization I could join?
Thank you so very kindly
Dedri Uys says
Hi, you can join the Official CCC Social Group on Facebook, or you can just follow the links in this post to find each pattern: https://lookatwhatimade.net/crafts/yarn/crochet/block-a-week-cal-2014/block-week-cal-2014/
Marlene D. says
Could you tell me what yarn and color list you used for the one that is mostly plums/turquoise? Thanks. I LOVE this square!
Dedri Uys says
Hi Marlene. That was Virginia’s square. You can find her here on Ravelry: http://www.ravelry.com/projects/mangomail. I am sure she would be happy to tell you which colours and yarn she used.
Betty says
Thank you
Betty says
Thanks
Quirina says
Thank you for the photo’s, it helps me so much!
And choclat, crochet and a happy child… Maybe they don’t mix, but it made me smile :-) thank you for sharing that.
Greats, Quirina.
The Netherlands
Amelia Vincent says
As soon as I saw the name of this square in my allfreecrochet.com email, I thought it was probably one of your designs. As soon as I saw the picture at allfreecrochet.com, I KNEW it was one of yours. Another beautiful design. Thank you for sharing your patterns.
jeni says
Thank you for sharing. Your work is stunning.
Wendy says
Beautiful! Would love to have a printer-friendly set of text only instructions as an option to the photo tutorial. :)
Dedri Uys says
Thank you. If you use the printer-friendly button at the bottom of the post you can delete all the images from the print-out, leaving you with a text-only print-out. I hope that helps.
georgina domenech says
thank you bery nice is beutiful scuse no se espresarme en ingles ruego me disculpe work bery nice
Helen says
Beautiful use of stitches and color,,, a feast for the eyes. Thanks so much for sharing your creativity with us SMILE
Dedri Uys says
Thank you, Helen. You are most welcome. Most of the praise for this one goes to Virginia :)
San says
<3 <3 <3 this square :). Beautiful work! I really enjoyed making it! x
Veronika says
Question: Is it supposed to be Petron for round 12 or Petrol? I was confused for a second about the colour name, but when I looked at the photos, it seems like it should be Petrol?
Dedri Uys says
Typo, thanx for bringing it to my attention. There is no such colour as petron in the Lucy Pack.
Mindi says
I’m a computer “nerd” and want to thank you for the way you formatted the downloadable pattern. It’s professional and easy to read, unlike many. I also love the block. :)
Dedri Uys says
Thank you, Mindi. I kept thinking maybe I should do it the standard way to save people ink and grumbling, but Sophie’s Garden is written in that way and the response was so good that I thought I would try it again. Maybe I should do a poll…
Elly D says
Thank you so much for sharing your time and expertise to do these tutorials! Your blocks are so beautiful!
Dedri Uys says
Thank you :)