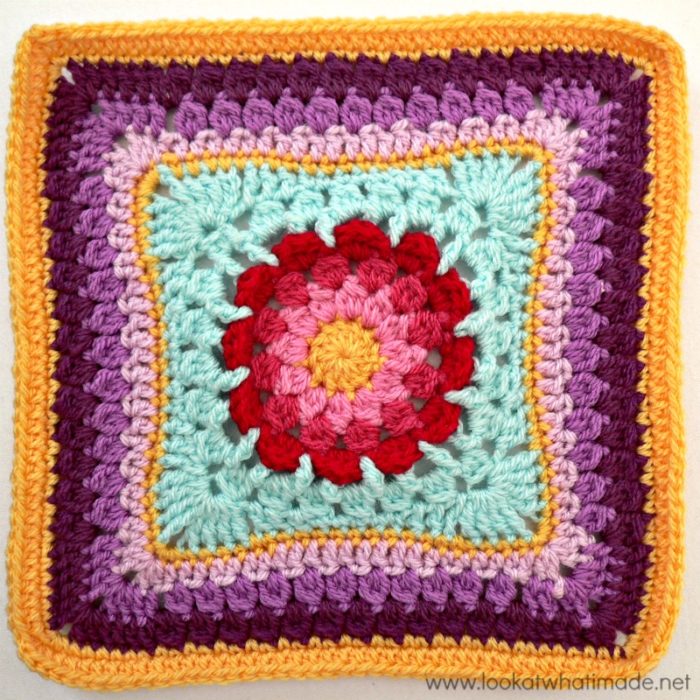
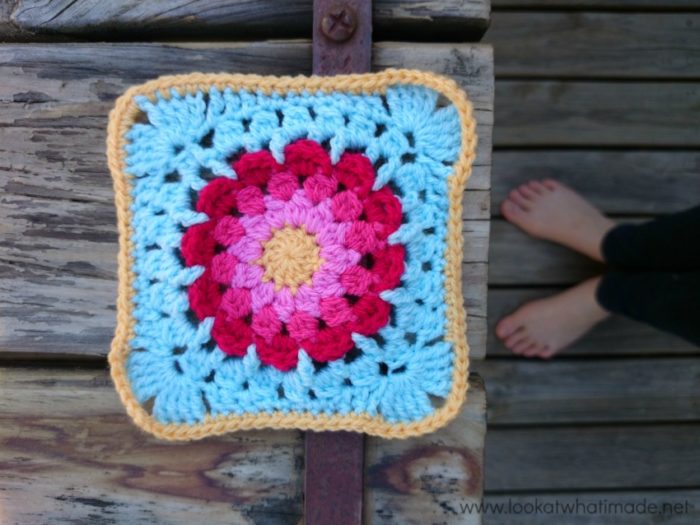
Block 14 of the Block a Week CAL (hosted by Kimberly Slifer) is Aurora Suominen’s lovely Autumn Clusters Square. If this is the first you’ve heard of the CAL, it’s not too late to join in. You can read more about the CAL HERE.
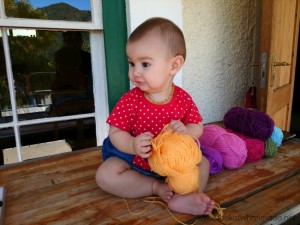
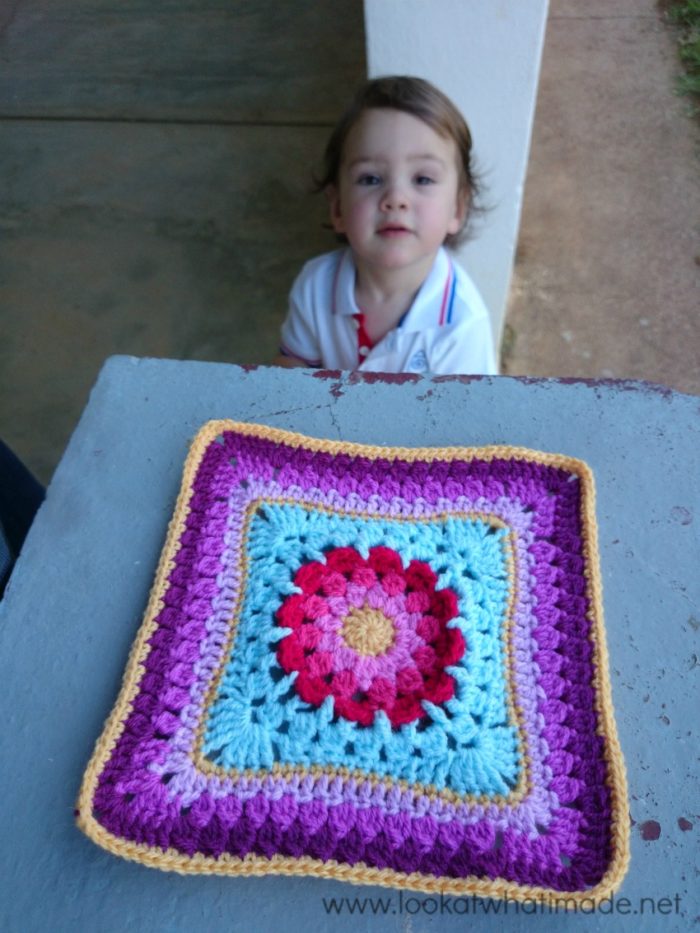
This last week has been a very busy one! My sister got married on Saturday, so the photos for the square were done in between preparations for the wedding. I also got to meet my god-daughter for the first time and she helped me test the yarn by seeing if it was edible.
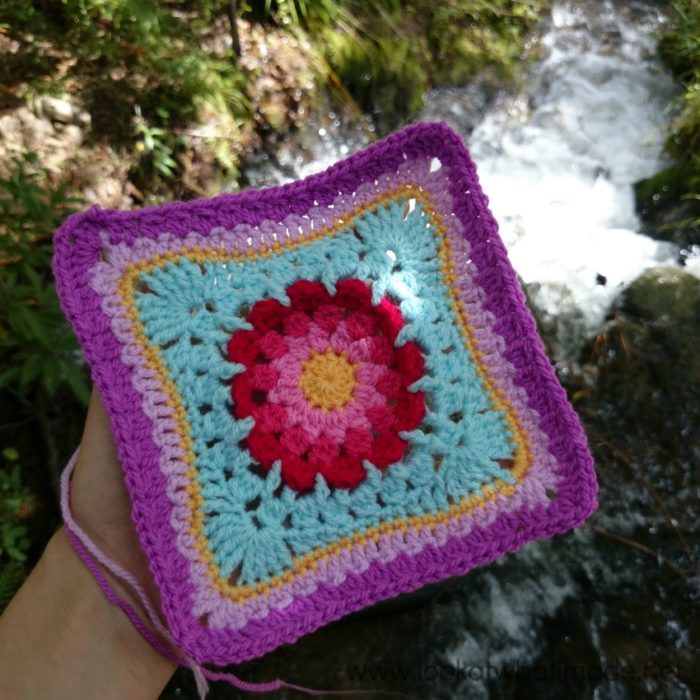
You will notice that this week’s photos have a slightly different feel to my normal photo tutorials, but I wanted to share some of the scenery and greenery of our family farm with you (and of course there has to be a photo of Lienke!).
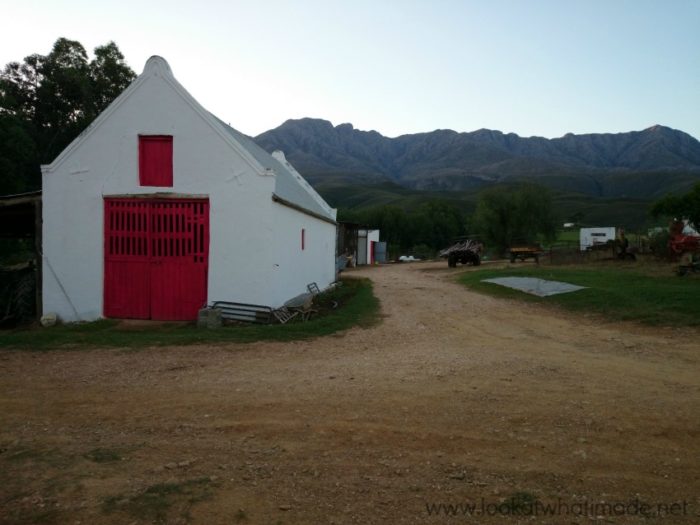
We stayed in one of the guesthouses on the farm and you are welcome to have a look at the website HERE. The farm is called Kruisrivier and has been in the Strydom family for 8 generations. It is situated at the foot of the Swartberg (literally translated as Black Mountain) and lies right under “The Man’s Head”, also known as Lord Gladstone. See if you can spot him in the photo below.
I hope you enjoy this glimpse into my soul.
Ps. My camera has now been fixed, but most of these photos were still done on my phone and are therefore a little bit dodgy.
Autumn Clusters Square
{Pattern © 2011 Aurora Suominen. Photo tutorial done with kind permission}
Pattern
The pattern is currently only available on a web archive HERE. You can also add it to your ravelry queue here.
Suggested Materials
- 5 mm Clover Amour Crochet Hook (US H/8 UK 6)
- Worsted weight yarn
Size
- Using the hook and yarn specified, your square should be a nice even 12″ when you are done.
- Using a 4 mm crochet hook (US G/6 UK 8) and double knit yarn, as I have done, your finished square will be about 7.5″ big.
 My Yarn and Colour Choices
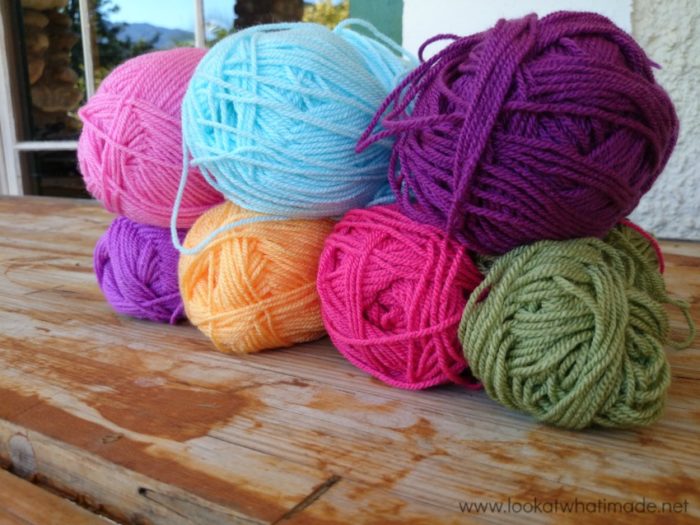
I am using the Stylecraft Special DK.
- Saffron (Rounds 1, 8, 12, and Optional Round 13)
- Fondant (Round 2)
- Pomegranate (Round 3)
- Lipstick (Round 4)
- Sherbet (Rounds 5-7)
- Clematis (Round 9)
- Magenta (Round 10)
- Plum (Round 11)
Notes
- The initial ch st’s in each round are counted as a stitch, except for Rounds 8 and 12, which are sc rounds.
- Each round is joined with a sl st.
- The stitch count for the last round has been omitted, but I have added it below. I have also added additional stitch counts (like per side and between corners).
- US Crochet Terminology used. (See this comparative chart if you need help transcribing from US to UK)
- IMPORTANT: For the purposes of this pattern, a stitch is defined as any space, stitch or cluster. This will make more sense later.
Speciality Stitches
This pattern uses a lot of cluster stitches (also sometimes called Bobble Stitches). Please see this Bobble Stitch tutorial for help with making the cluster stitches. The only difference is that Aurora starts her first cluster with a ch-2 and the tutorial starts it with a ch-3.
Corrections
- Round 5: The pattern tells you to join to the top of the ch-3. It should tell you to join to the third ch of the initial ch-5 as the round starts with a ch-5, not a ch-3.
- Round 7: First corner should have a ch-3 space, not a ch-2 space.
Autumn Clusters Photo Tutorial
This photo-walkthrough is NOT the actual pattern and should not be used instead of the pattern, but rather in conjunction with it.
Thank you very much to Aurora Suominen for giving us permission to do this photo-tutorial for her Autumn Cluster Square. And a special thank you to Kimberly Slifer for letting me do these tutorials and for obtaining the necessary permission.
Round 1
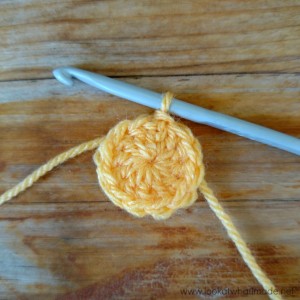
You can start this round with a magic ring instead of the initial ch-4.
Magic Ring Instructions for Round 1
Into a magic ring: ch 3 (this counts as your first dc). Dc x 11 into the ring and pull the ring tight. Join to the top of the initial ch-3 with a sl st. If you are not familiar with working into a magic ring, this video tutorial from The Crochet Crowd is very good. Please remember, when working into a magic ring you HAVE to work away your initial tail very well. If you just cut it, your whole square might unravel!
Stitch count: 12 dc’s
Round 2
Round 2 starts with a beginning cluster (Photos 1 and 2). You can see this Bobble Stitch tutorial if you need any help with making the first (and subsequent) cluster stitches. The only difference is that Aurora uses a ch-2 start for the first cluster stitch, whereas the tutorial uses a ch-3 start.
After you have made the first cluster stitch (Photo 2), ch 1.
Into each stitch around: *Make a cluster stitch (Photo 3), and then ch 1 (Photo 4)*. You should end up with 12 cluster stitches, each separated by a ch st (Photo 5). Join to the top of the first cluster st with a sl st.
Stitch count: 12 clusters and 12 ch-1 spaces
Round 3
Round 3 is worked into the ch-1 spaces between clusters.
To start Round 3, sl st into the first ch-1 space and make a beginning cluster. *Ch 2 (Photo 1) and make a cluster stitch in the next ch-1 space (Photo 2)* x 11. Ch 2 and join to the top of the first cluster with a sl st (Photo 3). This slip stitch counts as the first sl st in Round 4.
Notice that you are skipping the cluster stitches between ch-1 spaces (indicated with arrows in Photos 1 and 2 below).
Stitch count: 12 clusters, 12 ch-2 spaces
Round 4
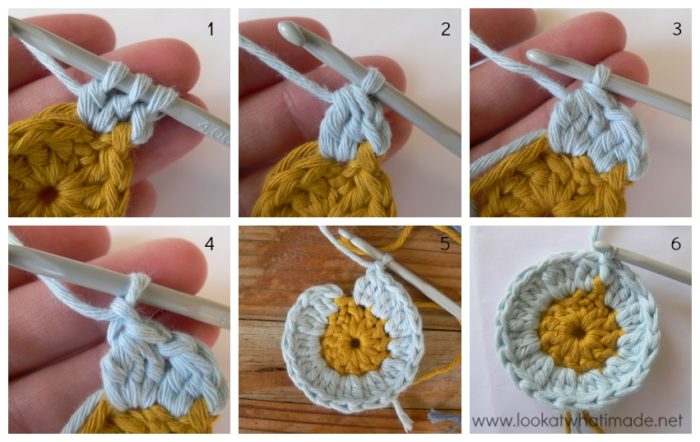
For Round 4, you will be making 3 dc’s in each ch-2 space (Photo 1) and a sl st in the top of each cluster around (indicated with an arrow in Photo 1 and illustrated in Photo 2).
Photo 4 shows you what this round should look like before joining.
Join in the first sl st of the Round (the blue loop in Photo 5).
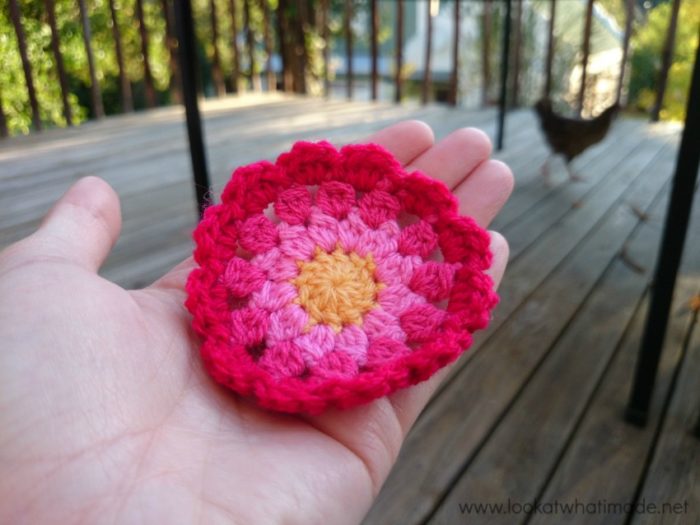
Don’t be alarmed if your flower has a slight curve to it at this point. When I made this example below, using cotton yarn, the flower was significantly curved, but it straightened out in the next few rounds.
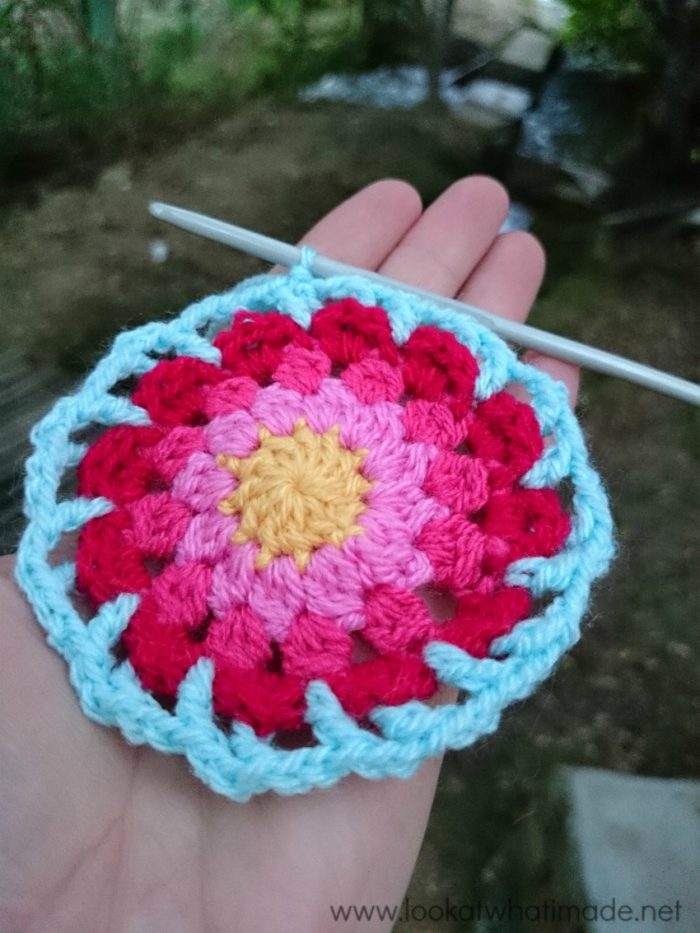
This is Round 4 completed in the stylecraft colours.
Stitch count: 36 dc‘s, 12 sl st’s. {12 petals}
Round 5
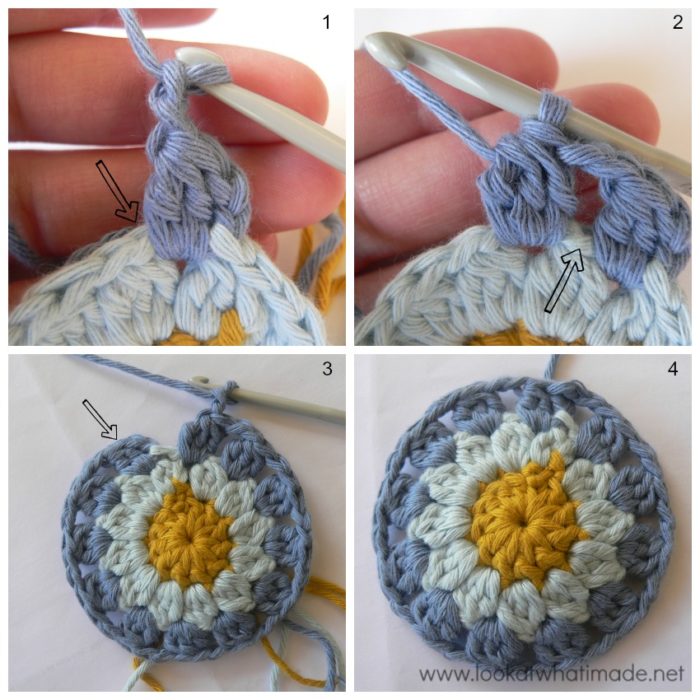
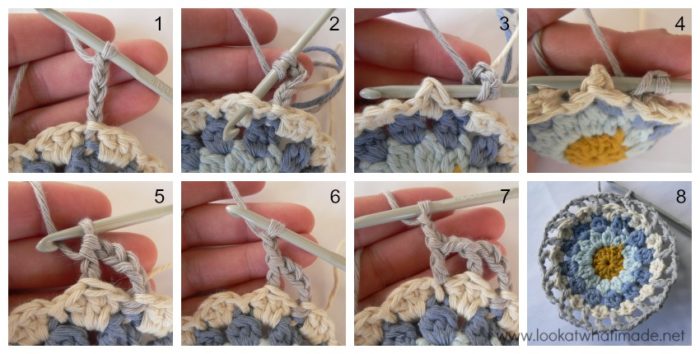
Ch 5 (Photo 1). This counts as your first dc and ch-2. *Bpdc around the central dc of the next 3dc petal. To do that, insert your hook from back to front (Photo 2) and then from front to back (Photo 3) around the post of the middle dc of the petal. Photo 4 shows you what it should look like from the top. Make a dc (Photo 5). Ch 2 (Photo 6) and dc into the next sl st. Ch 2 (Photo 7).* Repeat as in the pattern, joining to the third chain of the beginning ch-5 with a sl st.
Stitch count: 24 dc’s, 24 ch-2 spaces.
Round 6
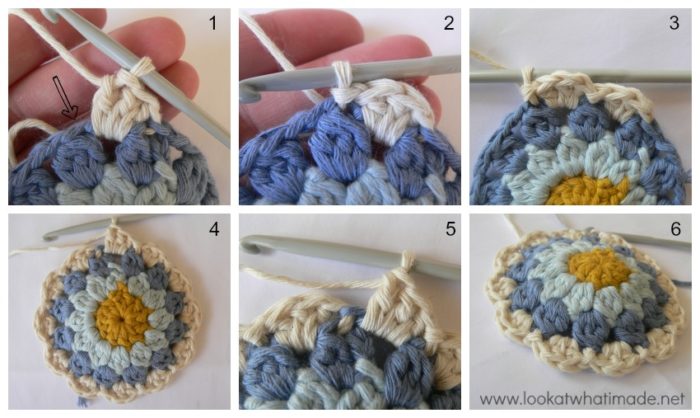
Sl st into the first ch-2 space (Photo 1) and make a beginning cluster. Ch 2 (Photo 2). *Make a cluster in the next ch-2 space and ch 2*. Repeat around as in the pattern, joining to the top of the beginning cluster with a sl st.
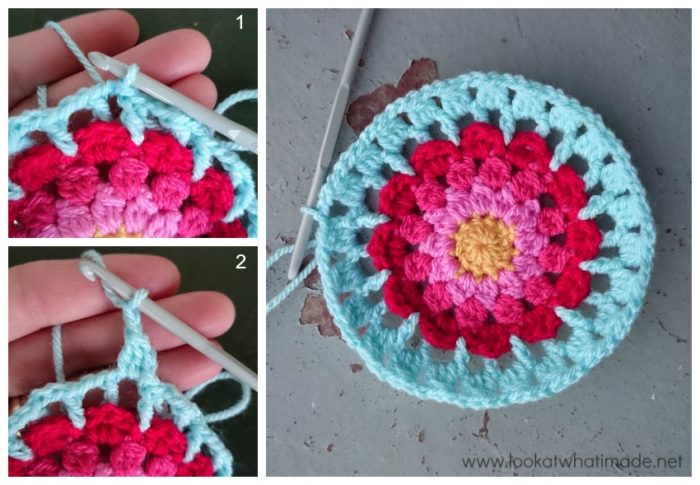 Stitch count: 24 clusters and 24 ch-2 spaces.
Round 7
Round 7 is straightforward. There are just 4 things to remember/look out for:
- You will be working into the top of each cluster and into each ch-2 space, so where you are told to dc in the next 3 st’s after the corner, you will work into the first ch-2 space, then the top of the next cluster, then the next ch-2 space (indicated with arrows in Photo 1 and illustrated in Photo 2). Does that make sense?
- Do not forget the ch stitches before and after each corner configuration. I kept forgetting them.
- Remember that each corner should have a ch-3 space. There is a typo in the instructions for the very first corner of the round.
- At the end of Round 7, remember to sl st your way to the corner ch-3 space.
Stitch counts: 24 dc’s, 32 tr’s and 20 sc’s, and 4 ch-3 spaces. {6 dc’s, 8 tr’s and 5 sc’s per side}
Round 8
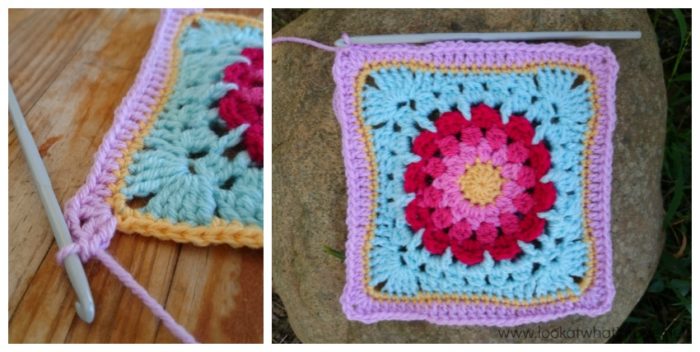
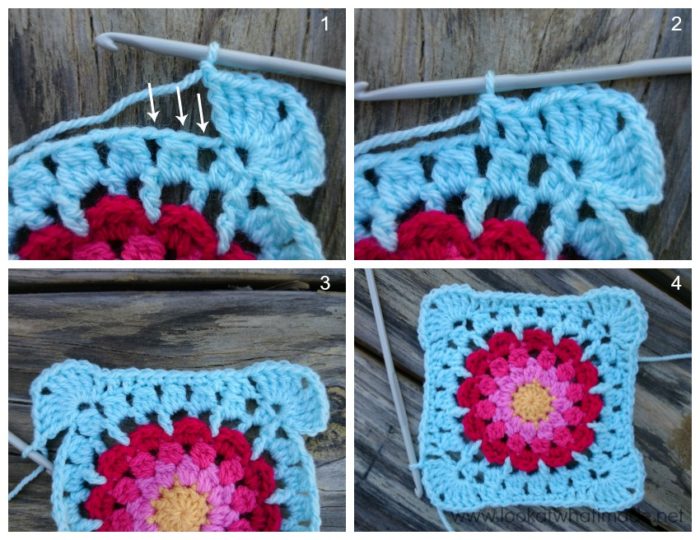
Round 8 is a standard sc round. After making the 3 sc’s into the corner space (Photo 1), you will sc in the next 21 st’s. To help you a little bit, I will break the 21 stitches down for you. The first 4 sc’s will fall into the treble stitches from the previous round’s corner (Photo 2). Don’t forget that first hidden stitch right after the corner. See this tutorial if you need some help identifying the first stitch to work into after the corner.
The fifth sc will fall in the ch-1 space (which you will hopefully have remembered to make -see Photo 3). Then you will make 11 sc’s (into the dc’s and sc’s from the previous round – see Photo 4), followed by a sc into the ch-1 space before the next corner. The last 4 sc’s will fall in the treble stitches from the previous round’s corner.
This will give you one completed side (Photo 5). Repeat around as instructed in the pattern and join to the first sc with a sl st.
Round 8 completed.
Little Lienke testing the edibility and squeezability of my yarn.
Stitch counts: 96 sc’s {21 sc’s between 3-sc corners}
Round 9
You can start Round 9 with a standing double crochet if you prefer, or you can start it with a ch-2 as instructed in the pattern. If you don’t know what a standing double crochet is, see this excellent tutorial by Tamara from Moogly.
This round is easy. You just work into each sc around. At the end of the round, remember to sl st your way over to the ch-2 corner space.
 Stitch count: 52 dc’s, 56 hdc’s, and 4 ch-2 spaces. {13 dc’s and 14 hdc’s per side}
Round 10
As I was starting this round, my mom brought me a big bowl of First Choice jelly and custard. Hence the jelly in the photo.
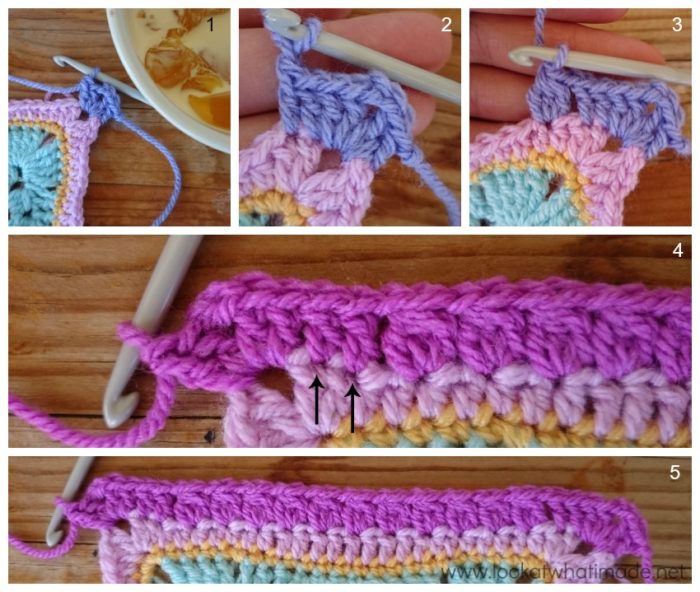
After making the beginning corner (as explained in the patter instructions for Round 9), dc in the next 2 st’s (Photo 2). Make sure that you don’t accidentally skip that first stitch.
After the 2 dc’s, *ch 1, skip the next dc and then make a cluster in the next dc (Photo 3)* x 11. When you have made 11 clusters (each separated by a skipped stitch and a ch st), dc in the last 2 st’s (indicated with arrows in Photo 4) and make your next corner.
Repeat around and join as in the pattern, remembering to sl st your way over to the ch-2 space at the end of the round.
Stitch count: 44 clusters, 32 dc’s, 48 ch-1 spaces, and 4 ch-2 spaces {11 clusters, 8 dc’s, and 12 ch-1 spaces per side}
Round 11
Round 11 is a repeat of Round 10, but with more clusters and stitches.
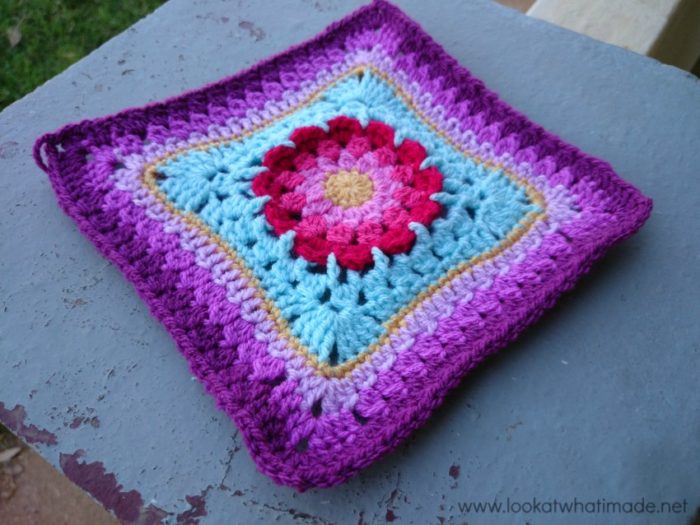 Stitch count: 48 clusters, 48 dc’s, 52 ch-1 spaces, and 4 ch-2 spaces {12 clusters, 12 dc’s, and 13 ch-1 spaces per side}
Round 12
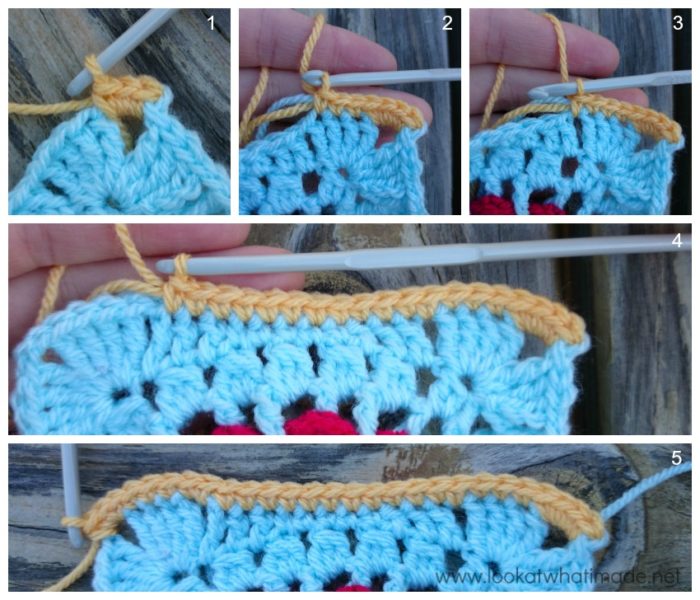
Round 12 is another sc round. Remember that each ch-1 space and each cluster counts as a stitch, so you have to work into each space AND cluster. Of the 37 sc’s on each side, the seventh sc will fall in the first ch-1 space and the thirty-first sc will fall in the last ch-1 space. For what that’s worth.
Stitch counts: 160 sc’s {37 sc’s between 3-sc corners}
I have added an Optional Additional Round 13 to get my square to the same size as the other squares. You can find the instructions for that HERE.
Join the Block a Week CAL
If you would like to be part of the Block a week CAL on Facebook, please join the Official CCC Social Group (you must be logged into Facebook to do so) so that you can access and utilize the support and encouragement of all the lovely ladies on there.
You can also join the Block a Week CAL Flickr Group so that you can inspire others and be inspired yourself.
For those of you who do not like Facebook, you can always follow along with me here. I will be posting the blocks every week.
Remember to subscribe to my Weekly Newsletter if you would like to be kept in the loop. You can also like my Facebook page or follow me on Bloglovin, Google+, Pinterest, Twitter, or Instagram.
More Blogs Following the CAL
- San from Loopsan – using Stylecraft in sophisticated Parchment, Denim, Mocha and Meadow
- Lou Mander from Tea, Crochet and Me – using Stylecraft in White, Mocha and Raspberry
- Wendy from Little Wendy Crochet (Dutch photo tutorials)
Happy Hooking!




Jana says
Once you see that old man you can’t un-see him! Reminds me of the Sleeping Indian in Jackson Hole, Wyoming (USA). You can barely see him until it snows, then you can see his face, headdress, folded arms, knees and feet!! It’s really beautiful.
So this is your families farm? Very beautiful Dedri!! South Africa seems like another planet away compared to California. Have you ever been to the US?
Thanks for sharing the photos. I looked at the website as well. Glad you had fun and congratulations on your new Brother-in-Law!
Dedri Uys says
Hi Jana. I have never been to the US, but I firmly believe that I will see it one day.
My family are all congregated on the farm as I type (all apart from us) and it is bittersweet knowing that they are there celebrating Christmas together.
tatie fabie says
bravo à la miss joli choix de couleurs, je vois que la relève est assurée! héhé.
Félicitations aux heureux nouveaux mariés. bonne journée.
Carrie says
Congrats to your sister! I must say, I wish I grew up on a farm. It looks beautiful!, I couldn’t find the Mans Head though ;). I also really like the photo tutorial this way. The different backgrounds makes for an interesting and pretty picture. Thankyou for showing us a little bit into your life. Lienke is darling :)
Dedri Uys says
Thank you, Carrie. I was so sad to leave the farm on Monday. It is the place I feel the most comfortable. We had an awesome (although stressful) week there and we have made loads of new memories :)
Kim says
Perfect as always Dedri!!!!! The farm is gorgeous as is your god-daughter and I must say this is my favorite of your blocks so far! <3
Dedri Uys says
Thank you, Kim :)