It’s a Bandana Bib, Baby!
I think a Baby Bandana Bib is just about the cutest thing a little boy can wear. And I think it is the only item of baby boy clothing that kicks any frilly dress’ ass! They are also incredibly simple to make. Anyone that can use a pair of scissors and push down the pedal of a sewing machine can make these. Even if you have never sewn in your life. I am so crazy about these bibs that I would almost urge you to go out and buy a sewing machine just to make some of these. I say almost…because urging you to actually do that might be considered more than a little bit insane.
So to make your own Bandana Baby Bibs, you will need a few supplies. Stop! Don’t reach for your wallet and car keys just yet. You will already have them in your house, so read on and then go gathering.
Supplies for Making a Baby Bandana Bib
For the pattern
- 1 sheet of A3 paper or 2 sheets of A4 paper. OR a sheet from a newspaper – everyone has those, surely.
- Scissors
To make the Bandana Bib
- Scrap fabric (about as big as a sheet of A3 paper) – jersey cotton, cotton, cloth nappies, old t-shirts, bedsheets…any fabric that doesn’t have pink hearts or flowers on it.
- 2 tiny pieces of Velcro
or some Poppers
– just cut some off of an old babygrow/onesie (remembering to leave a margin of fabric around the popper) and sew them onto the finished bandana bib with a decorative stitch.
- A sewing machine (like this awesome Brother Sewing Machine
) and some cotton thread
Making the Bandana Bib Pattern
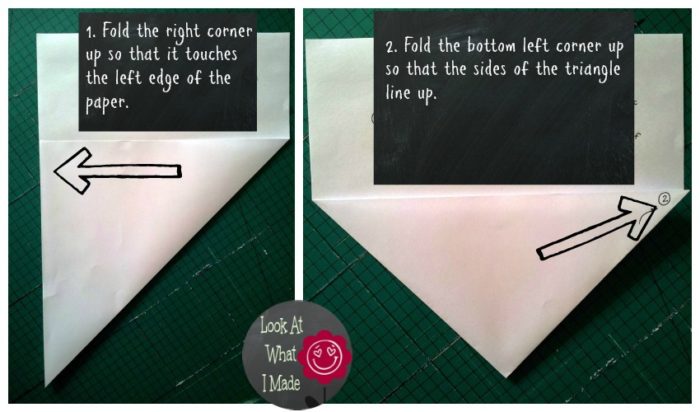
Take a sheet of A3 paper and fold the bottom right corner up until the bottom of the paper lines up with the left edge of the paper. This should give you a nice triangle. If you don’t have A3 paper, tape two pieces of A4 paper together along the length. Or use a sheet of A3-looking newspaper.
Fold the bottom left corner up so that the sides of the resulting triangle line up. Look at the photo. It speaks a thousand words. You are basically looking to fold the previous triangle in half…aargh. So difficult to explain with words.
Mark the neckline as indicated in the photo below. It doesn’t matter exactly how much you slant the neckline. Just slant it some. Cut on the dotted line and remove the pattern.
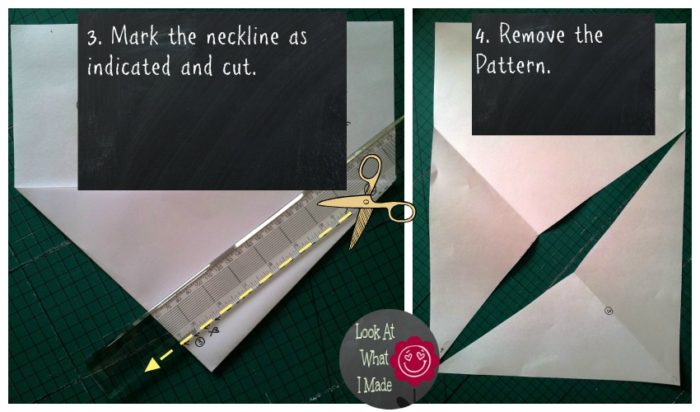
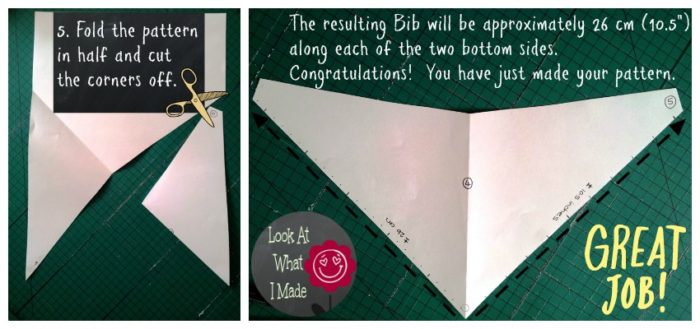
Finally fold the pattern in half along the fold and cut the top two corners off. Open your pattern up and admire your pattern-making abilities.
You will have a pattern that is roughly 10.5″ (26 cm) along the bottom sides. It will fit a boy from 0 – 2 years. So unless you have giant children, don’t adjust the pattern by too much. It seems small, but it will work. I am pretty sure your 2-year old will wear this more as a neckerchief than a bib anyways.
Making the Baby Bandana Bib
Lay your pattern on your fabric and cut out 2 pieces – one for the front and one for the back.
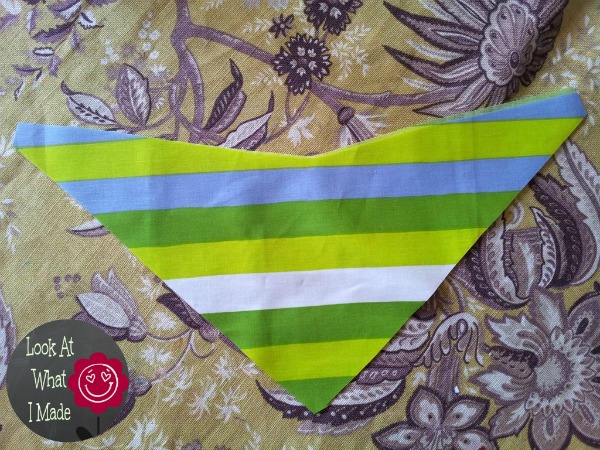
Turn the fabric over so that the right sides are together and the wrong sides of the fabric are facing out.
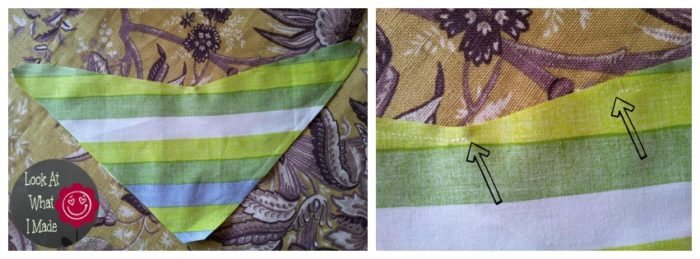
Starting anywhere around the edge of the bib, sew a 1/4″ seam, stopping about 2″ before you get back to the point you started at. You will need this 2″ gap to turn the bib right-side around. You will struggle to go wrong with this. Just keep the right edge of your sewing foot lined up with the edges of the fabric and sew, sew, sew. When you get to a corner, turn. When you’re almost back at the beginning, stop.
This is what your gap will look like (the gap is indicated with arrows in the photo below). I usually stop and start more or less in the middle of the top of the bandana bib because this bit is mostly hidden when a tiny tot wears it and so you can fudge as much as you want with impunity.
Turn the whole thing right-side out. You can iron it if you want to. Obviously I didn’t bother.
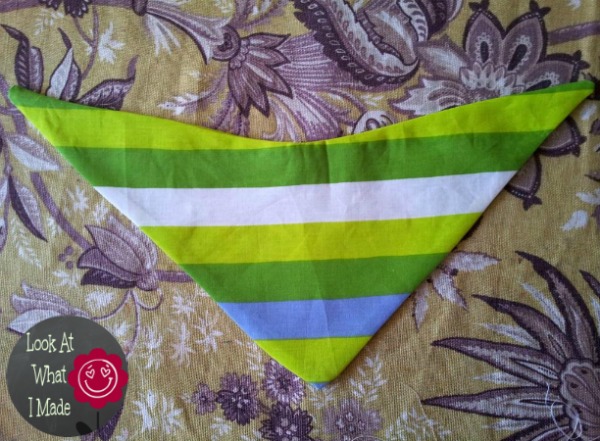
Now make a top stitch all around the bib. Most of you will know what top-stitching is. For those of you who don’t, read on and I will explain.
A top stitch is just like a seam, but it is done on the outside of the garment (the side that will ultimately show) and just inside of the sewn edges. The idea is to sew about 1/8″ in from the sides (if your original seams were 1/4″), thus catching all the layers of fabric (and seam) to prevent fraying. Not only will this prevent fraying if done even remotely right, but it will also give your finished item a more professional look.
So sew all around the sides of your bib. When you get to the “gap”, just pull the bib tight and top stitch over the gap. Make sure that you catch the 1/4″ seam allowance when you close the gap, otherwise it’s going to look yuk and will most likely fray.
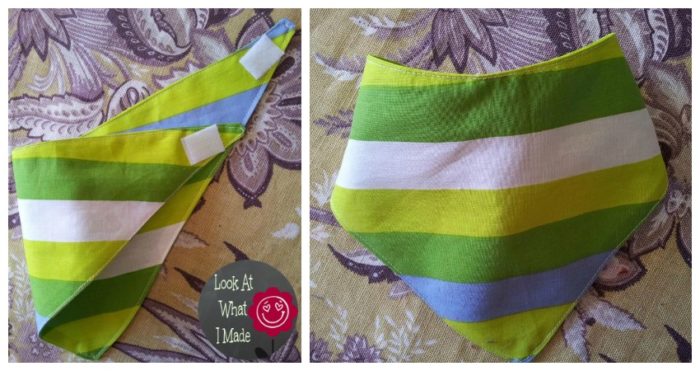
You should now have something that looks like this.
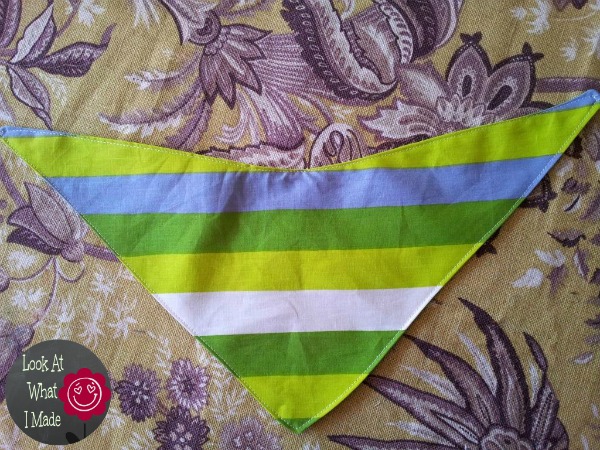
Lastly sew on your velcro or poppers. Don’t put both of them on the same side of the bib (that is, don’t put both on the front or both on the back). One goes on the front of one corner and one goes on the back of the other corner. If you accidentally mess up, no biggie. Just undo and redo.
And there you go. One completed Baby Bandana Bib.
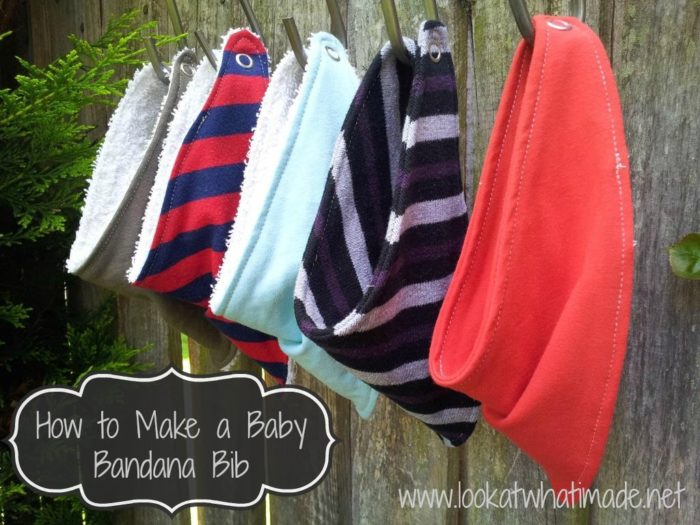
You can make these bibs out of any kind of fabric you fancy. And not just new fabric. I have made these from old jumpers, t00-small Baby Gap tops, t-shirts and old (clean) cloth diapers. If you want to know a little bit more about using upcycled fabric to make these bibs, see my post about making baby bandana bibs from old t-shirts.
If your little cowboy wears Bandana Bibs, do yourself a favour and make him some. Or better yet, make some to give away as gifts. Christmas is coming up, after all, and a few of these will make a lovely, unique and non-kitsch gift for any boy-mama.
Related Books
Remember to subscribe to my newsletter if you would like to be kept in the loop. You can also like my Facebook page or follow me on Bloglovin or Google+.
Happy Sewing!
xxx dedri


Carol says
Thank you great easy instructions. Going to try this. Thank you x
Holly Attias says
Thank you so much for your pattern tuorial, I’m on holiday and without a printer so your instructions were a god send.
Katie says
I have the big to see my baby in this instead of another tacky bib, but a busy day. With a single layer of microfleece and self stick Velcro tabs I made one out of just the pattern in about 5 min.! Looking forward to making more soon with cute fabric backed with PUL but this did the trick!
Jenny says
Sounds ideal, Katie!
Jenny :)