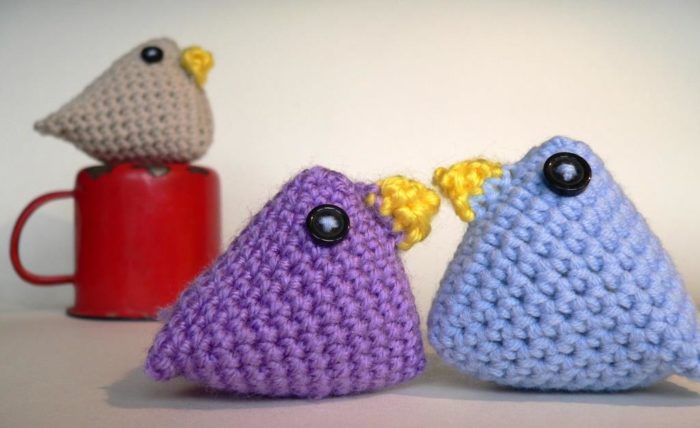
This FREE Mama Chicken Crochet Pattern was a very spontaneous affair. After I made my Super Quick Easter Chicks, I thought they looked awfully lonely without a mother. And then I thought: If I make a Mama Chicken, I might as well make her into a bag so that all the little chicks can have a safe place to sleep. The tricky bit was figuring out how many buttons I would need (and where they needed to go) to make the bag dual-buttonable. So whether your fancy is flat or 3 dimensional, I’ve got it sorted.
I think she is cute enough to make any little girl giggle.
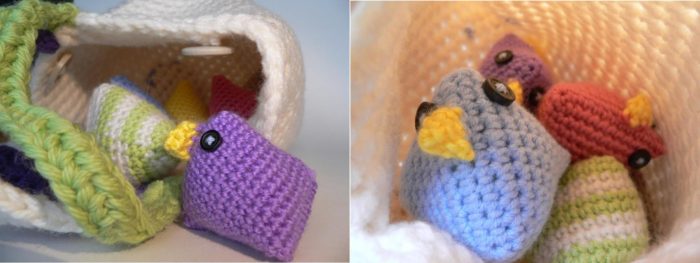
The Mama Chicken crochet pattern yields a bag that is roughly 20 cm square when flat and can hold about 10 Super Quick Easter Chicks.
I hope you have as much fun with this pattern as I have had.
Mama Chicken Crochet Pattern
© Dedri Uys 2013. All Rights Reserved.
Abbreviations
US Crochet Terminology Used
| Blo | Back loop only |
| Ch | Chain |
| Dc | Double crochet |
| Dc inc | Double crochet increase |
| Flo | Front loop only |
| Hdc | Half-double crochet |
| Hdc Inc | Half-double crochet increase |
| Sc | Single crochet |
| Sc inc | Single crochet increase |
| St/st’s | Stitch/stitches |
| * | Repeat all instructions between asterisks the amount of times specified. |
Materials
- Double knit yarn (light worsted weight/#3) in 6 colours (scraps)
- 2 Strands of Chunky yarn in cream for the bag
- 2 Strands of Chunky yarn in yellow (beak) and whatever colours you fancy for the tail (a few yards)
- 4 mm crochet hook (US 6/G UK 8)
- 7 mm crochet hook OR a 6.5 mm (US 10.5/K UK 3)
- Yarn needle
- 2 Buttons for the eyes
Instructions
Please note: I have not included progress pictures for Mama chicken’s body. If you don’t understand the first 2 rounds, take a look at my Super Quick Easter Chicks pattern. The steps for making the first 2 rounds are well illustrated in that pattern and are hugely the same for Mama chicken, except that she needs 2 strands of chunky yarn and more stitches on either side of the beak. I suggest making one of the little chicks first and then tackling Mama Chicken.
Perfectly Paisley Wing
To make the wing, follow this pattern here. Skip round 6 of the Perfectly Paisley Pattern, because you will be attaching the wing to the bag using a running stitch.
Beak
With a 7mm crochet hook and 2 strands of chunky yarn (yellow):
- Ch 2. 3 x sc in 2nd ch from hook. Ch 1 and turn. (3)
- 3 x sc inc. Ch 1 and bind off. (6)
Body
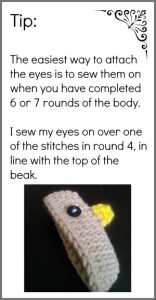 With a 7mm crochet hook and 2 strands of chunky yarn (cream):
1. Ch 5. The next 3 st’s will be worked into the beak. Insert your hook from back to front into the 3d st of the last row of the beak, and from front to back into the 4th st of the last row. This will naturally fold the beak in half. Make a sc through both layers. Make 2 more sc’s through both layers of the folded beak. Ch 15 and TURN. It is important that you turn, otherwise you’ll be working on the inside of your chicken, not the outside.
2. Sc in one loop only of the 2nd ch from the hook and the next 13 ch st’s (so 14 sc’s so far). Sc into the FLO of the next 3 st’s (across beak). Sc into one loop only of the next 4 ch st’s. 4 x sc in the last ch st. Continue around, working into the remaining loops of the foundation ch. Sc x 4. Sc into the BLO of the 3 st’s across the beak (so the loops remaining from when you worked into the FLO before). Sc x 13. 3 x sc in the last st. (48)
Don’t turn, just continue around, working the first st of each round into the first st of the previous round. Use a st marker to mark the beginning of each round if you prefer. I always do.
3-24. Sc x 48.
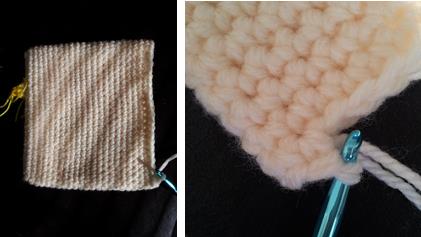
25. Sc x 7. Fold Mama Chicken Flat. You should end up 2 stitches after the fold. If you don’t, fudge it. You will be making the button holes in this round. They will be lopsided, but they need to be so that you can close Mama Chicken when she is both a bag AND a chicken.
So starting 2 st’s after the fold: *ch 2, skip 2, sc x 10* x 3. Ch 2, skip 2, sc x 3.
26. Sc x 7, *sc x 2 into the ch-2 button hole, sc x 10* x 3. Sc x 2 into the ch-2 button hole, sc x 3. Sl st in the next st and bind off. Work away your tails.
Handle/Tail
With a 7mm crochet hook and 2 strands of chunky yarn (any colour):
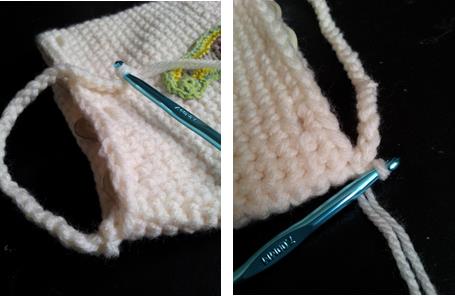
- Fold your bag flat and join your yarn (with a sl st) to the st on the fold of the bag. Ch 30. Sl st into the st on the other fold of the bag. Ch 1 and turn.
- Sl st in the 1st 3 st’s. Sc x 3, hdc x 18, sc x 3, sl st x 3. Sl st in the same st as joining. Bind off and work away your tails. This will form the middle of the handle (or the middle tail feather).
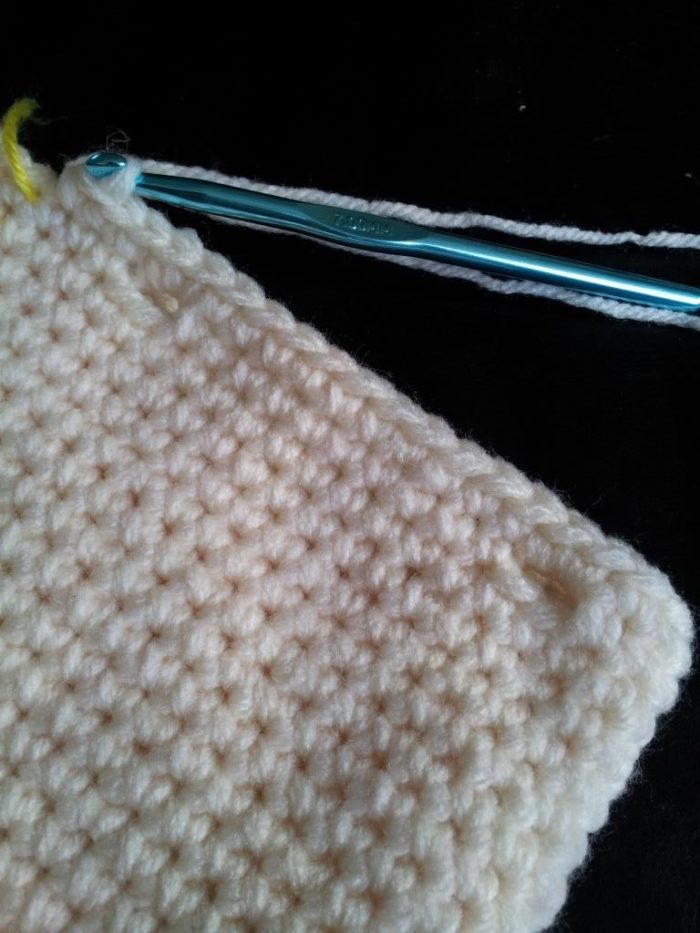
- With a new colour: Join your yarn by working a sl st into the st BEFORE the previous join (see photo below). Sc x 3 (one sc in each of the first 3 st’s of the handle). Hdc x 5, Ch 14 and skip 14. Hdc x 5, sc x 3. Join to the next st of the last round of the bag with a sl st. Ch 1 and turn.
- Sl st in the 1st 3 st’s. Sc x 3, hdc x 18, sc x 3, sl st x 3. Sl st in the same st as joining. Bind off and work away your tails.
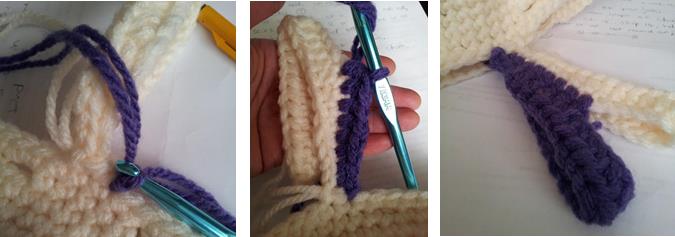
- Flip the bag around so that you start this round on the opposite fold. You want to be working into the other side of the first “feather”. So with a new colour: Join your yarn by working a sl st into the st BEFORE the previous join. Sc x 3, hdc x 5, Ch 14 and skip 14. Hdc x 5, sc x 3. Join to the next st of the last round of the bag with a sl st. Ch 1 and turn.
- Sl st in the 1st 3 st’s. Sc x 3, hdc x 18, sc x 3, sl st x 3. Sl st in the same st as joining. Bind off and work away your tails.

Finishing Touches
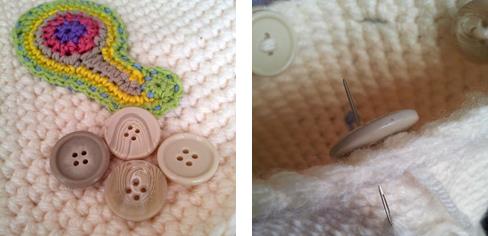
Sewing on the Buttons
You will need to sew the buttons onto the inside of the bag around the 5th st AFTER every button-hole. So…count 5 stitches to the left of any of the button holes and sew your button around the post of the stitch (with the button on the INSIDE of the bag). Repeat for all 4 buttons.
Attaching the Perfectly Paisley Wing
Place your wing in the middle of the bag with the rounded edge in line with the top of the fourth round of the bag. Using any colour you wish, attach the wing to the bag with a running stitch. I cheat a little when I do my running stitches…I hate having to insert the needle and then pull it through from the inside, insert it again and then pull it through from the outside…so boring. So I insert my needle into the next st of the wing and then snag a little loop of yarn from the bag, right beneath the stitch. I then pull my needle out through the next st of the wing and repeat the process. Using this method you get a nice clean finish on the inside of the bag as well.

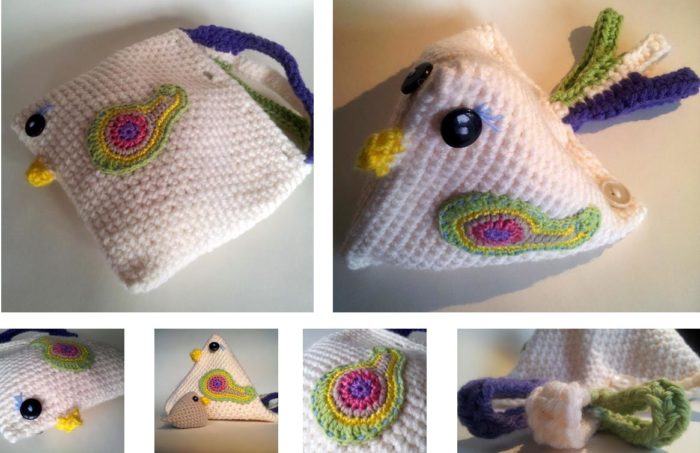
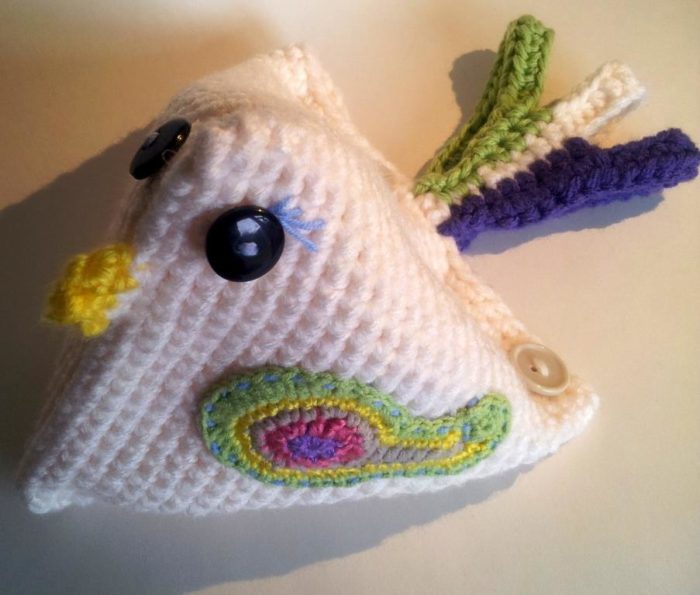
And here she is: Mama chicken ready to receive her load of Super Quick Easter Chicks.
Happy hooking, chickies! And if you find any errors in this pattern, please contact me so that I can fix them :)
Remember to subscribe to my newsletter if you would like to be kept in the loop, or you can like my facebook page if that’s more your thing.
xxx dedri


kharin fuchs says
ola adorei essa galinha copiei receita e vou fazer, ela é linda muito linda obrigada
sou do BRASIL – Rio Grande do Sul moro capital Porto Alegre
mais uma vez obrigada KHARIN
Laurel says
Dedri, For some reason the rows 1-2 for the Body are not showing up. Can you check on that? Thanks. Love your stuff. Always fun to make.
Dedri Uys says
Hi Laurel.
Sorry about that. There was a glitch with the ad. I have removed it so it should work now. Let me know if you still have issues. Also, note to self: Update the pattern already!
Ance Strydom says
Aw dis gorgeous Dedri! Jy is so ongelooflik amazing!!
Dedri Uys says
Dankie Ankepan :)