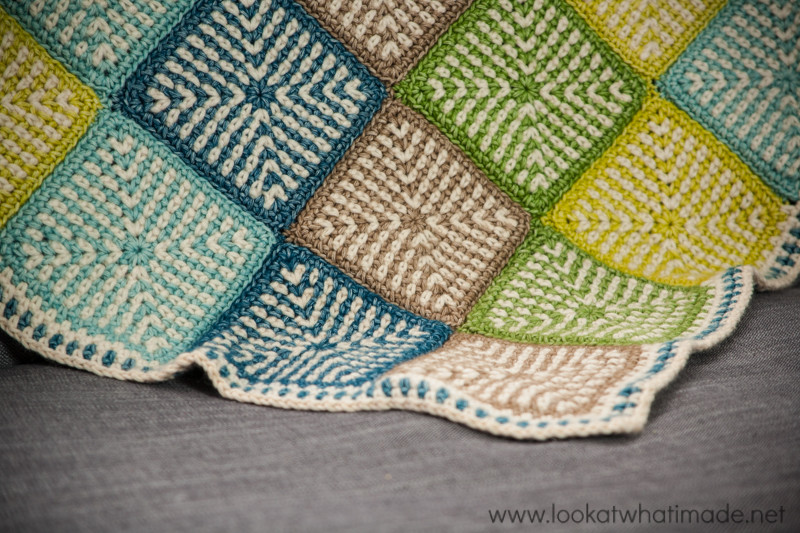
I have had so much fun making this Linen Stitch Manghan. The Linen Stitch has been one of my favourite stitches since I first started designing. It works up quickly, and you can alter the look of it so much by changing how often you change colours and how many colours you choose to use.
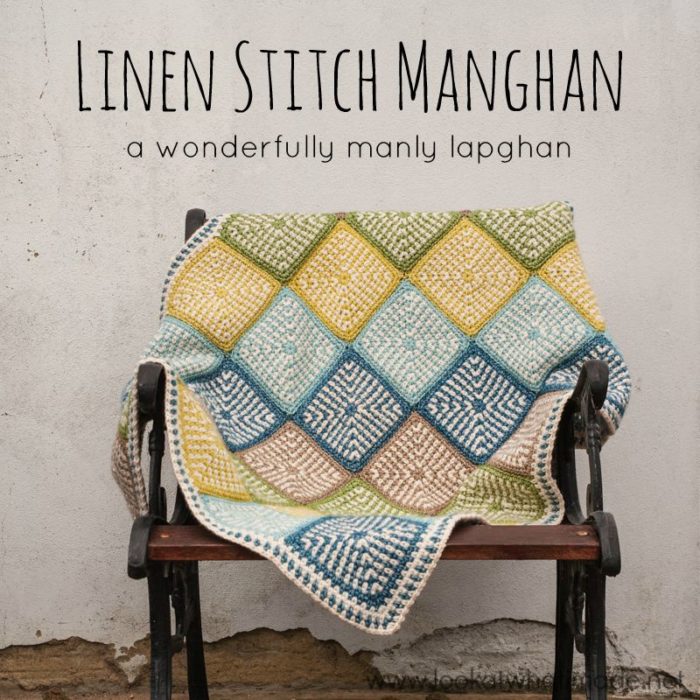
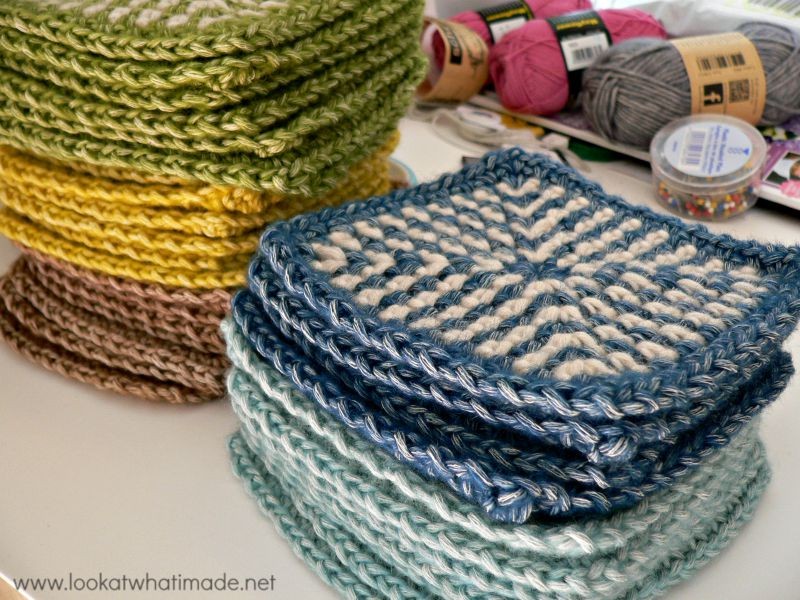
For my Linen Stitch Manghan, I have used Scheepjeswol Stonewashed XL in Canada Jade, Blue Apatite, Amazonite, Boulder Opal, Moonstone, and Lemon Quartz (Colour Packs available below) .
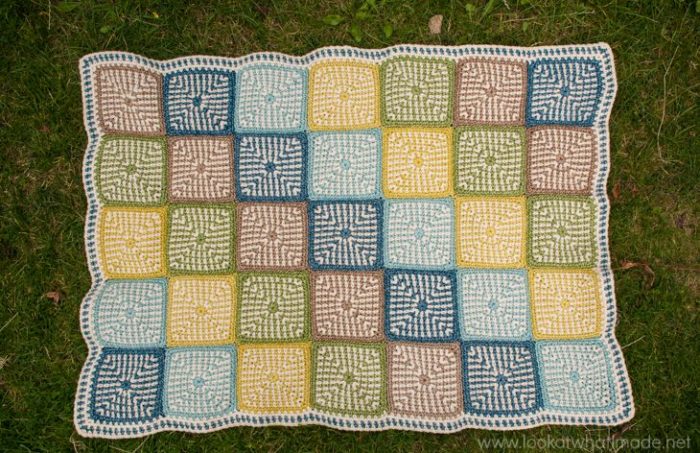
The final lapghan is 80 cm x 110 cm (31″ x 43″), which is perfect for me. If you would like to make it bigger, you can always add more squares or a thicker border. This specific lapghan is created by using a grid of 5 x 7 squares.
Linen Stitch Manghan Pattern
Add this pattern to your Ravelry Queue
Materials
- Scheepjeswol Stonewashed XL (Available from Wool Warehouse, Deramores and Scheepjes)
- Main Colour
- Moonstone (6 skeins) – Main Colour
- Contrasting Colours
- Blue Apatite (3 skeins)
- Amazonite (2 skeins)
- Canada Jade (2 skeins)
- Boulder Opal (2 skeins)
- Lemon Quartz (2 skeins)
- Main Colour
- 8 mm Clover Amour crochet hook (US 11/L)
- 6 mm Clover Amour crochet hook
(US 10/J UK 4) for joining only!
Colour Packs
You can buy the colour pack for the Linen Stitch Manghan HERE in my Wool Warehouse Shop (includes printed pattern). You can also buy them from Deramores.
Instructions
You will need to make 7 squares in each of the contrasting colours for a total of 35 Linen Stitch Squares. You can find the pattern for the Linen Stitch Squares HERE.
Once you have made all 35 Linen Stitch Squares, you will need to join them. Before you do, though, I should probably show you what the layout will look like. Please excuse the ruffled edges. Our grass hasn’t been cut in a while and doesn’t make for a very flat backdrop.
My favourite method for joining is the Diagonal Join, which I learned from my granny.
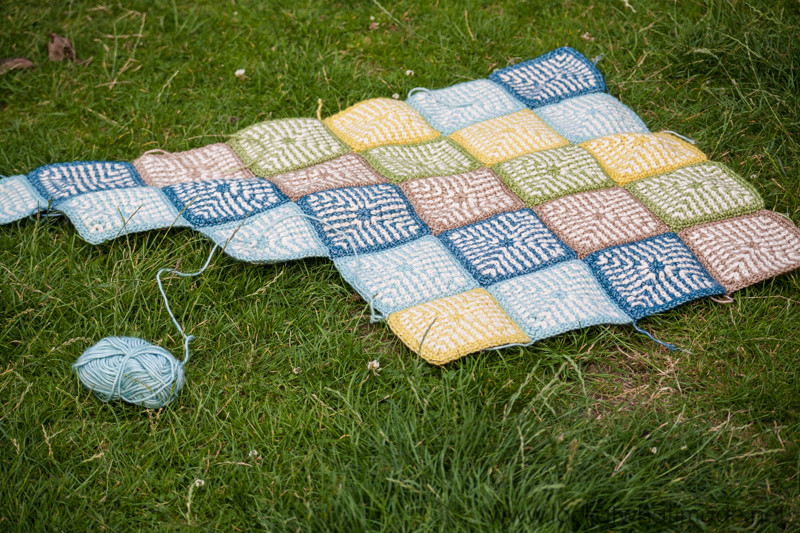
I have found that going down a hook size makes for a neater (and easier) join, so I suggest going down to a 6 mm hook to join your squares; however, you must keep your tension relaxed when making your sl st’s!! (!!)
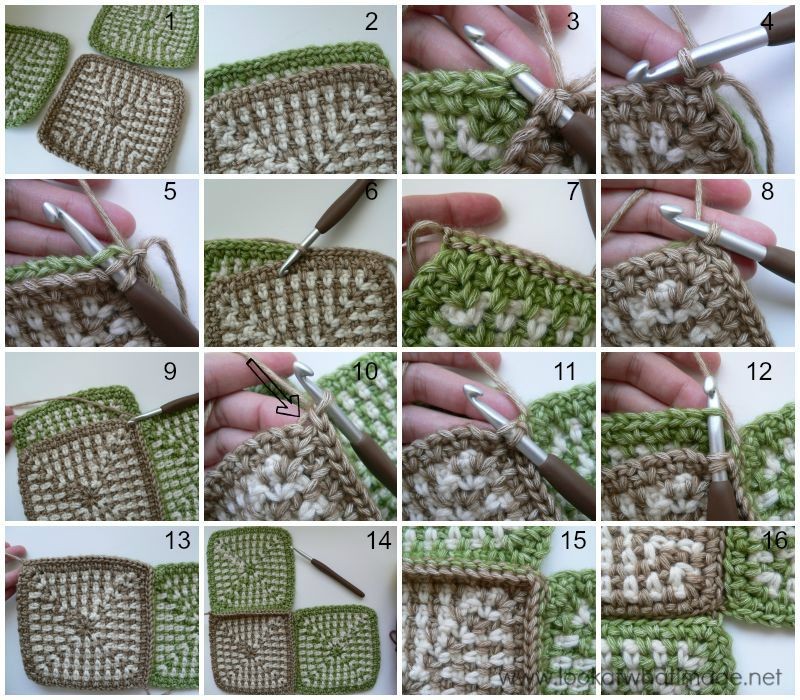
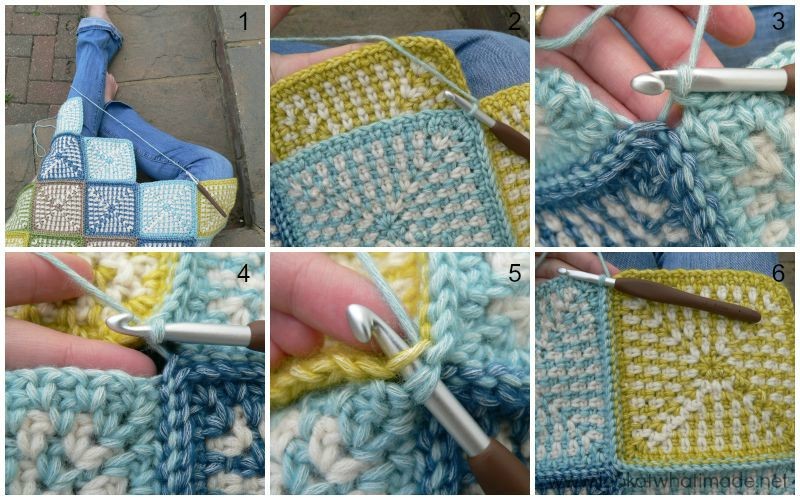
To join the squares diagonally, you will need to start with one of the corner squares (dark blue in the photo above and brown in the photos below). You will attach this square to the square that goes next to it and the square that goes above it (Photo 1). Please note that the squares below were used purely for the tutorial and do not reflect my layout. I suggest using the same colour as the corner square to join your first 3 squares together. By doing this, your joining stitches will melt into the design of the squares.
Lay the corner square and one of the other squares on top of each other so that the right sides are facing each other and the corner square is closest to you (Photo 2). With a slip knot already on your hook, insert your hook into the front loop only of the ch-1 corner space of the square closest to you. Then, insert your hook into the back loop only of the ch-1 corner space of the square farthest away from you (Photo 3). Make a sl st (Photo 4). Inserting your hook into the front loop only of the next stitch on the square closest to you and the back loop only of the next stitch of the square farthest away from you (Photo 5), make another sl st. Sl st in every stitch across (in this fashion) for a total of 23 sl st’s. The last sl st should fall in the corner ch-1 (Photo 8). Photos 6 and 7 illustrate what your join will look like from both sides.
Place the next square behind your corner square, again with the right sides of the square facing each other (Photo 9). Starting in the front loop only of the corner ch-1 of the square closest to you (indicated with an arrow in Photo 10 and illustrated in Photo 11) and the back loop only of the corner ch-1 of the square farthest away from you (Photo 12), make 23 sl st’s across this edge (Photo 13). Ch 1 and bind off.
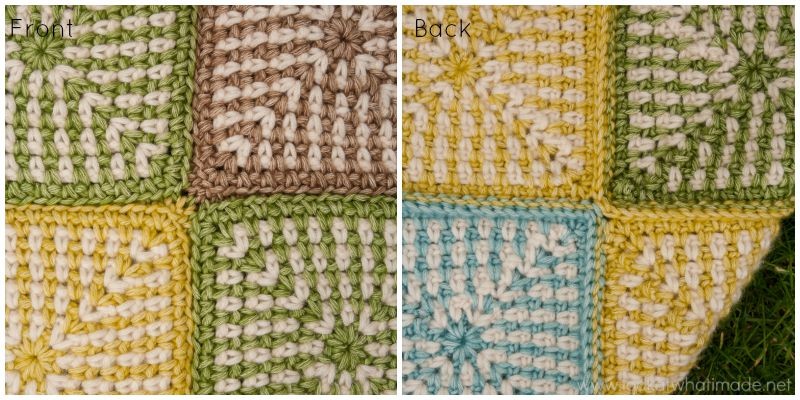
Photo 14 shows the first 3 squares joined, with the back of the blanket facing you. Photo 15 is a close-up of what the back of your join will look like. Photo 16 is a close-up of what the join will look like on the front.
When you add subsequent diagonal strips, you will need to know how to work into the ‘inside’ corners (the corners formed at the point where the 3 squares above meet), as well.
Photo 1 below shows me in the process of adding a diagonal ‘strip’. In Photo 2, I am placing the next square behind my work (as before). Photo 3 shows all 23 sl st’s completed. Notice how the last sl st fell in the front loop only of the corner ch-1, which already contains the join from the previous diagonal strip.
Once this edge of the square has been joined, you will need to turn your blanket 90 degrees to join the other side of the square to the blanket (Photo 4). Your first sl st will fall in the corner ch-1’s, which will each already contain a joining stitch (Photo 5). Photo 6 shows the square added.
I really love this join, both from the front and from the back.
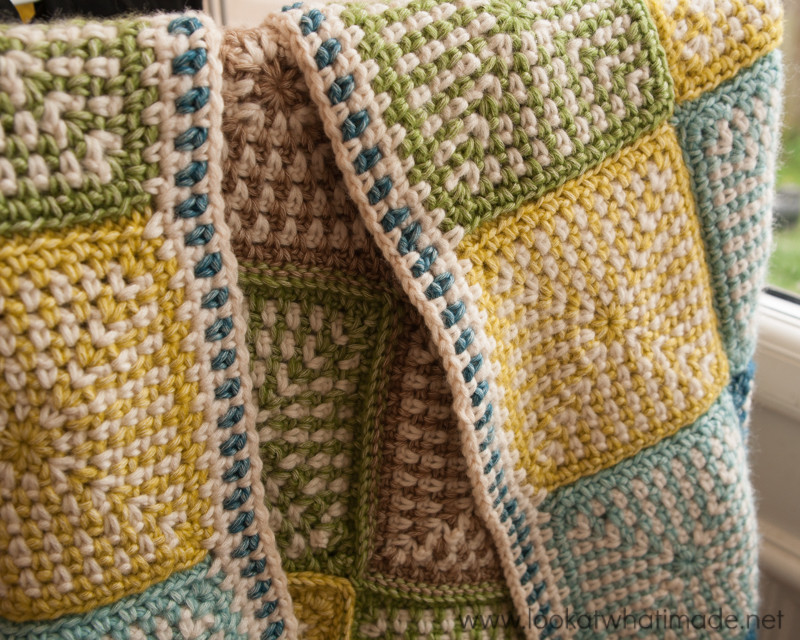
Once you have added all your squares, you will need to add a border.
Border
The border is made using an 8 mm hook.
Round 1
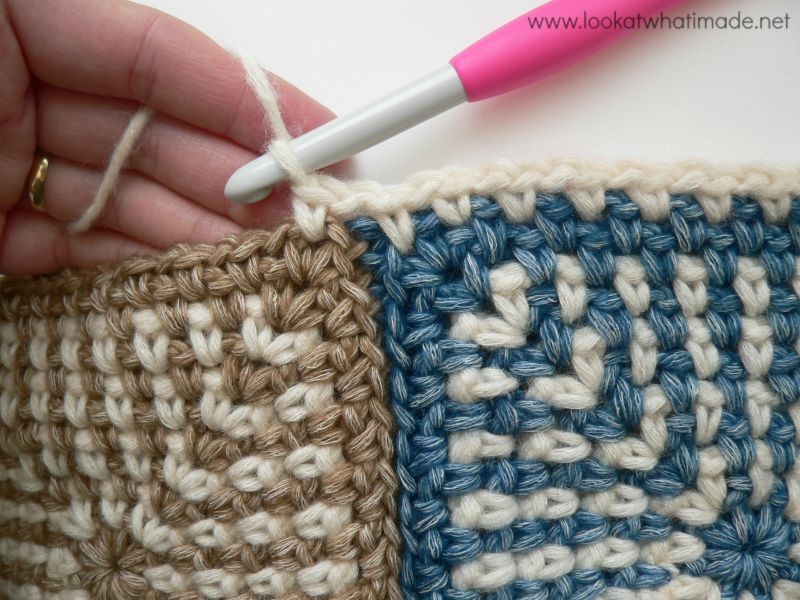
With MC, join your yarn by making a standing single crochet in any ch-1 corner space around. (Ch 1, sc, ch 1) in the same ch-1 corner space. (Sc, ch 1) in each ch-1 space across, including the corner ch-1 spaces of each individual square (see photo below). *(Sc, ch 1) twice into the next ch-1 corner space. (Sc, ch 1) in each ch-1 space across.* Repeat from * to * 2 more times. Join to the first sc with a sl st.
Round 2
Sl st into the next ch-1 corner space. Ch 1 *(Sc, ch 1) twice into the ch-1 corner space. (Sc, ch 1) in each ch-1 space across.* Repeat from * to * 3 more times. Join to the first sc with a sl st. Fasten off and work away your tails of yarn.
Round 3
With CC (Blue Apatite), repeat Round 1 and fasten off at the end of the round.
Round 4
With MC, repeat Round 1 and fasten off at the end of the round. Work away all your tails of yarn.
Blocking
You don’t have to block your blanket when you are done, but I always block my blankets to give them a neat, professional finish (spoiled a little bit by my bumpy grassy photo above, but hey ho).
If you are going to use foam squares to block on, consider buying these Interlocking Foam Exercise Mats. They are similar to these Knitter’s Pride Lace Blocking Mats, but cheaper. You will also need some of these Clover Fork Blocking Pins
.
Sharing
We would love to see some photos of your completed manghans, so feel free to share them on Instagram using #manghan. You can also share them on our Facebook Page.

This blog post contains affiliate links. I only link to products I personally use or would use. All opinions are my own.


Margaret says
I am just beginning this blanket. I am having trouble getting my squares, square. They are wanting to puff up. Any suggestions?
Jenny Lowman says
A light blocking resolves this issue, Margaret. Is your tension even?
Denise Bratschun says
Almost done, I love this texture, and it should be very warm. I modified pattern a bit, increased square from a 6″ to a 9″. I also had the off white as last round, then joined using invisible zipper stitch. I will also be putting a bigger border on it
Cheri says
I love this masculine pattern you have designed. Thank you so much!
Any chance you would do a step by step video of one of these double color linen squares for visual learners like me???
Dedri Uys says
Hi Cheri. I’m glad you like it. I wish I could help, but I don’t do video tutorials. I rely on video tutorials done by my dear friend Esther from It’s All in a Nutshell.
Kelli says
Thank you for this beautiful pattern! I would like to make it larger for my tall son. Do you think it would work better to add a round to each square or increase the number of squares? I really like your layout but don’t know if increasing the size of the squares would look and/or lay as well as the original.
Dedri Uys says
Hi Kelli. I would do both. Add 2 – 4 extra rounds to each square AND make more squares. You would have to do some maths to figure out how many more of each colour you need to make to maintain the diagonal colour placement, but that is easily done with colouring pencils :)
Alex Cameron says
Hi Dedri,
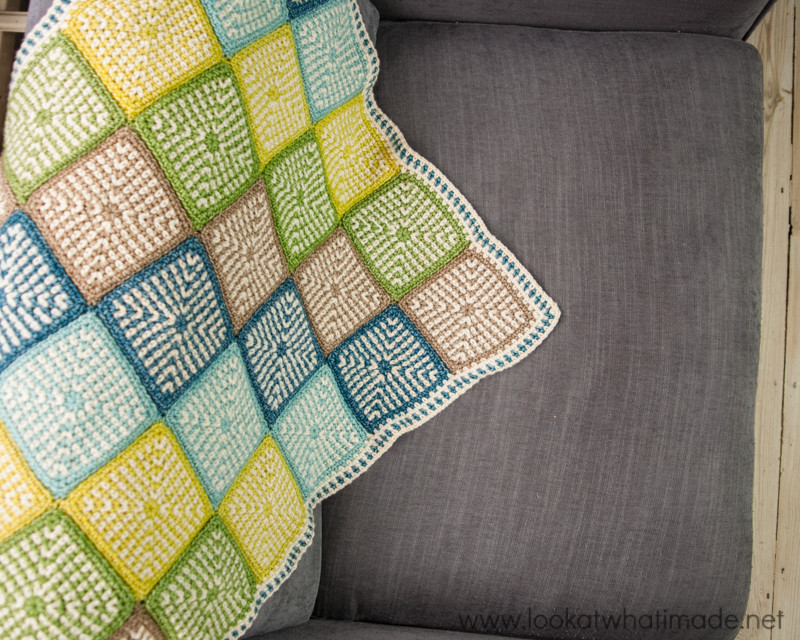
I love this pattern, I am looking for a masculine blanket to make for my husbands best friends baby, and have a few questions. I’m not intending it to be for the car or pram, more of a snuggle on the sofa type blanket! It this yarn to heavy for this purpose? I was also considering making it a bit smaller, maybe 6×4 squares instead of 5×7 but it sits very nicely on the rocking chair in the picture so don’t know if that’s really necessary.
Any advise would be awesome, I’m a reasonable crocheter but not experienced in manipulating patterns to my needs!
Thanks
Alex
Dedri Uys says
Hi Alex. I actually made this blanket for my then 3(ish)-year old and two years later he still snuggles under it on the couch. I don’t think it is too big for a baby and wouldn’t adapt it in any way. It is also not as heavy as you would think.
Rita says
Hi Dedri,
I need to make my bro-in-law an Afghan/Lapghan of a flag of his choice but takes only three colors. I suspect this stitch to be the winner so the question is – how much yarn for each color if it is done in Red Heart Soft?
Dedri Uys says
Hi Rita. Red Heart Soft works up to the same tension as Stonewashed XL, so you would just need to divide the yardages specified in the pattern (for the colours only, not the cream) by 3 if you are going to make the same size as I did. That will tell you how much of each colour to get. If you are going to make a bigger blanket, you will need to make up 1 square, check how much you have used, and multiply that by however many squares you want to make, remembering to add extra for the border.
I hope that helps,
Dedri
Kathy Robertson says
You have a gift for writing clear instructions!! And thank you for such a lovely pattern!
Cheryl Gallegos says
I love all your work. Sophie’s Universe is absolutely my favorite all time pattern. I was hoping for some help. I would like to increase the size to 6×8 blocks. Could you please help me with how much Stonewashed XL to purchase? I would only like to use the Blue Apatite, Amazonite and Boulder Opal. Of course the Moonstone as well for all the blocks as you have done. Thank you in advance for your help.
Dedri Uys says
Hi Cheryl
I am going to have to estimate, so here goes: For the squares you will need 4 (to 5) each of Blue Apatite, Amazonite, and Boulder Opal, and 8 (or 9) skeins of Moonstone. For the border you will need 2 skeins of whichever colour you choose to use and 4 skeins of Moonstone. That gives you 26 – 30 skeins in total. I would get more rather than less. I really hope that helps and that my estimates are correct.
Jenny says
I know quite a few men who have fragile masculinities lol
Mayuri says
Just showed hubby this and for the first time he showed some enthusiasm! Definitely a manghan
Cynthia says
After making two Sophie universe blankets and two modified baby Sophies, I knew you were extremely talented. Then…You came out with this man blanket design and blew me away again. We are sporting all of your designs! Thank you so much for your amazing talent and dedication. You really are exceptional!!!
Dedri Uys says
Lol. Cynthia, the manghan is so ‘basic’ compared to Sophie. But it was a lot of fun to make (relaxing, uncomplicated fun) and we use it often :)
Francesca says
So happy I came accross this post! I love linen stitch and you have just enabled me to make so much more with it :D Thank you for sharing!
Dedri Uys says
I’m glad you found the tutorial useful, Francesca :)
Shirla Ghadaki says
This is an afghan that all of the makes in the immediate family like—all 9 of them. I was admiring the pictures and then realized they were looking at the pictures with me. They like the simplicity of the pattern and the more than one color going on. Got many requests for one for them — each of them!
Lia says
Thank you so much for the pattern. I hope, wen I startend my crochet-morning, they will choose it and will become famous in the Netherlands also !!!!!
joy says
what a beauty! that is a stunning afghan..
Barbara says
Thank you Dedri for the wonderful pattern, you do such great work and I enjoy all you do :)
Barbara says
Thank you for sharing this wonderful stitch, can’t wait to do one of these Mangan :) And I love your work…take care.
Tonya says
Hi Dedri
Awesome pattern. I saw the blocks you made when you where trying to decide which design to use. I was wondering if you could post the directions for the other designs. Thank you for this site. You inspire me every time I visit.
Dedri Uys says
Hi Tonya. I will be posting thkse directions later thhis week.
Dedri Uys says
Hi Tonya. I will be posting these directions later this week.