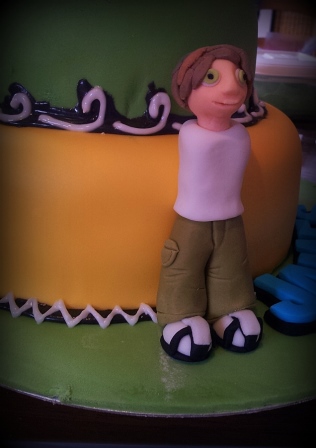
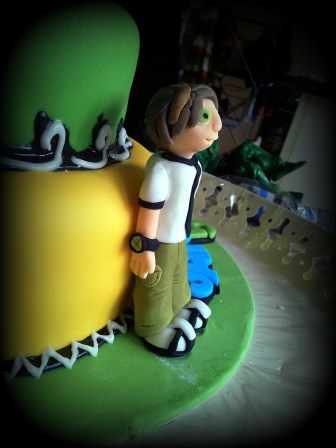
How to Make a Fondant Ben 10
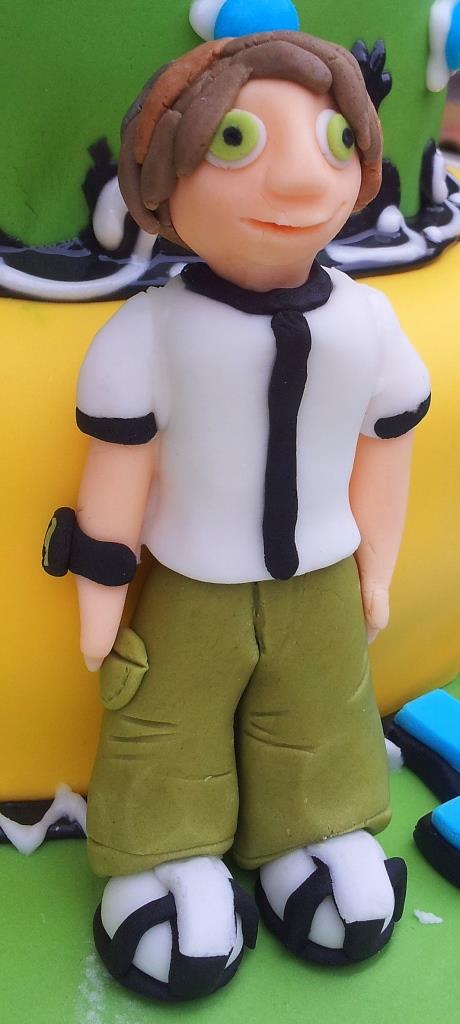
I know he doesn’t resemble Ben 10 in facial features (Ben 10 has a pointy chin and a pointy nose, not a flat, fat nose and hardly any chin!), but he was a last minute decision, so I had to make do with what I had. How could lack of resources case a funny face? I will explain later. In the meantime, let me show you how to make him.
Ben 10’s Shoes
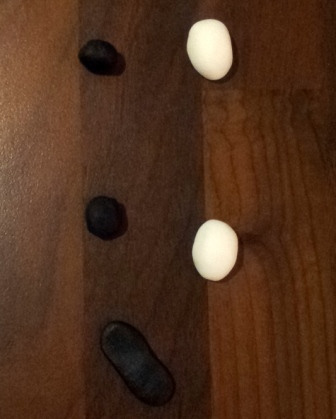
Start with two little balls of black fondant (just bigger than peas) and two bigger balls of white fondant (about double the size of the black).
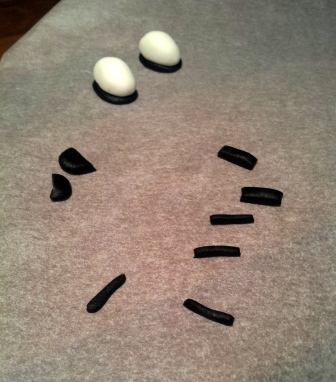
Take a little bit of black fondant and flatten it. You will cut this piece into strips for decorating the shoes.
Flatten the two black pieces into rough ovals. Shape the white fondant into ovals and place on top of the black.
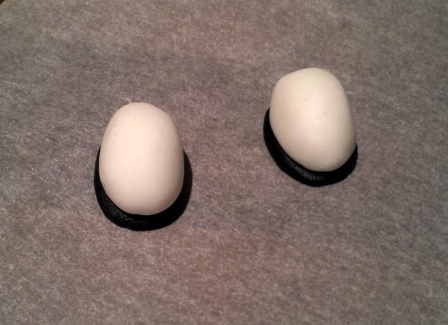
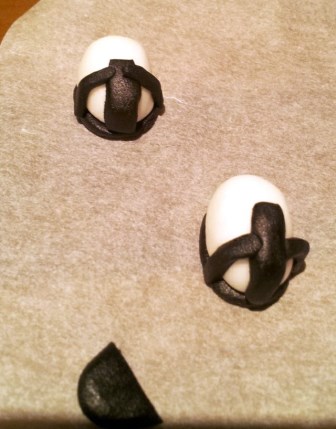
Cut 4 very thin strips (or 8 if you want to have 2 black stripes on either side of each shoe) and 2 fat strips.
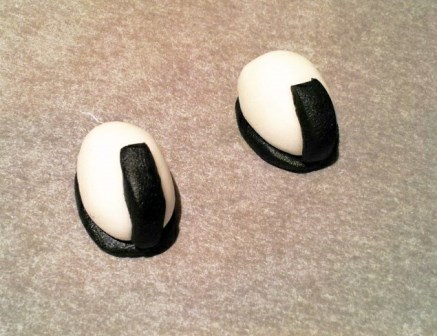
Place the thicker strips on the fronts of the shoes.
Place the thin strips on the shoes at a 90° angle to the thick strip (If you are using 2 strips per side, place them a millimetre apart). The joins don’t have to be neat, they will be covered up in the next step.
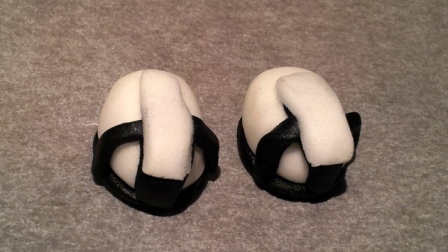
Flatten a piece of white fondant and cut out two rectangles that are slightly thicker than the thick black strips and just as long. Lay them over the thick black strips, leaving a little gap at the front so that the black strip shows at the bottom.
Ben 10’s Trousers
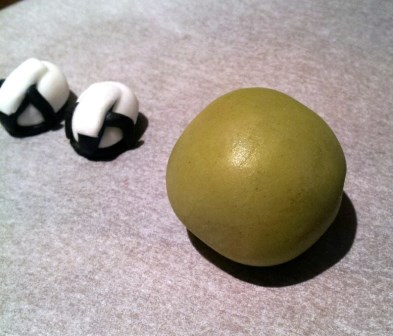
Take a ball of khaki-ish fondant (about the size of a ping pong ball). At this point I will just mention one of the main drawbacks to being unprepared. I do not have any shortening in the house. And you cannot work with fondant if you don’t have shortening to hand. I used margarine, because I thought: Heck, it’s similar right? Wrong. And because this particular ball of fondant had been lying around for a while, it was all crumbly and miserable. So I could not do the pocket detail I wanted, nor could I add lovely rolled seams to the bottom of my trousers. I had a hard enough time just doing the basic shaping.
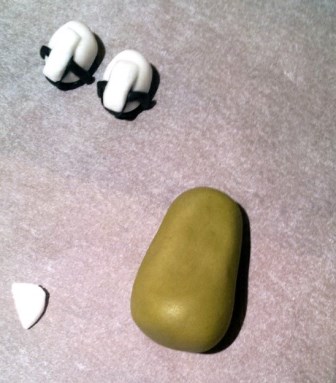
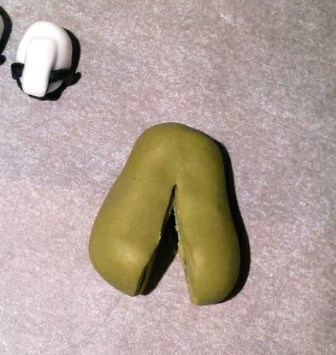
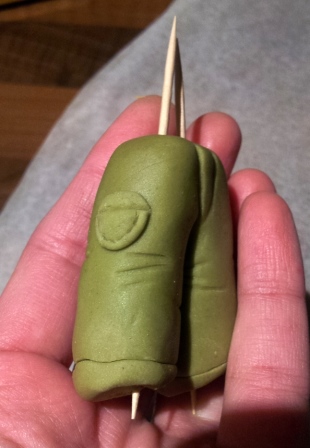
So take your ball of khaki and roll it into a semi-cone. Flatten the cone a bit.
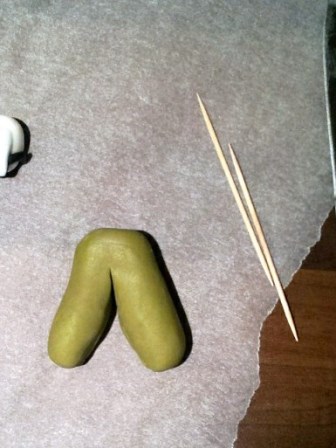
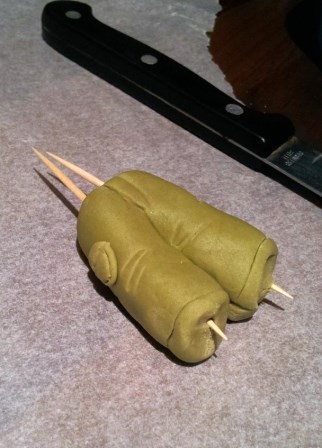
Take a sharp knife and cut the fondant cone as pictured.
Neaten up the cut edges by rolling them a little with your fingers. Make the legs longer than you actually want them as they will sag while hardening.
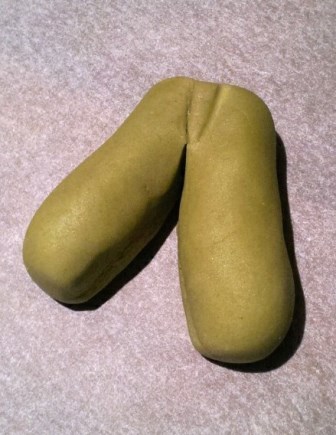
You could add a little piece of fondant to the front of the trousers for the zipper area, or you could just take the dull side of the knife blade and indent the trouser to give the illusion of a zipper bit.
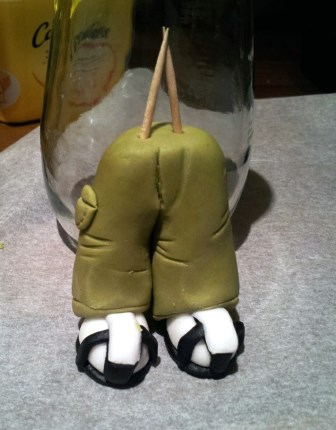
Shape the bottoms of the trousers by pushing up from the bottom at an angle. The idea is that the bottom of the trousers will be slanted with the front being higher than the back. This is because the front will be resting on the trainers and the back will need to rest on the ground. If you give your trousers flat bottoms, your fondant Ben 10 will be unstable once assembled.
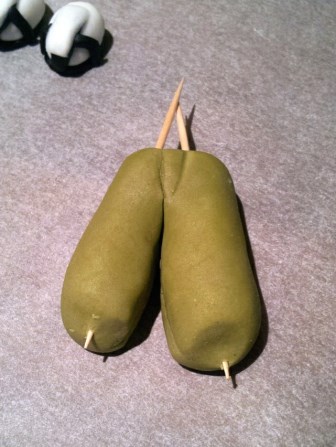
Skewer each trouser-leg with a toothpick.
I had a tiny tiny bit of fondant left, so pressed it into a little flat disc and attached it to the side of the trousers with a bit of water. Ideally you would add a side pocket and two back pockets. Adding thin strips to the bottoms of the trousers (rolled hems) would also be ideal. I just made a cut all around the trousers and pretended it looked like a rolled hem.
Take your knife and make some “creases” in the trousers. Use the dull side of the blade for some of them and the sharp side for others.
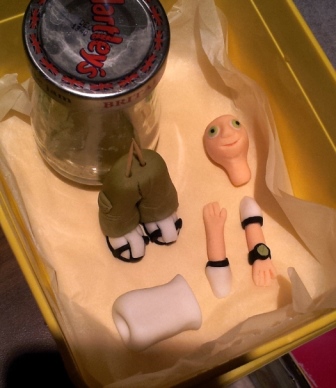
Now place a little blob of royal icing on each sneaker (towards the back) and place them a little bit apart. Place the trousers on top of them and press the toothpicks into the sneakers. Let this rest against a glass jar while it hardens.
Ben 10’s Arms
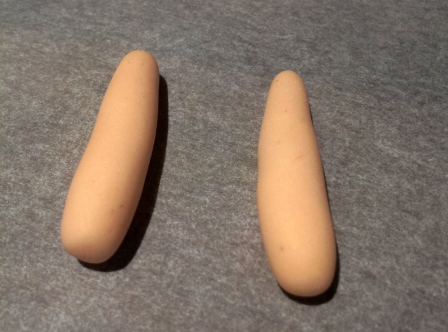
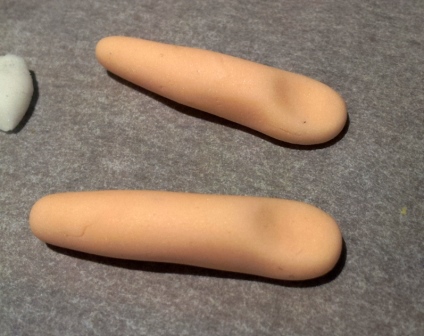
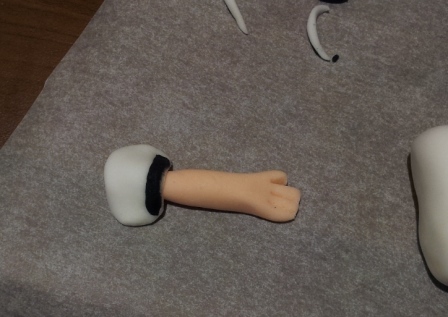
Take two pieces of flesh-coloured fondant and roll them into fat little sausages.
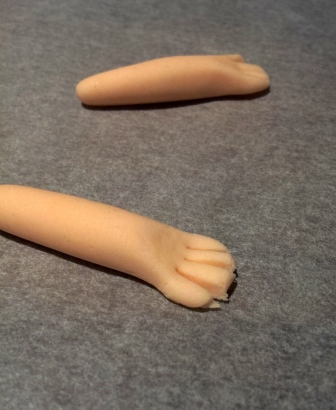
Flatten one end of each for the hand.
Make 3 cuts in each hand to form 4 fingers. You can make 5 fingers, but it becomes way easier to snap one off, so stick to 4 and you should come out the other side with all your fingers intact…
Neaten them up a little bit so that they don’t look like you have just hacked at a piece of fondant with a knife!
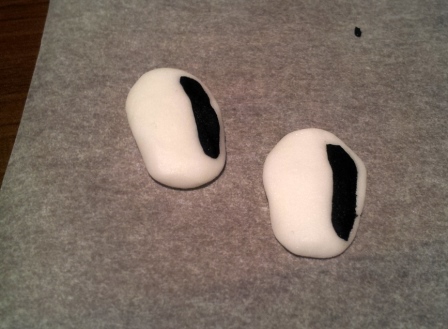
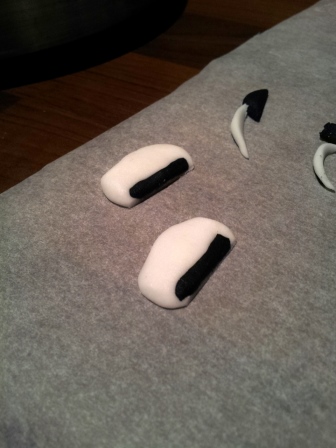
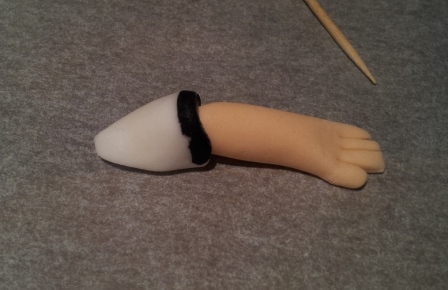
For the sleeves, take 2 pieces of white fondant (smaller than a pea) and flatten them like in the photo below.
Press 2 thin strips of black fondant into one side.
Cut a straight edge just inside the edge of the black strip so that the black forms a stripy seam.
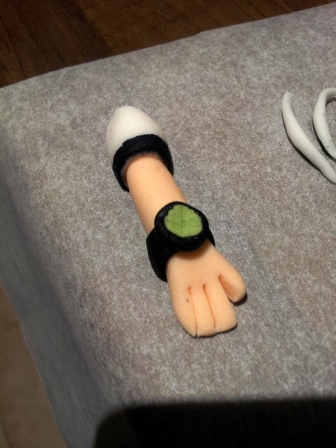
Lay this over the top of your arm and then wrap it all the way around.
Flatten the back and shape the sleeve into a triangle.
Add a little Ben 10 Thingamajiggy by placing a thin black strap on the right wrist. Top it with a little ball of black fondant and press a smaller ball of green fondant into the black ball. This will give you a flat green-and-black-disc-thingy.
Ben 10’s Head
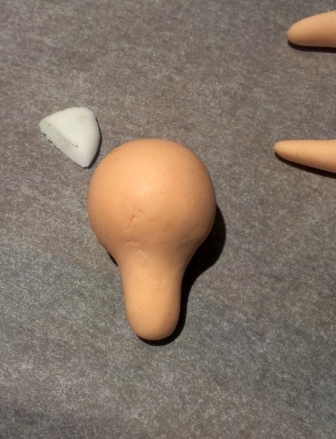
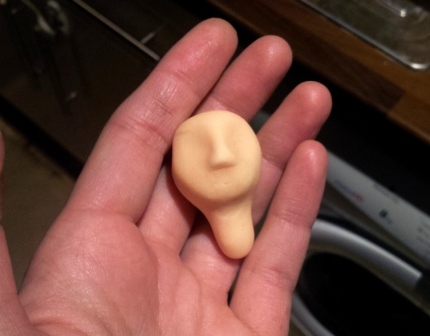
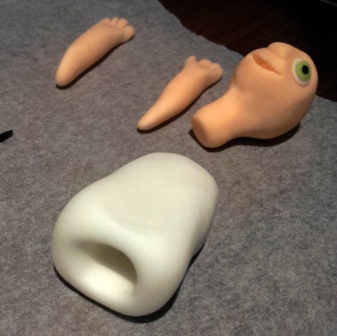
Take a piece of flesh-coloured fondant and roll it into a ball. Pinch the one end and roll it until you have a rough head and neck. Look at those cracks, eek!
Using the thumb and index finger of your right hand and the index finger of your left hand, pinch a triangular nose. Use your index finger to shape the eye sockets. Now would also be a good time to form a nice pointy chin. As this bit of fondant was also quite crumbly, it was difficult enough to shape a face without the fondant cracking too much. The more pliable the fondant is, the easier it is to manipulate. If you find your fondant too crumbly, add a little bit of shortening and knead it well. This will make it more elastic and less prone to cracks and tears.
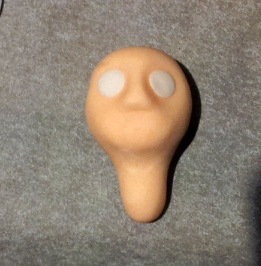
When you have the shape you want, press two little balls of white fondant into the eye “sockets”.
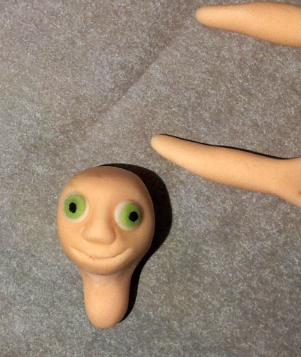
Press two smaller balls of green fondant onto the white. And then add two minuscule balls of black fondant and press them flat.
Take a toothpick and draw on the mouth, making a deep indent.
Ben 10’s Shirt
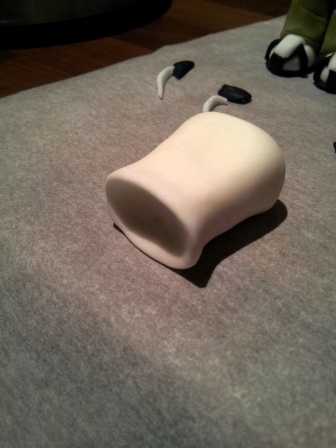
Shape a piece of white fondant (just smaller than a ping pong ball) into a short, fat sausage. Flatten it out slightly. Make an indent in the bottom. The idea is to have a “lip” all around the edge that will fit over the top of the trousers. If you make the bottom of the shirt flat, the odds are that you will have a nasty gap and/or seeping royal icing when you go to assemble poor Ben.
At the top of the shirt, make a hole almost as deep as your neck is long. I found that using my little finger for this was just the ticket.
Place everything in a safe place to dry and harden up. Ben is still hairless at this point.
Ben 10’s Hair
Erm…trial and error. What you are supposed to do is this:
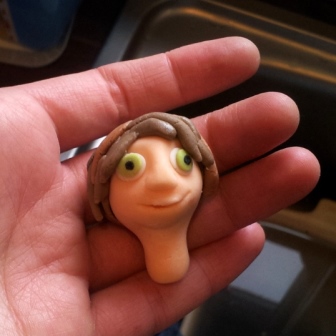
Take a small ball of brown fondant and flatten it out. The resulting disc should be big enough to fit on top of the head and around the back. Then make little teeny sausages and stick them on over the brown sort of random-like. Finally take a pointed gumpaste tool and just draw some lines on the sausages to make them less sausagey and more hair-like.
Did it work this time around? Nope. Why? No Shortening!!! I’m only joking. I think I had 2 minutes left before the cake had to be next door and I still wanted to take photos. I think, quite possibly, I didn’t give 100% to Ben Tennyson’s hair.
Assembly
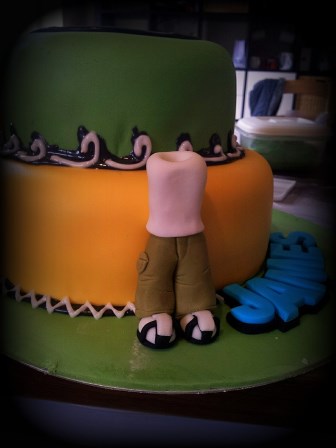
Put a dab of royal icing right where each shoe will go and stick down the shoes and trousers. Push the sticky-out toothpicks into whatever is underneath the shoes to secure Ben to his perch.
Pipe some royal icing onto the top of the trousers and place the shirt on top of that.
Place another bit of royal icing into the hole in the top of the shirt and stick the neck into it.
Attach the two arms with royal icing. If there are any gaps between the sleeves and the shirt, fill it up with white royal icing and smooth down/wipe away the excess.
Finally add a thin strip of black fondant to the front of the shirt (stick it down with a dab of water) and also add some black trim to the neckline.
In case anyone was wondering, the reason he was such a last-minute addition to the Ben 10 Cake is because I am back at work and didn’t feel up to making fondant figures. So Liz (for whose son the cake was) bought some plastic figures I could use instead. Cheating, I know, but I am so over being snobby about what I put on a cake.
So there I was, cakes baked and crumb coated and fondant all coloured. Hmmmm, I thought…If I make a Ben 10, I could use it for my blog…
Nothing good can come of such an idea at 10 pm the night before the cake is due. I soon realized that most of my small balls of coloured fondant was crumbly, that I was out of shortening and that my brown fondant was all gone. But by then it was too late. Once I have something in my mind…
I am sorely disappointed by how his face turned out (I think I might have mentioned that once or thrice), but I am also determined to post this blog without making him again, so I hope this tutorial helps you to make a better Ben 10 than I did.
You can see full instructions for the Ben 10 Cake here. And if you want to make a less time-consuming cake, have a look at my Ben 10 Face Cake.
Remember to subscribe to my newsletter if you would like to be kept in the loop. You can also like my facebook page.
xxx dedri
