Part 18 is the Last Official Part of Sophie’s Universe. Next week, we will look at optional squares/rows for growing Sophie into a rectangle. The week after that, we will look at the optional border. The week after THAT, we will cover the optional surface crochet and a few other bits and bobs.
I am a sentimental little thing, so I love the fact that I am sharing the last official instalment on Mother’s Day (US/SA). It seems fitting. These Sophies are like my babies, which makes me their crochet-mommy. Feel free to share photos using #mothersdaysophie.
So happy Mother’s Day and Happy Sophie Sunday!
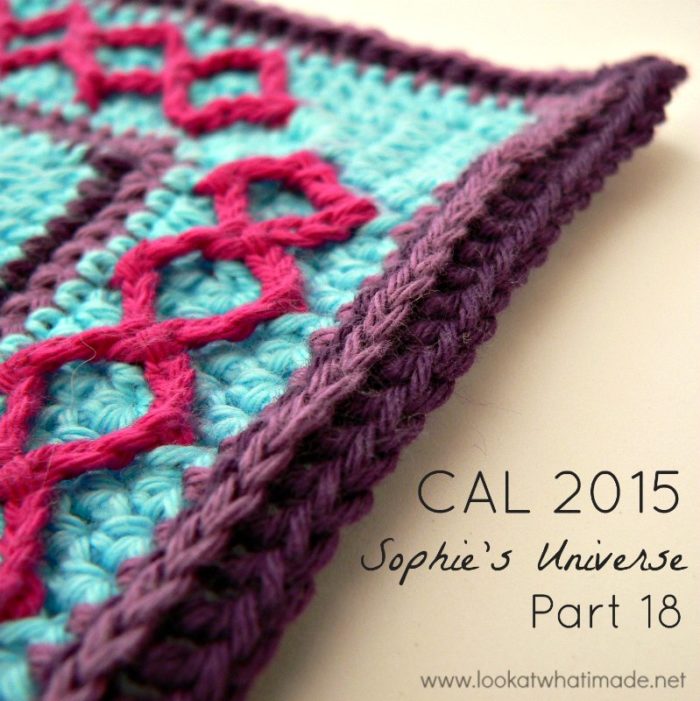
Sophie’s Universe Part 18
©Dedri Uys 2014. All Rights Reserved.
Resources
- Add this CAL to your Ravelry Queue
- Sophie’s Universe CAL 2015 Information
- Use the Print-friendly button at the bottom (right) of this post to print/save this tutorial. Don’t know how? Find out HERE.
- **Part 18 VIDEO TUTORIAL** by Esther Dijkstra from It’s All in a Nutshell.
Translations
- Dutch Translation by Dianne Baan
- German Translation by Maja Heidingsfelder
- Spanish Translation by Lynda Hernandez
- French Translation by Sandra Larvin (with Video Tutorials by Géraldine Cymer)
- Danish Translation by Tina Poulsen
- Russian Translation (with Video) by Natalie V. Alimpieva
- Swedish CAL Information by Emma Vingqvist, Agnetha Magnusson, Åza Karlsson, and Ulrika Larsson
Materials
See the Information Post.
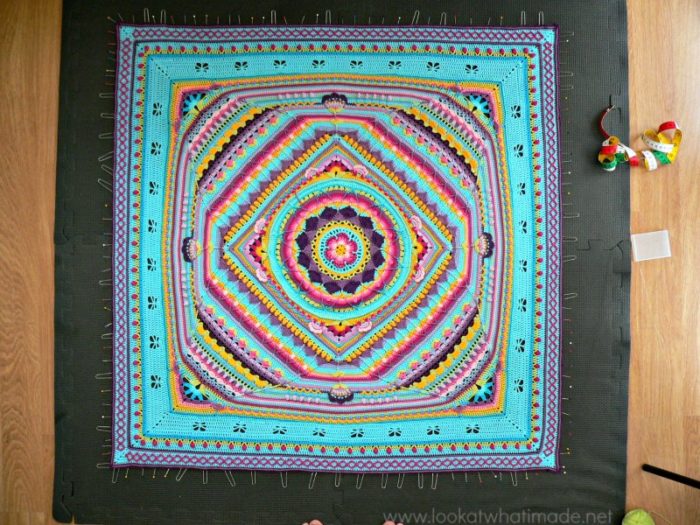
My large Sophie has come out smaller than estimated. My final size was 1.65 meter (5’5″), which is 6″ short of the 1.8 meter (5’11”) of my “prototype”.
Abbreviations
US Terminology Used (Basic US/UK comparison chart here)
- Bpsc – Back post single crochet
- Bpdc – Back post double crochet
- Ch – Chain
- Hdc – Half-double crochet
- Sc – Single crochet
- Sl st – Slip stitch
- St/st’s – Stitch/stitches
- Tr – Treble crochet
- * – Repeat instructions between asterisks the number of times specified. This is a hardcore repeat and will consist of multiple instructions.
- () – Repeat instructions between parentheses the number of times specified. This is a lower level repeat.
Special Stitches
- Standing Stitches: Standing sc’s, hdc’s, and dc’s are stitches used to start the round without the need for the traditional beginning chain. Links to tutorials are supplied in each relevant round.
Instructions
Rounds 1 – 109
You can find the links for Rounds 1 – 109 HERE.
Round 110 {Second Part of Diamond Pattern}
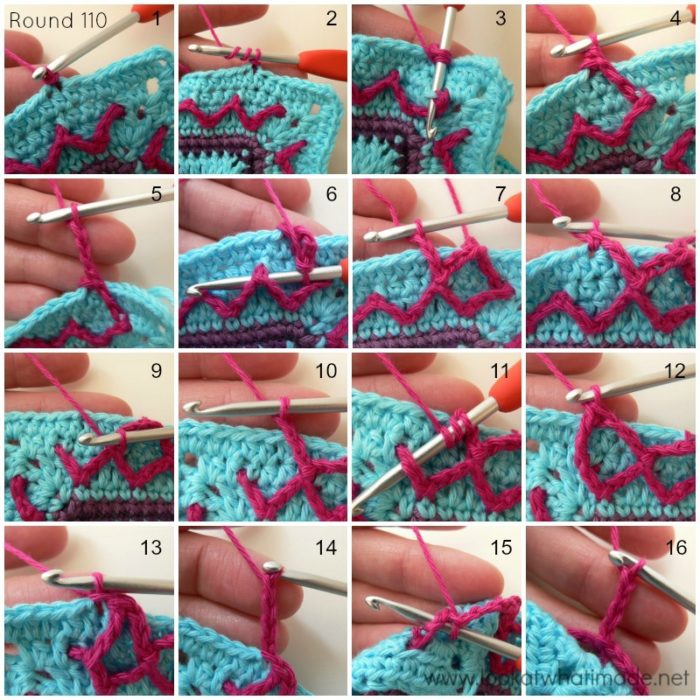
In this round, you will complete the Diamond Pattern by making some more “zigzag hills”. The first and last “hills” on each side are formed differently to the rest. Pay special attention when making them. Pay extra special attention to the placement of the first treble and look at the photos or the video if you need help.
Join your yarn by making a sl st in the eighth hdc at the start of any side (Photo 1).
*Make a tr in the stitch that contains the first sc from Round 107. To do this, insert your hook from top to bottom into the stitch containing that first sc, making sure that you work to the left of the first ch-3 from Round 107 (to the right if you are left-handed). You will need to twist your work a bit to get into that stitch. See Photos 2-4. Ch 3 (Photo 5). Make a sl st around the back post of the next sc from Round 107 (Photo 6).
(Ch 3 – see Photo 7. Skip the next 3 st’s from Round 109 and make a sc in the next st, which will be the hdc made into the bpsc from Round 108 – see Photo 8. Ch 3. Make a sl st around the back post of the next sc from Round 107) 47 times (Photo 9).
Ch 3 (Photo 10). Make a tr around the top of the last ch-3 from Round 107 (Photos 11 and 12). Skip the next 3 st’s from Round 109 and sl st in the next st, which should be the hdc made into the bpsc from Round 108 (Photo 13). Ch 4 (Photo 14). Skip the last 5 hdc’s of Round 109. Sl st into the ch-3 space from Round 107, which you will find behind your work (Photo 15). Ch 4 (Photo 16). Skip the first 7 hdc’s of the next side and sl st into the eighth hdc (just like in Photo 1).*
Repeat from * to * 3 more times, making your last sl st into the first sl st of the round to join. Fasten off and work away your tails of yarn.
Stitch Counts:
- Total: 196 st’s, 384 ch-3 spaces, and 8 ch-4 spaces behind the corners – not including sl st’s {188 sc’s and 8 tr’s}
- Per Side: 49 st’s and 96 ch-3 spaces– not including sl st’s {47 sc’s and 2 tr’s}
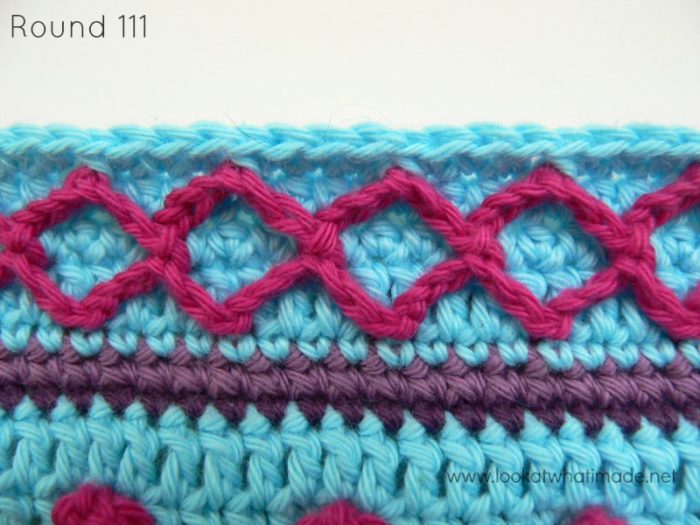
Round 111 {Diamonds – Base Round 4}
The first and last zigzag “hills” from the previous round (on each side) do not have a sc at the top of the “hill”. When making your back post sc’s around these hills, insert your hook behind the treble AND the ch-3 just like you would if they did contain a sc.
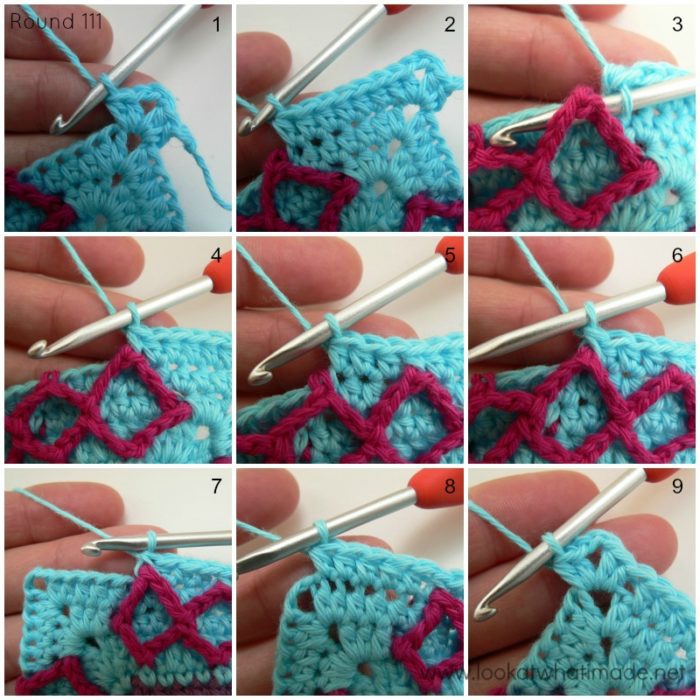
Join your yarn by making a standing half-double crochet in any ch-2 corner space from Round 109. (Hdc, ch 2, 2 hdc) in the same ch-2 space (Photo 1).
*Skip the first (hidden) stitch. Hdc in the next 6 st’s from Round 109 (Photo 2). Make a bpsc around the top of the first zigzag “hill” from Round 110 (Photos 3 and 4).
(Hdc in the next 3 st’s from Round 109, between the sc’s that form the “zigzag hills” – see Photo 5. Make a bpsc around the next sc from Round 110 – see Photo 6) 47 times. There should now be one zigzag “hill” left. Hdc in the next 3 st’s from Round 109. Make a bpsc around the last zigzag “hill” from Round 110 (Photo 7). Hdc in the last 5 st’s from Round 109 (Photo 8). (2 hdc, ch 2, 2 hdc) in the next ch-2 corner space (Photo 9).*
Repeat from * to * 3 more times, omitting the last corner on the last repeat. Join to the top of the standing half-double crochet with a sl st.
Stitch Counts:
- Total: 832 st’s and 4 ch-2 corner spaces {196 bpsc’s and 636 hdc’s}
- Per Side: 208 st’s {49 bpsc’s and 159 hdc’s}
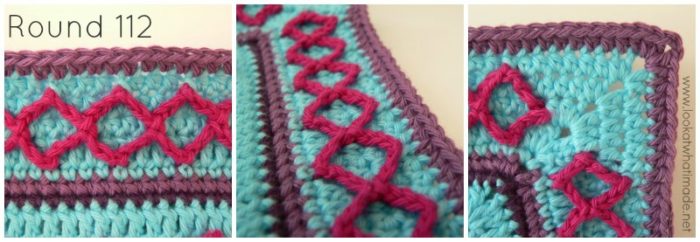
Round 112
- If you are using the same colour, sl st into the next hdc and into the ch-2 space. (Ch 2, hdc, ch 2, 2 hdc) in the same ch-2 space.
- If you are using a new colour, join your yarn by making a standing half-double crochet in any ch-2 corner around. (Hdc, ch 2, 2 hdc) in the same corner space.
*Hdc in each of the 208 st’s across. Don’t accidentally skip that first (hidden) stitch. (2 hdc, ch 2, 2 hdc) in the next ch-2 corner space)*
Repeat from * to * 3 more times, omitting the last corner on the last repeat. Join to the top of the beginning ch-2 (or the standing half-double crochet) with a sl st.
Stitch Counts:
- Total: 848 hdc’s and 4 ch-2 corner spaces
- Per Side: 212 hdc’s
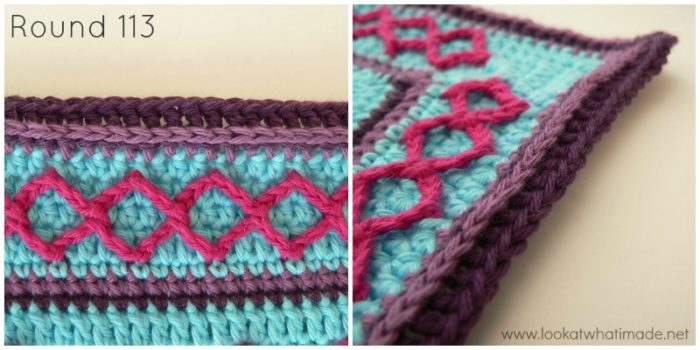
Round 113
You’re not going to like me very much! This round has 864 st’s, 848 of which are back post stitches. But as this is the Last Official Round of Sophie’s Universe, I am sure that you will forgive me :)
- If you are using the same colour, sl st into the next hdc and into the ch-2 space. (Ch 2, hdc, ch 2, 2 hdc) in the same ch-2 space.
- If you are using a new colour, join your yarn by making a standing half-double crochet in any ch-2 corner around. (Hdc, ch 2, 2 hdc) in the same corner space.
* Make a bpdc in each of the 212 st’s across. Don’t accidentally skip that first (hidden) stitch. (2 hdc, ch 2, 2 hdc) in the next ch-2 corner space)*
Repeat from * to * 3 more times, omitting the last corner on the last repeat. Join to the top of the beginning ch-2 (or the standing half-double crochet) with a sl st.
Stitch Counts:
- Total: 864 st’s and 4 ch-2 corner spaces {16 hdc’s and 848 bpdc’s}
- Per Side: 216 st’s {4 hdc’s and 212 bpdc’s}
Note About Curling
So…one final blocking for my “babies”.
Annie’s has some good advice for Blocking Afghans and Other Large Pieces.
If you are going to use foam squares to block on, consider buying these Interlocking Foam Exercise Mats. They are similar to these Knitter’s Pride Lace Blocking Mats but cheaper. You will also need some of these Clover Fork Blocking Pins
.
Due to the weight and size of Sophie the Large, she had become quite stretched in places (I guess that is what 4 months without a bath will do to a blanket), so I washed her before the final blocking. I am pleased to say that everything bounced back into place and “tightened up”. It did mean that I had to employ quite a bit of elbow grease to block her, but I am so excited about the outcome!
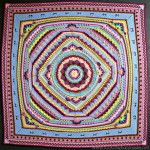
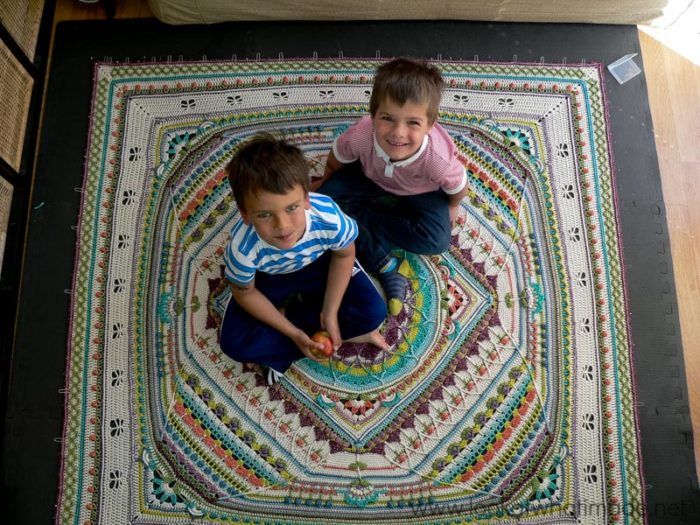
I asked the boys to come “pose” for me. Pieter and Jaco obliged…
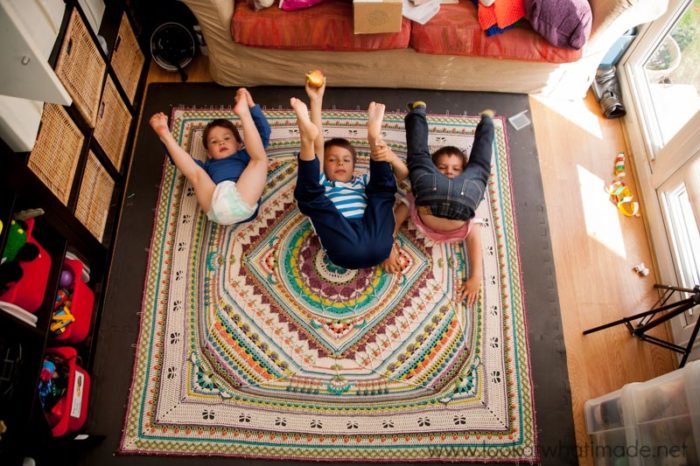
… but when Xandi finally agreed to be in the photo too (unusual for him not to be first to volunteer), this is what happened.
I tried to get a nicer photo, but they were just being too silly. Plus I was standing on a ladder with the ceiling fan threatening to decapitate me, so I thought it prudent to abandon the endeavour.
If this part marks the end of your Sophie journey, I would like to thank you for joining us and for all your encouragement, comments, helpfulness to other members, and general all-round awesomeness. You will never know how epic this journey has been for me, all thanx to you guys!
If you are going to continue on with us for the optional squares (next week), the growing options (week 19), and the miscellaneous (week 20), I hope you will continue to enjoy the journey :)
This part of the pattern was tested by Kimberly Slifer, Claire Martin, Maja Heidingsfelder, Lynda Hernandez, Susan Wilkes-Baker, Venetia Smith, and Dianne Baan.

This blog post contains affiliate links. I only link to products I personally use or would use. All opinions are my own.



ELIZABETH KURATA says
hello Dedri,
I just finished this CAL, Sophie’s Universe. I loved making it! Wonderful pattern & thx so much for sharing it! My center kind of bulges out & i’m blocking it right now, so I had to really pull the corners to flatten out the center. I hope, when it dries, it will be flat. Do you have suggestions as to how to keep the center from bulging out?
Thank you very much again for this wonderful pattern. You are a brilliant designer!
kelly poole says
ive just finished this part of sophie for my 8 year old daughters bed, currently 4th july 2021 at 1:49am, i started it in 2016 and forgot i had stored it under my bed while until i purchaced more yarn for it,then i forgot what i bought the yarn for and used it for something else and had to order more, i used varigated coloured 4 ply yarn and thin dk yarn with tones of white, lemon yellow, bright yellow, peach, orange, baby pink, light pink, mediam pink, coral, dark pink and eletric pink and a 3.5mm hook, currently my hook now has a slight bend in the middle of it off it been so thin, going to block then test it on my daughters single bed as i may need to add the extra squares and border for it to fit, then im going to make the centre square and turn it into a matching cushion too, thank you for this apsolutly amazing pattern, im going to make charlottes dream in varigated white, blue, orange, red, yellow and greens for my sons bed and then ill be back on to making a considerably larger sophie for my double bed in all grey, and i cant wait. thank you for the amzing pattern and i cant wait to have a brouse through your other patterns too
Dedri Uys says
Hi Kelly, thank you for sharing this glimpse of your life with us. Enjoy every precious moment xx
Stacey Duran says
Just finished my first Sophie’s Universe. I LOVED IT!!!!!!! I’m sad the center bulges…I saw in another comment that you ways to prevent that in the pattern so I will have to go back through and pay better attention . I DEFINITELY plan on doing another ❤️. Thank you so so much for this amazingly beautiful pattern
Sally says
Dedri
What an amazing journey. I started my Sophie last year during a really rough time in my life. She has seen tears but also some laughter now. I have done my first Sophie in an single colour Ivory, this was the only colour i could find in Mozambique at the time, and it will be going to my eldest daughter for her to take through her life as she grows up and spreads her wings!! I have inherited a second Sophie a colour one this time from an amazing aunt who has run out of time to do it, which i am going to finish off for my youngest daughter. I will have to wait a bit as during this tough time that the world is going through i will have to wait for the shops to open to get the colour cotton. I have never followed a crochet pattern in my life, but this has been an amazingly easy pattern to follow.
I would like to say thank you for this pattern, Sophie has given me a bit of direction and a place to go and heal and for this i am truely greatful.
Thank you and happy crocheting for you.
Sally
Savannah Wade says
How did you wash your Sophie?
Dedri Uys says
I wash them all on a regular 40 C wash and let them air dry flat.
Melanie Ross says
Is this pattern fun or what?!!!! After staying away from crocheting for a few years, I have just re-discovered the new direction many creative-crocheting people are taking. I am self-taught at 6 yrs old and crochet has been my sanity in this lifetime. My “test Sophie” is in progress as a doily/candle doily. Fun, fun, fun and absolutely gorgeous in thread. You are geniously creative, Dedri. Thank goodness for you and “Sophie”.
Dedri Uys says
Thank you very much, Melanie. Please let me know when you have finished your thread Sophie. I would love to see it :)
Tom Ellement says
A couple years ago I did the garden. I made 2 of them and stuffed it to be used as a pillow. I finally got the time to do the universe and it was soooo much fun. Great directions and tutorials. I am now working on the squares so it will fit my bed. Then I may start a second one. Christmas present?
Jenny says
Good luck Tom! We look forward to seeing your progress.
Jenny :)
Susan Breeze says
Wow.. thank you so much Dedri for all the joy… I am really sad to be at the end, but at the same time elated to have my very own Sophie
It has been like a good book that you can’t put down !! I haven’t been crocheting very long and managed it all thanks to your fabulous detailed pattern instructions.
Dedri Uys says
Susan, after the unflattering email I just received, your comment is like a balm! I am so glad that you could manage the pattern, even as a fairly new crocheter. This pattern was always meant to uplift and encourage people in this wonderful craft of ours. Have you shared any photos? I would love to see your Sophie.
Dedri
becki says
Drum roll!!!! Lol I just now finished it!!!!!! So much fun! I got out today and got supplies for #2! Thank you so much for the great instructions!!!!!
Dedri Uys says
Congratulations! It feels wonderful completing a big project like this, doesn’t it?
Kristina says
I did it! I’ve been staring at everyones Sophie’s for months and months (definitely my most searched on pinterest is “Sophie’s Universe”) thinking that there was no way I could do it and I finally decided to give it a shot. And I DID IT! This is the best written pattern I have ever used, it is so thorough and detailed – its leaving other patterns looking a little lacking! Thank you so much for putting this wonderful piece of artwork into the world, I can’t imagine the time, energy, dedication and love that went into creating Sophie.
Dedri Uys says
Hi Kristina. I am so pleased to hear that you like the pattern. I hope you really enjoyed the journey xx
Carol S. says
I’m done! Just finished at 12:10 a.m. 2/6/2017. Started some time in May 2015. It’s going to my granddaughter, Cora!
Some days it was a struggle to pick it up and do the next round. There were months where I did not work on it at all. I did smaller projects for family or just for fun.
Glad I persevered. Thank you Dedri for the inspiration, written pattern and video tutorial (although I only used the video at the end!).
Dedri Uys says
Well done, Carol. I hope Cora loves it!
Ashley White says
I just finished my sophie! I stumbled upon this pattern two months ago and I’m so happy I did! I’m sharing your site with everyone I know. Your patterns are lovely. Thank you so much for sharing this amazing pattern with me. My kids loving sleeping with my sophie so much I might have to make another one lol
Jenny says
Sophie is a gorgeous pattern indeed, Ashley! She is so versatile too. Please share your pics with us on the Facebook page :)
Jenny