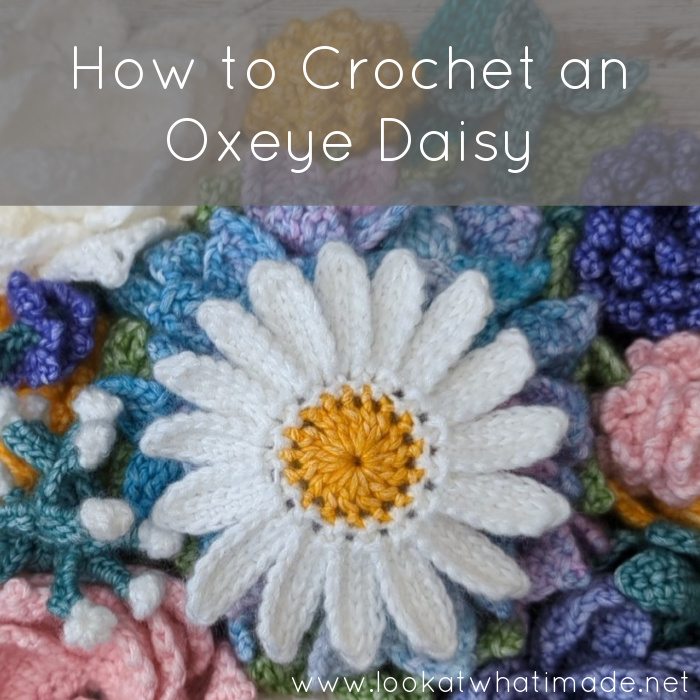
Hi guys!
I have a simple crochet Oxeye Daisy pattern to share with you. It is the first flower in my Lucy Wall Bouquet series of crochet flowers. Some of them (like this one) can be used as embellishments or even turned into motifs if you are adventurous. Others, like the Crochet Rose and Crochet Daffodil, are three-dimensional and perfect for crochet bouquets, cushions, or twiddle muffs.
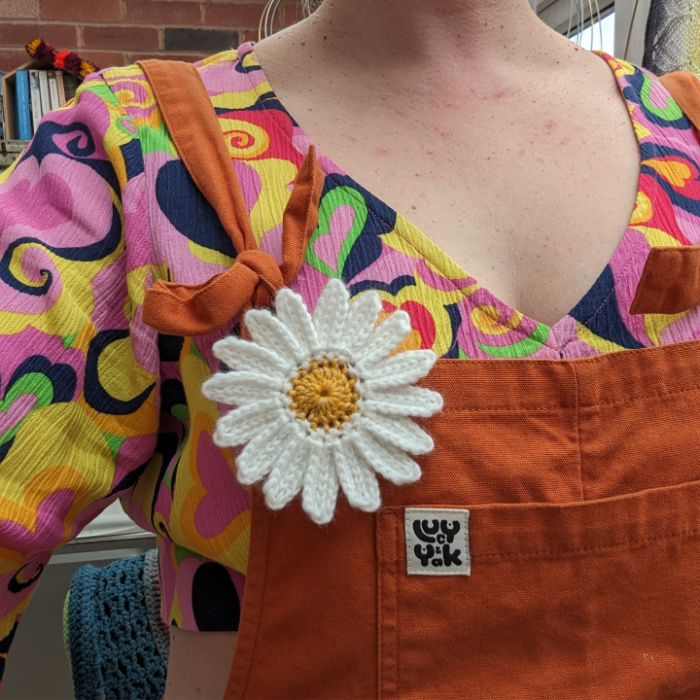
Embellishment, you say? Well, I wore one of mine as a brooch the first day I made it…
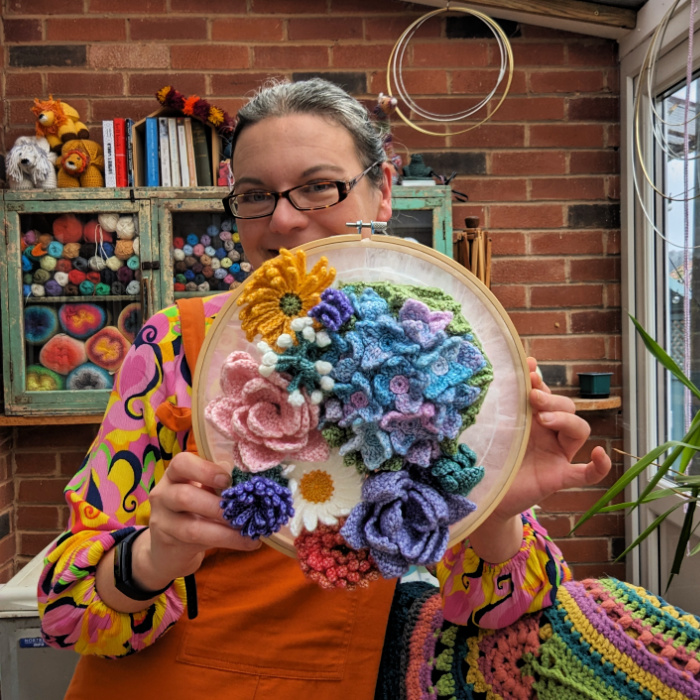
And did you mention a bouquet??? Why yes, I did :) This is the bouquet three-quarters done. I’ve since added loads more flowers and some leaves. I think it needs one more flower, and it will be complete. You can see a collection of the individual flowers and leaves HERE in my Instagram Highlights.
Crochet Oxeye Daisy Pattern
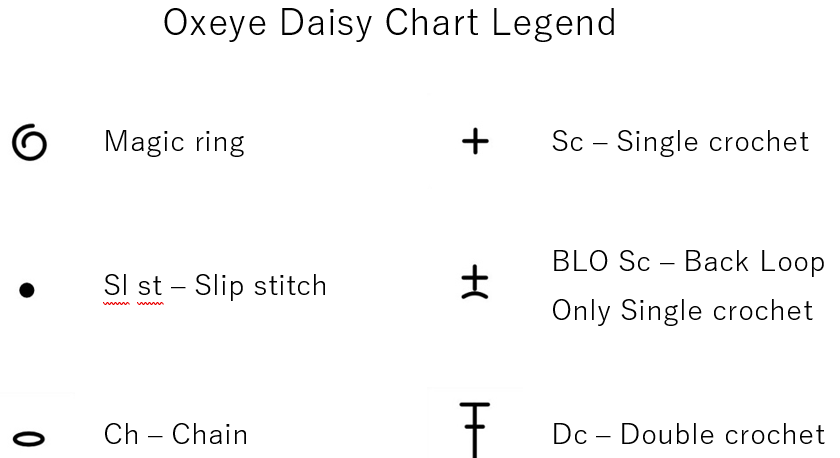
I have chosen to share this free crochet daisy pattern as a written-only pattern with charts by the talented Masako Kawahara from Crochethmmm. If you have any problems with the instructions, please have a look at the Video Tutorials listed below.
Resources
- Add to Your Ravelry Queue
- Other Flowers in the Crochet Flower Series
- Video Tutorials:
- Instagram: #crochetoxeyedaisy
Abbreviations
US Terminology
- Beg – Beginning
- Ch – Chain
- Dc – Double crochet
- Rem – remaining/remains
- Sl st – Slip stitch
- St/sts – Stitch/stitches
- * – Repeat instructions the number of times specified
Special Stitches
Surface Sl st
With your working yarn behind your work, insert your hook into the indicated st/sp. Yarn over and pull through your work, then pull through the loop on your hook, completing your slip stitch.
Materials
- 4mm crochet hook (I use Clover Amour, available HERE on Amazon.com and HERE on Amazon.co.uk)
- Yarnsmiths Pebble Haze DK (50g/145m; 33% acrylic, 67% cotton) – available from Wool Warehouse HERE.
- Yellow – 2C110 Yellow Amber
- White – 2C040 Marble
Instructions
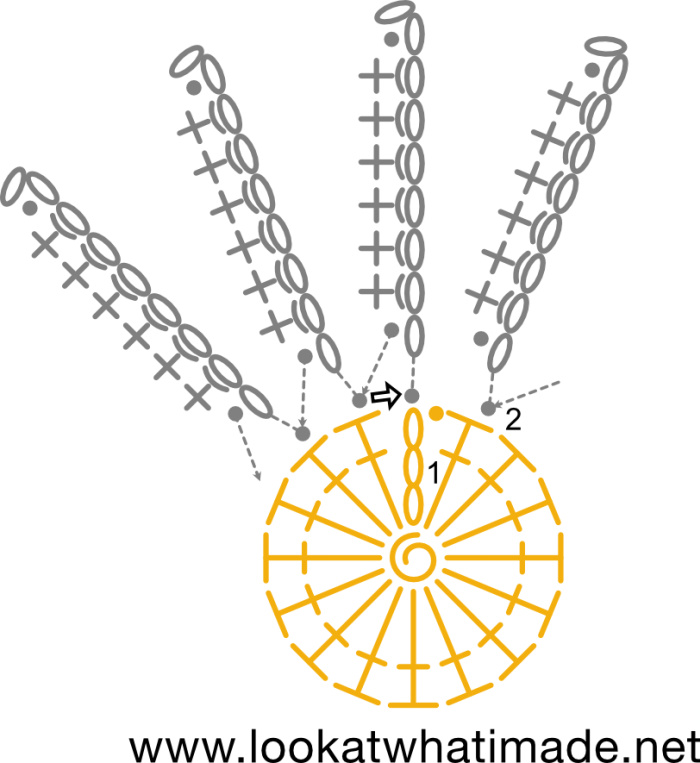
Round 1
With Yellow and working into a magic ring: Ch 3 (counts as first dc), 15 dc. Join to the top of the beg ch-3 with a sl st. Fasten off and work away your ends. {16 dc}

Round 2
In this round, you will be making the first half of each Petal.
Join your yarn by making a sl st in any stitch around. Ch 9. Working into one loop only: sl st in the second ch from the hook, sc in the next 6 ch sts, sl st in the last ch st. *Sl st in the next st of Round 1. Ch 9. Working into one loop only: sl st in the second ch from the hook, sc in the next 6 ch sts, sl st in the last ch st.*
Repeat from * to * until you wave worked into each dc from Round 1. {16 Half-petals}
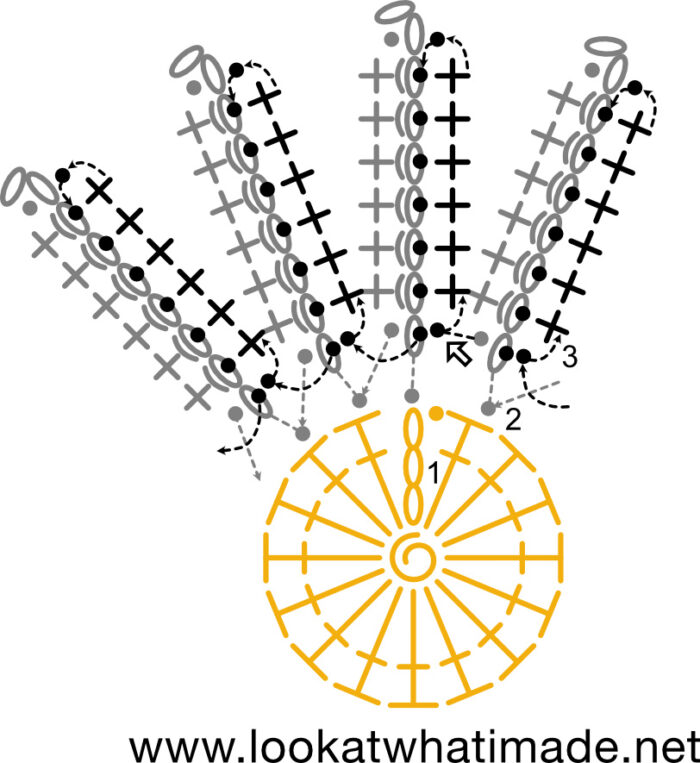
Round 3
In this round, you will be completing each Petal.
*Working into both rem loops of each ch st of the next Petal: sl st in the first ch, sc in the next 6 ch sts, sl st in the last ch. You will notice that there are 7 ‘holes’ down the middle of your Petal. Make a surface sl st in each of these 7 holes.*
Rep from * to * until you have completed each Petal. Fasten off and work away your ends. {16 Petals}
When you are done, the flower will curl a bit…
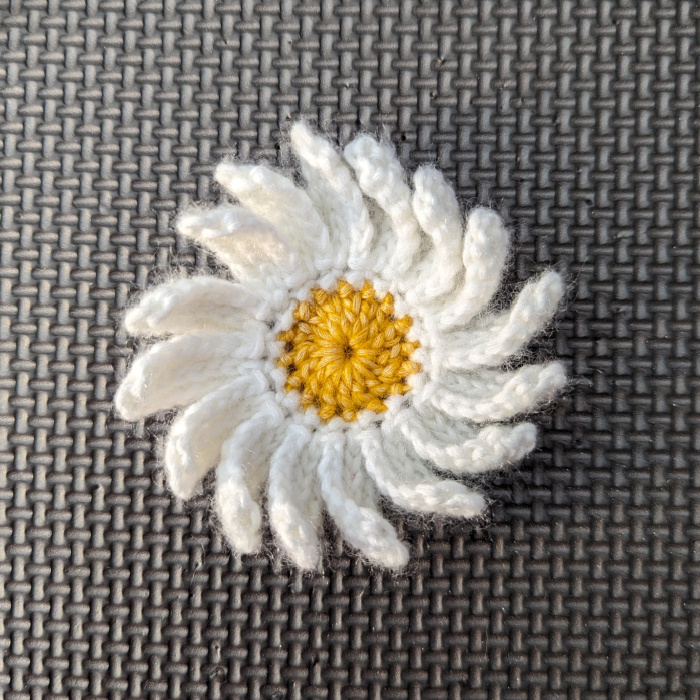
It’s nothing a good blocking won’t cure. I steam-blocked mine, but you can wet-block with equal success.
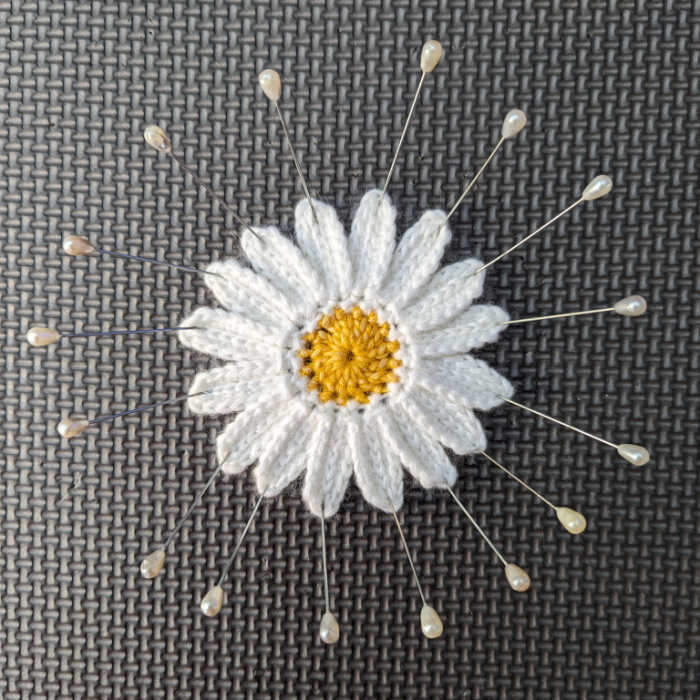
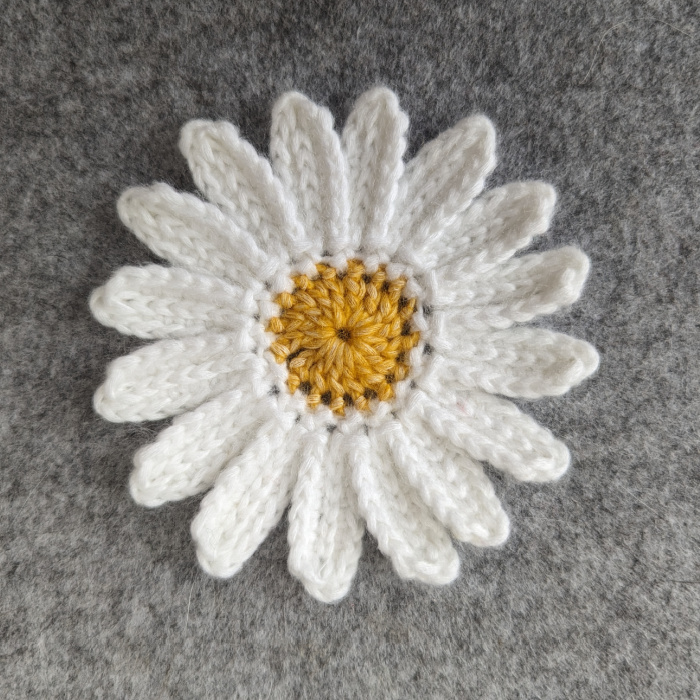
After blocking, the petals will be nice and flat.
You can, of course, use oranges or purples if you choose to make Cape Daisies instead :)
I hope you have enjoyed making this little Daisy, and that you look forward to making some of the other flowers when I release the patterns. Please remember to use #crochetoxeyedaisy when you share on social media so that I can see your beauties.


This blog post contains affiliate links. I only link to products I personally use or would use. All opinions are my own.


Frankie says
These are lovely. My garden is full of these at the moment, dancing in the breeze.
Jenny Lowman says
Such lovely flowers!