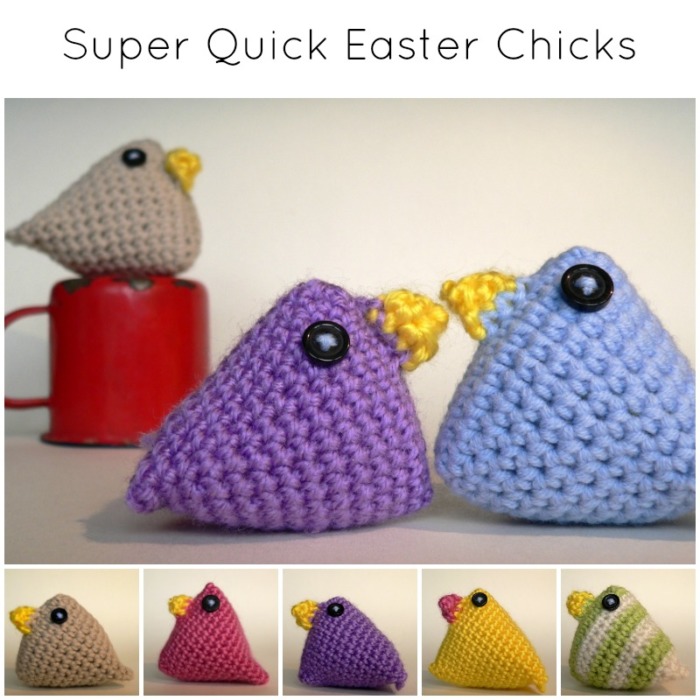
These Super Quick Crochet Easter Chicks are very easy and quick to make, so if you are looking for a last-minute Easter pattern, they are perfect! They use very little yarn, so they are also a good stash-busting project.
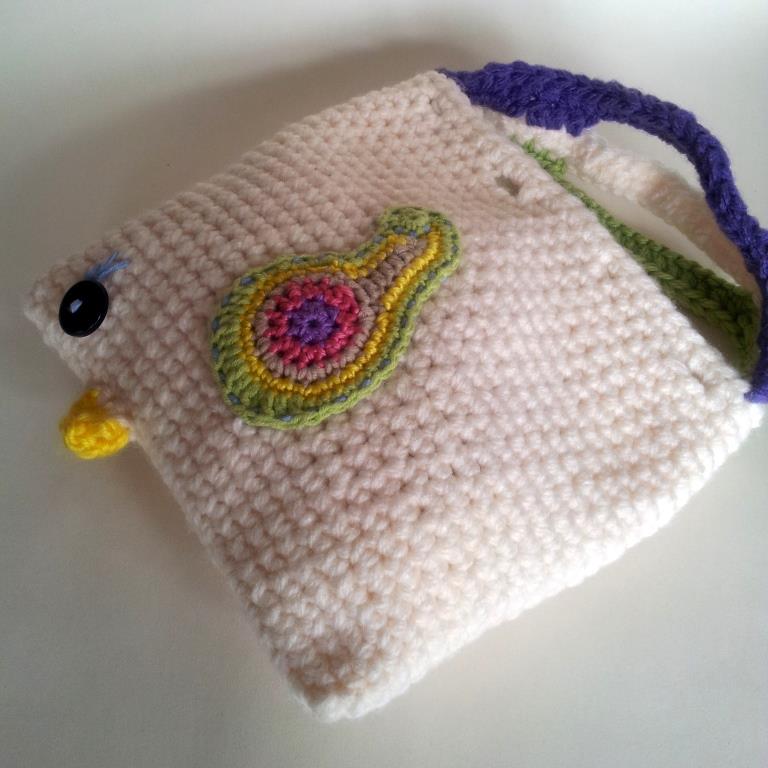
Once you have made your Crochet Easter Chicks, you can create a Mama Chicken Bag to store them in.
Super Quick Crochet Easter Chicks
©Dedri Uys 2013. All Rights Reserved.

Materials
- 4 mm crochet hook
- Double knit yarn (light worsted weight/#3) in 2 colours (or more if you want stripes)
- A tiny amount of stuffing
- Yarn needle
- Buttons for the eyes (alternatively you can embroider some eyes)
- Scrap yarn to use as stitch marker (optional)
Abbreviations
- BLO – Back Loop Only
- CC – Contrasting Colour
- Ch – Chain
- FLO – Front Loop Only
- MC – Main Colour
- Sc – Single Crochet
- St/st’s – Stitch/stitches
Special Instructions
Running Stitch Marker – Use a piece of scrap yarn as a running stitch marker. This will form a dotted line up your work, marking the first stitch of every round and giving you a visual confirmation that every round started where it was supposed to. This dotted line should creep slightly to the right (left, if you are left-handed).
Instructions
Beak
1. With CC: Ch 2. Make 3 sc’s in the second ch from the hook. Ch 1 and turn. {3}
2. Make 2 sc’s in each of the 3 st’s. Ch 1 and fasten off. {6}
Chick
Foundation Chain
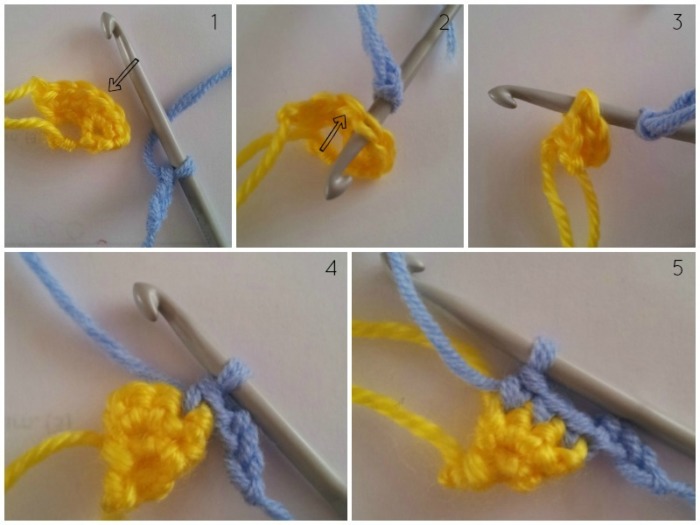
With MC: Ch 3. The next 3 st’s will be worked into the beak you made above. Insert your hook from back to front into the third st of the last row of the beak {indicated with an arrow in Photo 1 and illustrated in Photo 2}, and from front to back into the 4th st of the last row {indicated with an arrow in Photo 2 and illustrated in Photo 3}. This will naturally fold the beak in half. Make a sc through both layers {Photo 4}. Make 2 more sc’s through both layers of the folded beak {Photo 5}. Ch 7. Turn the chain so that the back of the chain is facing you! If you don’t do this, your beak will be on the inside of your chick!
Round 1
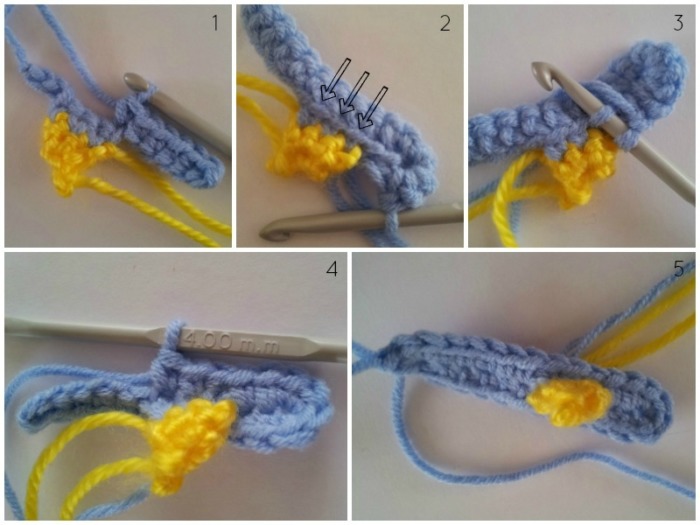
Sc in the top loop only of the second ch from the hook, making sure that the back of the chain is facing you. You can find out more about the front and the back of the foundation chain HERE. Sc in the top loop only of the next 5 ch’s {Photo 1}. You should now have 6 sc’s. This will bring you to the 3 sc’s made into the beak. Sc in the FLO of the next 3 sc’s. Sc in the top loop only of the next 2 ch’s. Make 4 sc’s in the last ch {Photo 2 shows the back of your work at this point}. You will now continue working around the foundation chain, and into the remaining loops of each ch. Sc in the next 2 ch’s. Sc in the BLO of the 3 sc’s across the beak (so the loops remaining from when you worked into the FLO before). This is indicated with arrows in Photo 2 and illustrated in Photos 3 and 4. Sc in the next 5 ch’s. Make 3 sc’s in the last ch, which will already contain a sc {Photo 5}. {28}
Now you will continue working in a spiral, so you won’t turn and you won’t join. You will just make the first stitch of the next round in the first stitch of this round. See THIS TUTORIAL if you need help working in a spiral. I suggest using a piece of scrap yarn as a running stitch marker. Alternatively use a stitch marker to mark the first st of each round.
Rounds 2 – 12
Sc in each stitch around*. In Photo 1 below, you can see the running stitch marker (yellow). Photo 2 shows the end of Round 12 and the running stitch marker.
*See Adding The Eyes below before completing your crochet Easter chick.
Round 13
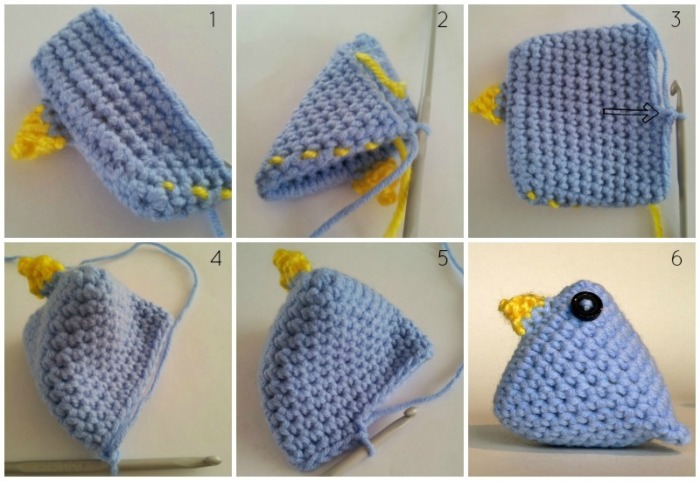
Sc in the next 9 st’s. You should end up in the middle of one of the sides of your chick {Photo 3}. Fold the back of the chick flat (using the last st as an edge guide) – see Photo 4.
Sc into each st and through both layers, stuffing your chick as you go. When you get to the end, ch 1 and fasten off. Work away your ends of yarn.
Stripy Easter Chicks
To make thin stripes, change colours on the last st of every round. (Click HERE for instructions on how to change colours.)
To make thick stripes, change colours on the last st of rounds 2, 4, 6, 8 and 10.
There will be a little visible “step” at every colour change, but this isn’t such a big deal as it will run along the bottom of the chick, which is the least visible part.
Adding the Eyes
The easiest way to attach the eyes is to sew them on when you have completed 6 or 7 rounds. I sew my eyes on over one of the stitches in round 3 (in line with the top of the beak).
And there you have it… Super Quick Crochet Easter Chicks :)
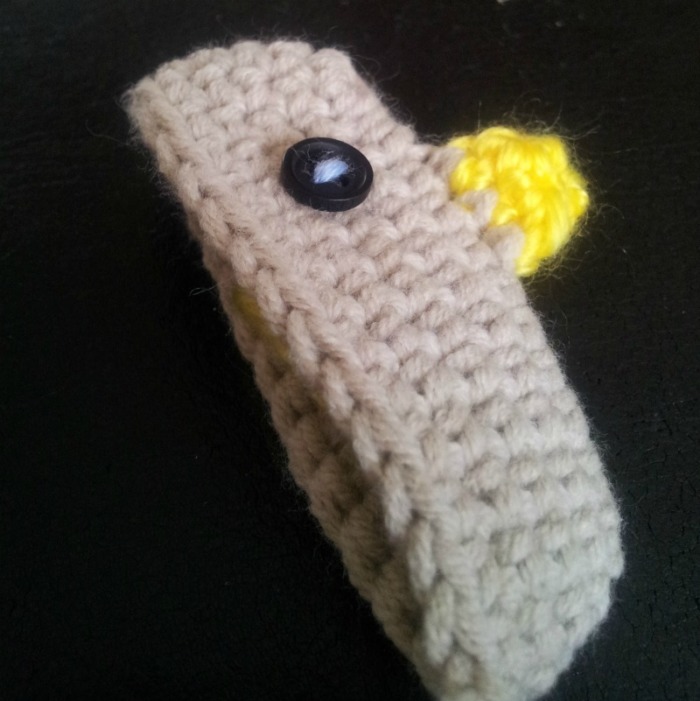
And because I am too excited about Mama Chicken, I am going to give you a little peek.

Please remember to subscribe to my Weekly Newsletter if you would like to be kept in the loop. You can also like my Facebook page or follow me on Bloglovin, Google+, Pinterest, Twitter, or Instagram.
Happy Hooking!


Kitty says
These are so cute! Mine ended up with little wing looking things, but that’s okay, my mom liked them anyway. It’s funny because my step dad’s nick name is Chicken, so I gave them little chickens :)
Dedri Uys says
Lol. I am just trying to figure out why his nickname would be chicken…
lita fiorenza says
Soy de Argentina me encanta tu pagina , y me fascina el crochet , agradezco me compartas tu sabiduria !!! gracias Lita
Jenny says
We are happy you like the page, Lita :)
Carole says
These are absolutely adorable!
Dedri Uys says
Thank you, Carole. They are sooooo simple to make and don’t take a lot of time. I love simple, quick projects x
zuzana says
Cute, interesting. I have to give it a try. Designed as a keychain. I wish you a long and healthy dexterous hands and a lot a lot of good ideas. Greetings from Slovakia.