Welcome to Part 2 of the Mighty Fine Day Bag pattern. You can find Part 1 (and all the information) HERE.
Strap
Row 1: With RS facing, join Yarn B by making a standing sc in the marked st from Round 43. Sc in the next 7 sts. TURN. {8 sc}
Row 2: With WS facing, sl st in each st across. Ch 1 and TURN. Don’t accidentally skip the first st, which will be hidden by the working yarn. {8 sl st}
Row 3: With RS facing and working over the sl sts from the previous row, sc in each sc from the row before that. TURN. {8 sc}
Rows 4 – 9: Repeat Rows 2 and 3.
Row 10: With WS facing, sl st in the first 2 sts. Ch 5 and skip the next 4 sts. Sl st in the last 2 sts. Ch 1 and TURN. {4 sl sts and 1 ch-5 sp}
Row 11: With RS facing and working over the sl sts from the previous row, sc in the first 2 sts, make 4 sc in the next ch-5 sp, sc in the last 2 sts. TURN. {8 sc}
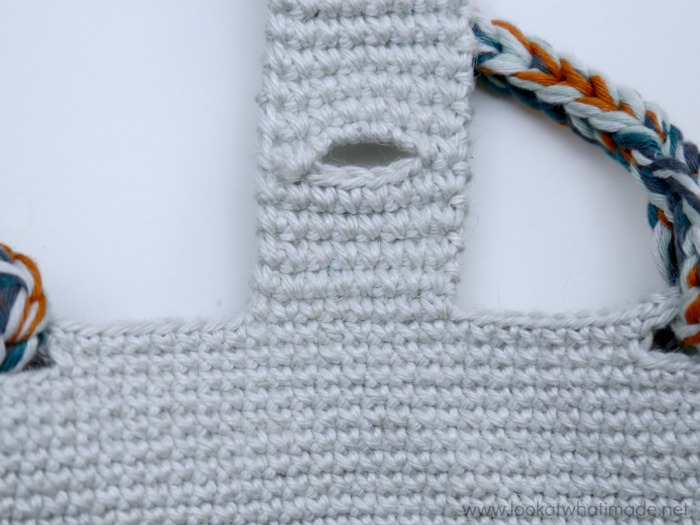
Rows 12 – 35: Repeat Rows 2 and 3.
Rows 36 – 37: Repeat Rows 10 and 11.
Row 38: With WS facing, sl st in the first 3 sts. (Ch 3, sc in the next st) twice. Ch 3. Sl st in the last 3 sts. Ch 1 and TURN. {6 sl sts, 2 sc, and 3 ch-3 sps}
Row 39: With RS facing, ([sc, hdc, dc, hdc ,sc] in the next ch-3 sp) 3 times. Sl st in the last sc from Row 37. Fasten off and work away your ends. {6 sc, 6 hdc, and 3 dc – not including sl st}
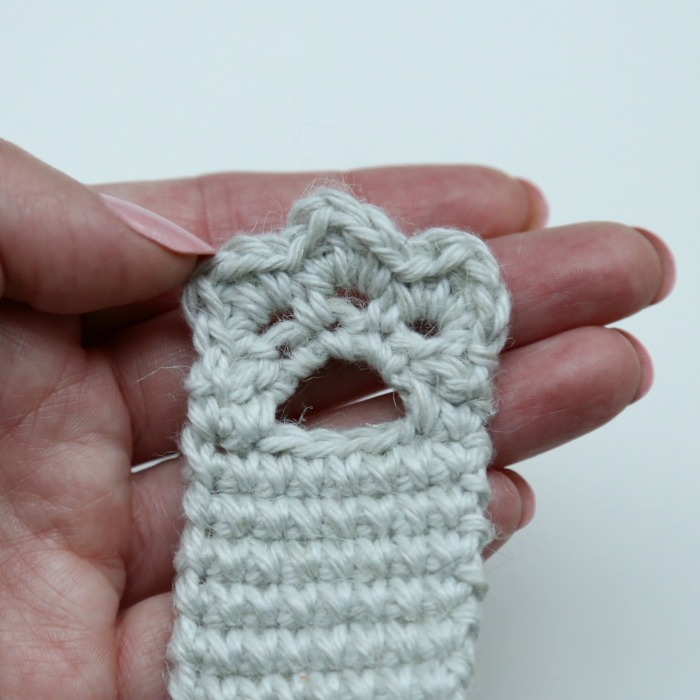
Doesn’t that look like a little cat paw?
Handles
Before you start making the handle, flatten your bag and line up the holes created by making the ch-5 sps in Rows 42 and 43. There should be two ch-5 holes on each side. You will be attaching the handles to these holes.
Holding one strand each of Yarn C – G together and using a 6mm hook, measure a 2.5m end and make a sl knot. With the 2.5m end pointing down, hold your working yarn (all 5 strands) as you usually would. Loop the 2.5m end around your hook from front to back (yarn under) – indicated with an arrow in Photo 1 and illustrated in Photo 2. Then yarn over with your working yarn {indicated with an arrow in Photo 2 and illustrated in Photo 3} and pull through both loops on your hook {Photo 4}. This completes your first st.
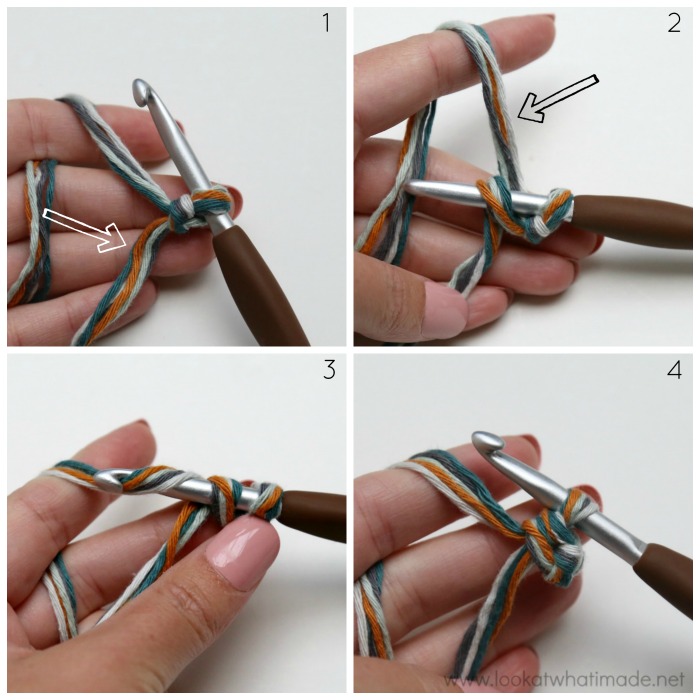
We are going to run through that one more time. Yarn under with the yarn end {indicated with an arrow in Photo 1 and illustrated in Photo 2}. Then yarn over with the working yarn {indicated with an arrow in Photo 2 and illustrated in Photo 3}. Pull through both loops on your hook to complete the second st {Photo 4}.
Make 8 more sts for a total of 10.
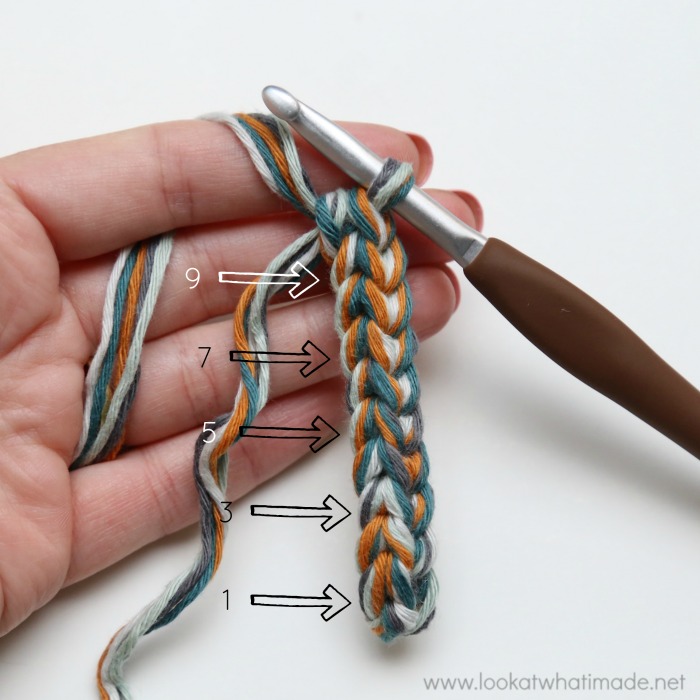
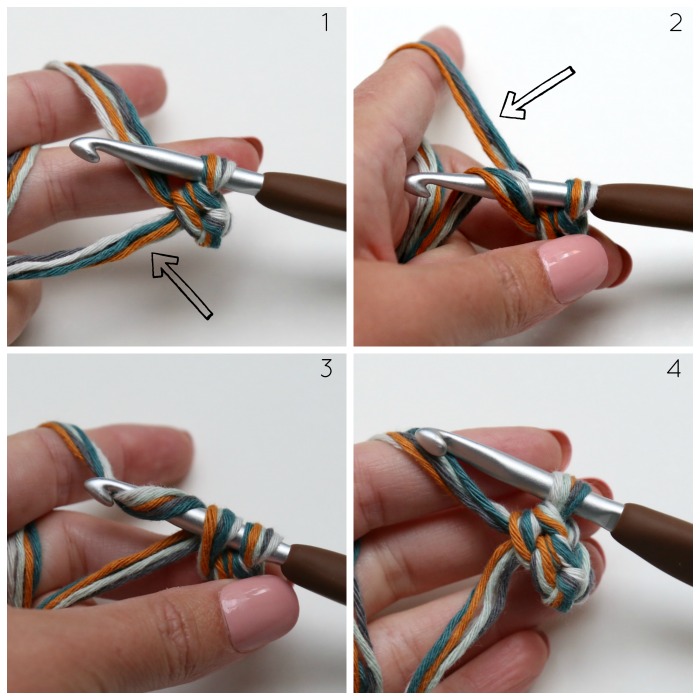
Flip the end of the handle away from you so that you are looking at the wrong (bumpy) side and thread it through the right ch-5 hole of one side (left, if you are left-handed) – Photo 1.
Insert your hook into the first st, making sure that your working yarn is to the right of your hook (left, if you are left-handed) – Photos 2 and 3. Yarn over with the working yarn and make a sl st {Photo 4}.

Make 60 more sts (or work until your strap is roughly 44cm/17″ long from folded end to the end containing the hook). Fasten off, leaving 20cm/8” ends.
You will notice that my ends are very short in the tutorial. That is because I had to frog the straps to re-do the photos. Don’t make your ends that short!
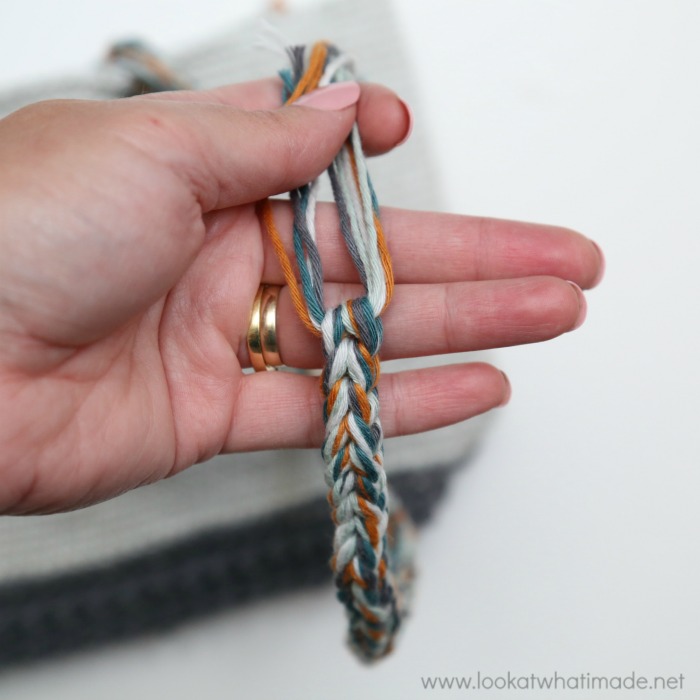
Flip the handle over onto the bag so that it looks like a smile. Make sure that it is not twisted and that the bumpy side is facing you.
Insert the end of the handle into the left ch-5 hole (right, if you are left-handed) and thread your yarn needle with one of the ends – it doesn’t matter which one.
Insert your needle from side to side into the 10th st from the end, working from the side closest to the yarn end {Photo 1} and pull tight {Photo 2}.
Knot the two yarn ends {Photo 3}.
Work the end closest to the ‘loop’ of the handle away by working into each st from side to side for at least 6 sts {Photos 4 and 5}. Work the other end away into the actual handle in the same way {Photo 6}.
Cut your ends.
Now do the same on the other side of the bag so that you have two handles.

Adding Buttons
With your bag still flattened, fold the strap/closure over so that it looks centred. Using pins, mark where you will need to add your buttons.
Sew the buttons onto the bag using Yarn B.

Floral Pouch
First Circle
Round 1: With Yarn C, make a magic ring. Into the ring, ch 1 (doesn’t count as a st), 10 hdc. Join to the first hdc with a sl st. Fasten off and work away your ends. {10 hdc}
Round 2: Join Yarn D by making a standing hdc in any st around. Hdc in the same st. Make 2 hdc in each rem st. Join to the first hdc with a sl st. Fasten off and work away your ends. {20 hdc}
Round 3: Join Yarn E by making a standing hdc in the same st as the sl st join. Hdc in the same st, hdc in the next st. (Make 2 hdc in the next st, hdc in the next st) 9 times. Join to the first hdc with a sl st. Fasten off and work away your ends. {30 hdc}
Round 4: Join Yarn F by making a standing hdc in the same st as the sl st join. Hdc in the same st, hdc in the next 2 sts. (Make 2 hdc in the next st, hdc in the next 2 sts) 9 times. Join to the first hdc with a sl st. Fasten off and work away your ends. {40 hdc}
Second Circle
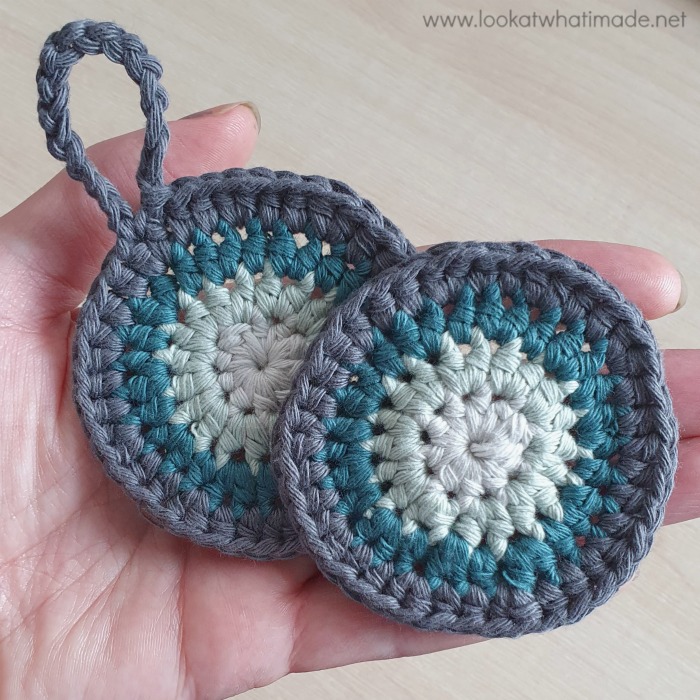
Repeat Rounds 1 – 4 above, but don’t fasten off. Ch 15 to create a loop. Sl st in the same st as the sl st join. Fasten off and work away your ends.
Completing the Pouch
Round 5: Turn the second circle so that the WS is facing you. Join Yarn G by making a standing sc in the same st as the sl st join. Sc in the next 6 sts. Place the first circle on top of the second circle with RS facing you. Working through both layers, sc in the next 26 sts. Working only into the sts of the second circle, sc in the last 7 sts. Join to the first sc with a sl st, making sure that the ch-15 loop is in front of the sl st join. {40 sc}
You should now have a little pouch.
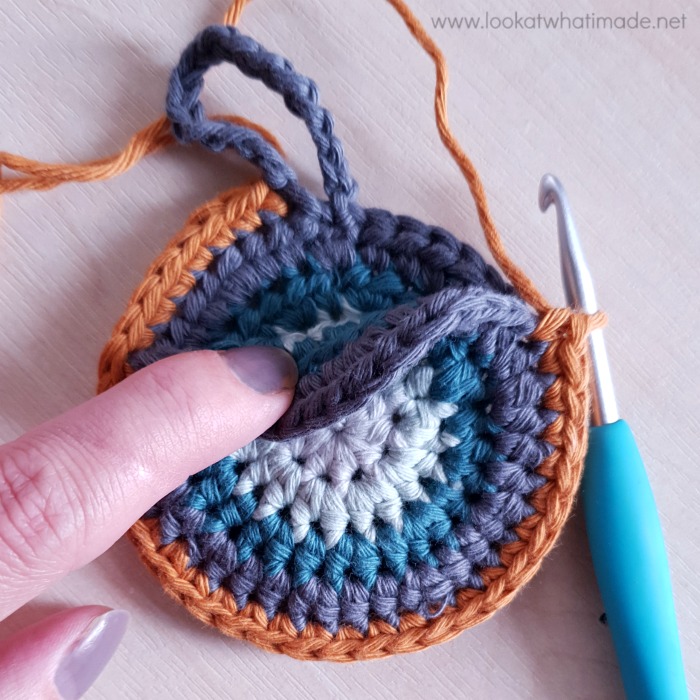
Round 6: Starting in the st after the sl st join, ([sc, hdc] in the next st, [dc, ch 1, dc] in the next st, [hdc, sc] in the next st, sl st in the next st) 10 times. The last sl st should fall in the same st as the sl st join. Ch 10 and fasten off, leaving a 10cm/4” end.
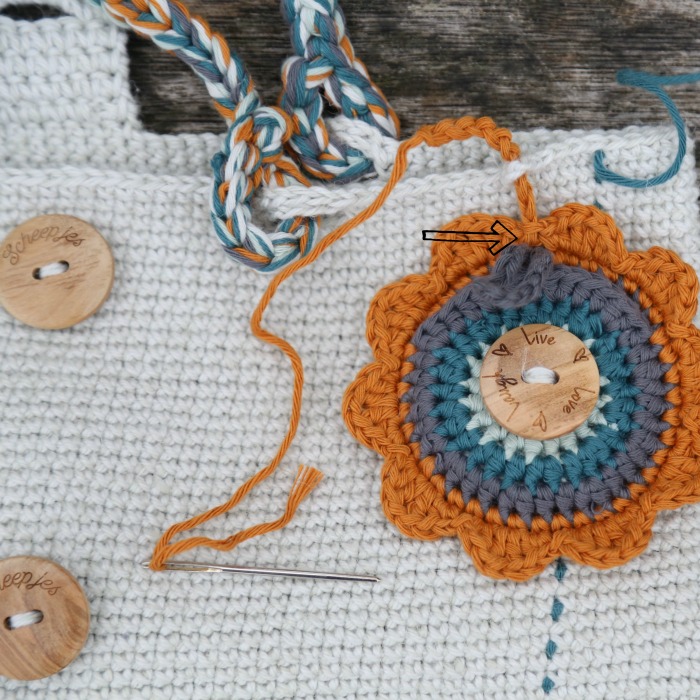
Thread the end through the ch-3 loop of Round 44 of the bag. Using your yarn needle, attach the end of the chain to the flower in the same st as the last sl st join and work away your ends.
Using Yarn C, sew a button onto the centre of the front flap of the pouch and loop the ch-15 loop around the button to close the pouch.
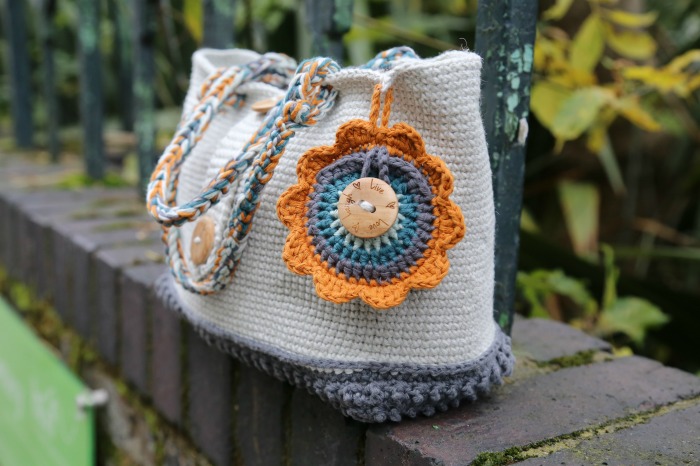
And there you have it. One Mighty Fine Day Bag completed :)

This blog post contains affiliate links. I only link to products I personally use or would use. All opinions are my own.


Debbie Medearis says
Absolutely Beautiful!!!! You are so appreciated!!!! Thank you from someone who can follow any pattern but can not design patterns.