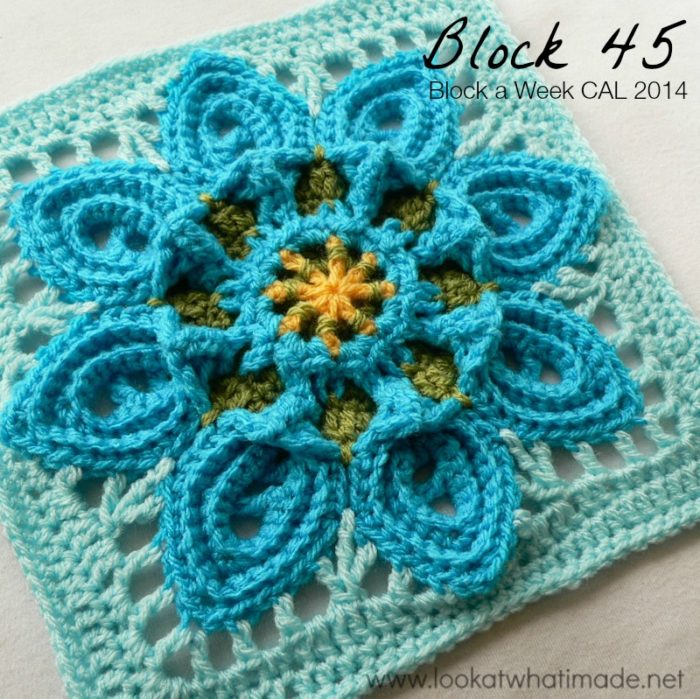
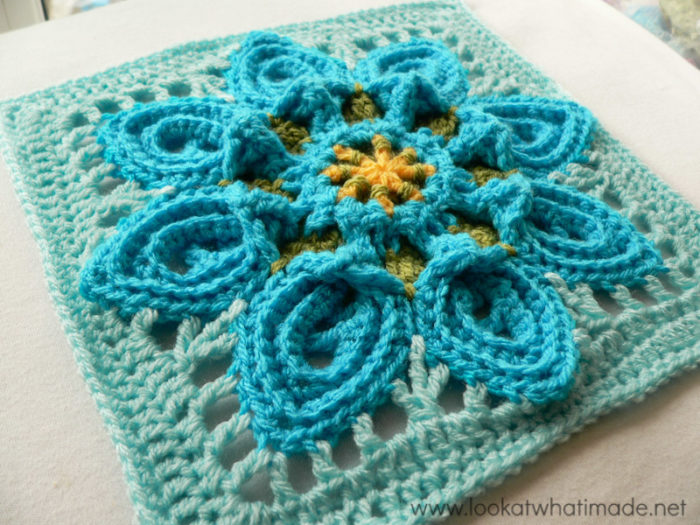
Block 45 of the Block a Week CAL (hosted by Kimberly Slifer) is Margaret MacInnis’ Purifying Puritans Square. Although Margaret has already done a photo tutorial for this square, I do have a few tips, so have a little read below.
It seems fitting that this week’s square should be magnificent, because it is, after all, the last square in our Block a Week CAL 2014. And as I write this I find myself oddly close to tears. It has been such a brilliant, roller-coaster ride and I want to thank each and every one of you who has commented, encouraged, interacted, corrected, helped, and made me laugh (and cry)!
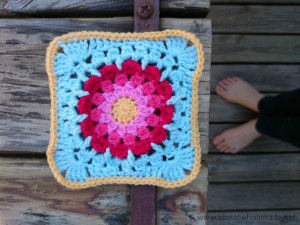 Of all the squares the ones I did in South Africa remain my most prized, not necessarily because of their beauty, but because they remind me of a wonderful, poignant holiday with family and friends, and my sister’s beautiful wedding.
To all the designers I would once again like to say a HUGE THANK YOU for letting me do these photo tutorials so that we could all (beginners and experienced crocheters alike) make them together.
Don’t forget that I am currently doing a series called “Joining Crochet Squares”, which will touch on preparation and layout, joining diagonally, joining methods, joining squares with different stitch counts, and 4-squares. That will be followed by a post about borders and finally a list of all the colours (and quantities) I have used for my squares.
I hope to see you all back here next year for a brand new CAL!
Dedri
Purifying Puritans Crochet Square
{Pattern Redesign © 2013 Margaret MacInnis. Based on original pattern ‘Puritan Bedspread’ by Cecilia Vanek.}
Pattern And PHOTO TUTORIAL
Available as Free Ravelry Downloads.
Suggested Materials
- 5.5 mm Clover Amour Crochet Hook (US I/9 UK 5)
- Worsted weight yarn
Size
- Using the hook and yarn specified, your square should be a nice even 12″ when you are done.
- Using a 4 mm crochet hook (US G/6 UK 8) and double knit yarn, as I have done, your finished square will be about 8.5″ big.
My Yarn and Colour Choices
I am using Stylecraft Special DK.
Petals
- Saffron (Round 1)
- Turquoise (Rows 1-4 and Finishing Rows)
Square
- Meadow (Rounds 1 – 7) – Background circle
- Sherbet (Rounds 8 – 11) – Border Rounds
Notes
- PLEASE download the photo tutorial that Margaret has supplied. There are 2 Ravelry downloads: one is the pattern, one is the photo tutorial!
- US Crochet Terminology used. (See this comparative chart if you need help transcribing from US to UK)
Purifying Puritans Square Tips
This Square consists of 3 parts or “steps”.
Flowers
Firstly you will need to make the flowers. They are made one by one and consist of 5 rows each: Rows 1 – 4 and a finishing row. Why rows? Because each one is worked back and forth, turning at the end of each row, before making the next flower.
You will complete the first flower (Pages 1 – 6 of the Photo Tutorial). Flowers 2 – 7 will be attached to the previous flower using the End Petal Instructions (Pages 7 – 9 of the Photo Tutorial). Flower 8 will be attached to Flower 7 AND Flower 1 on the finishing row using the Petal Eight Only instructions.
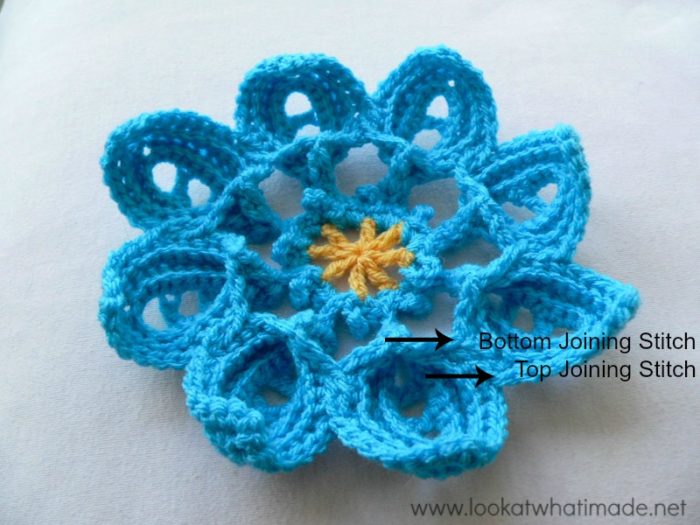
Each flower is joined to the next in a JAYGO (join as you go) fashion. There will be 2 “joining stitches” between each petal: a bottom joining stitch and a top joining stitch.
Background
Once your flowers are completed you will make a background circle behind the “stems” of the flowers. This circle consists of 7 Rounds. It starts as back post stitches around the center of the flowers (the homebase as Margaret calls it). You will anchor this circle to the flowers by catching the picot stitches in Round 5 of the background circle…
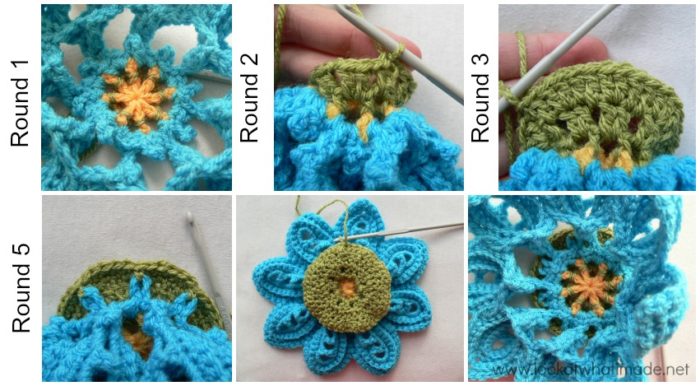
… and by catching the bottom joining stitches (between flowers) in Round 7 of the background circle.
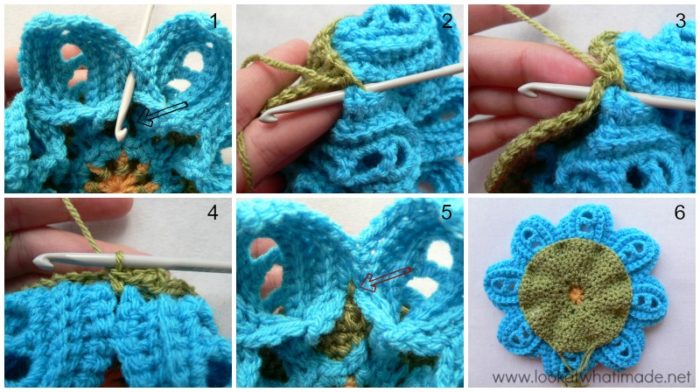
To catch the bottom joining stitch, you need to insert your hook from the back of your work between the two joining stitches (Photo 1). Then insert it front to back into the space that contains the picot (indicated with an arrow in Photo 1 and illustrated in Photo 2). You are basically inserting your hook around the bottom joining stitch. Then insert your hook into the next st of the background circle (Photo 3) and complet a sc (Photo 4). This will create a little vertical stitch on the front of your flower (Photo 5).
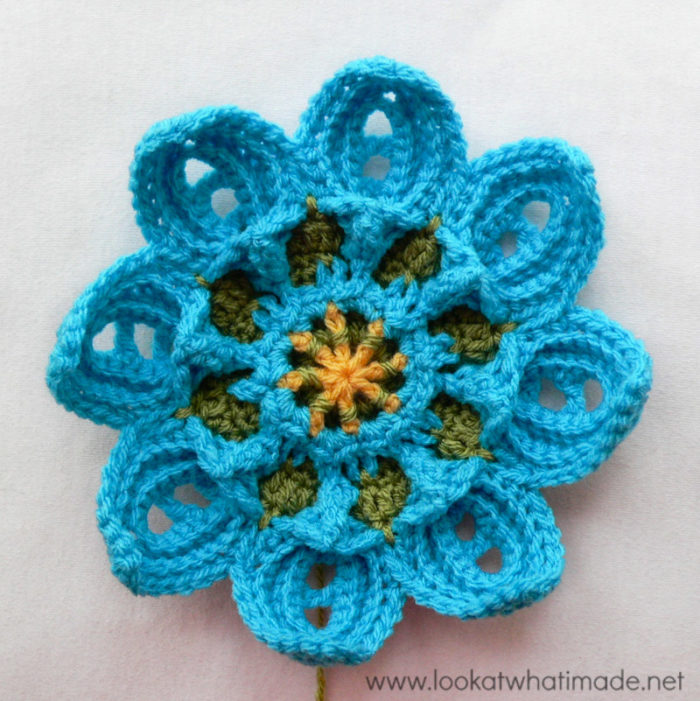
This is Round 7 of the Background Circle completed. Isn’t it pretty?
“Border Rounds”
Finally you will build your square by making what Margaret calls the Border Rounds.
These start as a BLO (Back Loop Only) Round worked into the flowers.
Pages 11 – 17 of the Photo Tutorial cover Border Round 8 in detail.
Border Round 9 is straightforward. The only hint I can give you as that all the stitches for this round are made into the ch-2 spaces. The only stitches you will be working into are the tr3tog’s.
Border Round 10 was easy.
For Border Round 11 I used single crochet instead of hdc, because this square packs a LOT of stretch.
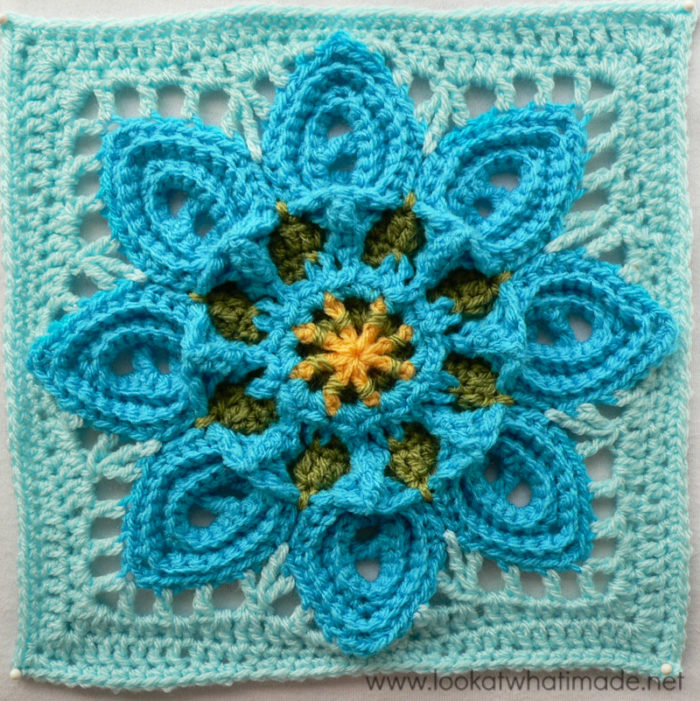
I have decided against adding an optional additional round for this square, so this is the only one that I have done that doesn’t have between 160 and 164 st’s as a final round stitch count.
And so this chapter of our journey comes to an end. Remember to check back for joining tutorials and information about borders (and if you want to see my completed blanket)…

This blog post contains affiliate links. I only link to products I personally use or would use. All opinions are my own.



Lee Ann Steinmetz says
Hi Dedri,
I found this CAL in 2016, and two years later, I am preparing the squares to be joined! I am so excited! I have learned a lot about color, new stitches and techniques. Thank you so much for these beautiful photo tutorials.
Dedri Uys says
Hi Lee Ann. Yay you!!! I’m excited for you :)
Roula says
very nice!!! thank you very much !!
sophie says
Just wanted to say THANK YOU SO MUCH for all those exciting and soooo lovely patterns!
Dedri Uys says
You’re welcome, Sophie. I feel very blessed that the designers of these squares allowed me to do these photo tutorials.
Rotana says
Hi Dedri,
thank you for sharing, I love all your post and also want to learn how to do it too, I am very interested in this square and tried to make it but I haven’t been succeed yet, I don’t know why? my petal seem to be so big and can’t form a proper petal, do I have to use exactly the same type of yarn and hook size with the instruction, because where I live I can find only 8 ply yearn, I used them for making crocodile flower square from your post ( your excellent detail photo tutoring ) turn out ok.. please help me,,,
thank you very much for your kindness,
best regard,
Rotana
Marie Carlson says
Love your patterns!
Caro says
Hola tus trabajos son muy bonitos y gracias por compartirlos
Krista Wells says
Hi Dedri!
I love the colors you have choosen. I went through and downloaded all the blocks today from Ravelry, I was certain I had a few wrong, they looked totally different in one color! I saw the color list for Sophies Garden (a mind blowingly beautiful pattern), it looks like the same colors were used for the CAL, can you tell me roughly how much of each color is needed to complete all blocks and Sophies Garden?
Dedri Uys says
Hi Krista. I will be doing a post about yardage when I reveal my final blanket. A friend of mine has been kind enough to keep a tally for me as I didn’t think to keep a tally myself. If you check back in a week or two I should have the info for you,
Dedri
vered says
Hey Dedri
A huge thank you for all your help this lovely project.
I found it only in September and so far I managed to make a 24 square.
Although my English is reasonable, your pictures helped me to understand the details in the pattern.
You are great.
Thank you a lot and enjoy the holidays with your family and your lovely son.
Dedri Uys says
You are most welcome, Vered. You have a lovely holiday season too!
Carrie says
This one is beautiful! I love the colors you picked too :).
I’m so sad the CAL’s over :(. I have by no means stayed caught up (I admire you for never getting behind, Dedri — Even on vacation!), ever since summer began I’ve been so busy and lagged to the point of standstill, but I loved seeing what each new post on Sunday would hold! :)
You are so inspiring! Great job!!! <3
Carrie
Dedri Uys says
Carrie, I always look forward to hearing from you and it would be great to see something you’ve been working on. I am quite chuffed with myself for not getting behind too, although there were a few times when my posts only went up on the Monday, but hey ho…those were actually when we were on holiday and internet connection in the mountains was dodgy at best.
I hope you are having fun preparing for Christmas!
Dedri
Janie Sloan says
These squares are just about the pretties things I have ever seen!!! Are you going to do a book?
Dedri Uys says
Hi Janie.
I cannot do a book because these squares were all designed by different designers.
Gaye says
So….my Christmas holiday project awaits…..all of 2014 in 10 days! Hang on….45 blocks, 10 days *counts on fingers*…..mmmmmm……maybe into 2015 too!!!!
Just a gorgeous project, thank you for all the glorious photo tutorials. Loving your blog. xx
Dedri Uys says
lol…you better stop typing and start hooking!
Diana Anderson says
Dear Dedri,
It has been just the best fun! What a brilliant Crochet adventure we have all been on this year. I am so looking forward to next years wonderful ride. In the mean time I wish you and your beautiful family a fabulous Holiday Season. Be blessed, safe and happy!
You know I could go on for days thanking you, so instead I will simply say “Thank You and God bless you!”:-)
Dedri Uys says
Thank you, Diana. Despite having the busiest year of my life, I have enjoyed 2014 so much. God has been so good to me and my family and I have met such wonderful people. You have a wonderful festive season to!