This Elmo Cake could not be simpler. It is basically just a standard victoria sponge covered in white fondant. Elmo’s face is piped on with royal icing using a template I found online. Below you will find step by step instructions for recreating this cake.
Elmo Cake (Sesame Street)
To make an Elmo Cake, you will need:
- One 8″ cake covered in white fondant (see my posts on baking the victoria sponge and icing cakes if you want more detail about how to get to this point – they include recipes, links, tips, tools…everything!)
- Royal Icing in Red, Orange, White and Black. (See my post about making black royal icing without gel food colours if you need some advice)
- Piping Bottles (Available on Amazon.com and Amazon.co.uk
)
- 10″ Cake Drum/Board
- An Elmo Template -use your computer program of choice to resize it to the required size and print.
- A toothpick or a kebab stick for transferring the outline of Elmo’s face onto the cake
Method
Place the template onto the cake (make sure it isn’t completely off-center).
Using your toothpick or kebab stick, trace along the outlines of the face. Use a fair bit of pressure, because you want to indent the fondant beneath the paper. Don’t use so much force that you poke a hole into the cake – ah, it doesn’t really matter, you’ll cover it with royal icing anyway.
When you have finished, use your black royal icing and pipe along the indent of the outline. If you squint, you can see the indented outline on the cake below.
Tip: make sure that the icing you use for outlining isn’t too runny. It needs to be stiff enough to not spread, but not so stiff that it is difficult to work with. Aim for slightly more runny than toothpaste.
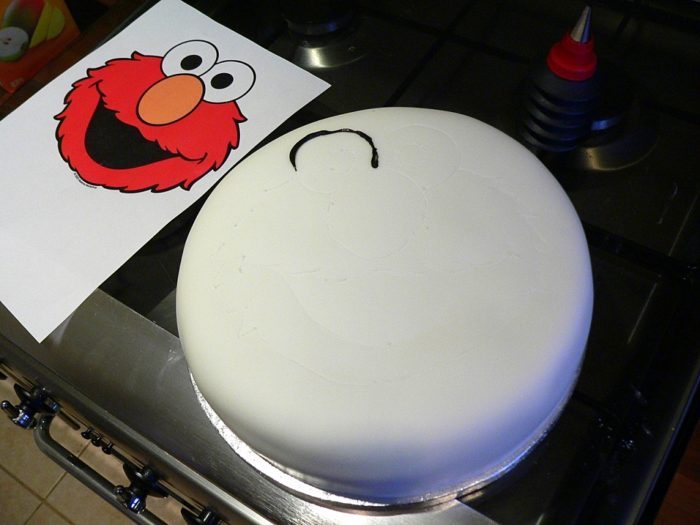
Keep outlining until you’re done. If you make a mistake, take a blunt knife and scrape the black icing off. Scrape it towards the inside of the face so that any marks will be covered by the coloured royal icing of the face later on.

Fill in the pupils and mouth – this is called flooding. You can see that my mouth isn’t completely smooth. That is because I was hurrying. If your royal icing is a bit thick, it will tend to leave ridges when you flood/fill in colour. To avoid this, dip your finger into some water – it needs to be damp, not wet – and smooth down the ridges and bumps. You have to work very fast as royal icing starts drying very quickly. If you use a wet (not damp) finger, you will get little drops of water in the royal icing and they will dry blotchy and yuk.
Now flood your eyes with white, your nose with orange and your face with red. Err on the side of caution and make sure that the royal icing you use for flooding is slightly more runny than the royal icing you used for piping the outline. It will settle a lot better and you needn’t worry about spreading, because the black icing will form a wall that will keep the colour contained.
You can use the royal icing to pipe names, phrases, numbers, dots, stars…anything, really…on the side of the cake.
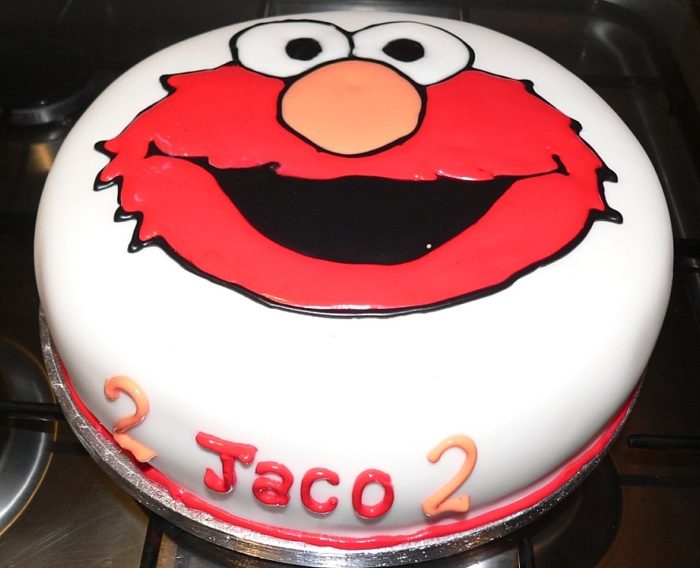
I piped Jaco’s name on the side – not very centred, hehe.

You might want to print out your name/phrase and trace it onto the cake (in the same way as the outline) before piping. That way you can alter it if it is really wonky. And you can also copy really fancy letters in this way. Free-hand piping and I are not the best of friends!
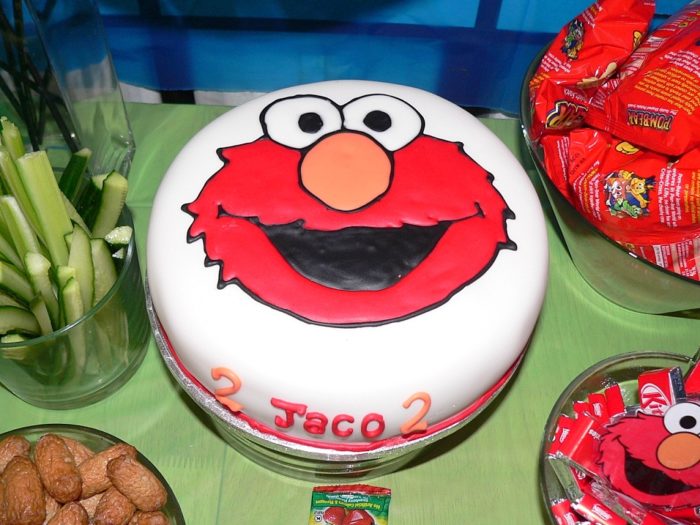
And there you have it. A perfectly simple Elmo Cake!
If you would like to make some Elmo Cookies to go along with your Elmo Cake, you can find the instructions HERE.
Remember to subscribe to my newsletter if you would like to be kept in the loop. You can also like my facebook page.
Happy Baking!





Shelley says
What is icing sugar?
Thanks for your help.
Shelley
Dedri Uys says
It’s also called confectioners sugar, Shelley.