This Ben 10 Cake was yet another last-minute affair. I hadn’t been planning on baking Jaco a birthday cake this year (shock, horror) as we didn’t have a birthday party for him (YES, you heard right). Instead, we went to Whipsnade Zoo with the Vinten’s from next door to celebrate the occasion. We were supposed to be a bigger group, but life happens… And he did get a caterpillar cake from Asda, so he was happy!
Anyway…on the Sunday evening I realized I couldn’t send him to Lynda’s without a cake, so I threw together this quicky Ben 10 Cake.
I used this sponge recipe (a single batch) and baked it in a rectangular cake tin. It never fails and is super yummy, by the way.
Once the cake was all baked and cooled, I set forth on my little decorating expedition.

You will Need:
- A Rectangular Cake – you can find my favourite (fail-proof) recipe here.
- Ben 10 Face Template (see below)
- Royal Icing in Black, brown, green and white. If you are daunted by making black royal icing, don’t be. If you have a little stash of black fondant lying around, you can always make my EASY BLACK ROYAL ICING without messing about with black gel colour.
- Fondant in Flesh colour, brown and green. If you don’t have brown/flesh coloured, I do explain how I made my, so don’t stress.
- Butter Cream Icing (Good old-fashioned butter cream is made with butter and icing sugar in a ratio of 1:2 by weight. Add 1 tsp of vanilla for every 250 g of butter used.)
- Wax paper
- A pencil – this is just to trace the design onto the fondant. You’re not ACTUALLY going to draw on the fondant, but rather onto the back of the template, using enough force to leave an indent of the outlines of the face on the fondant.
Ben 10 Face Template
I used this template from www.oncoloring.com. (I did have a link to the site, but they seem to have removed the image)

And this is just to give you an idea of which colours go where…no eyes, unfortunately, but I winged it and will show you how later.

Making the Royal Icing And Colouring the Fondant for your Ben 10 Cake
If you have a tried and tested recipe for Royal Icing, by all means use that. If you don’t have a favourite recipe, you can find the recipe I always use by following this link. Use the recipe for flooding, not the recipe for piping, and just follow the instructions.
Please note: you want your green and brown royal icing to be the right consistency for flooding, so quite runny. You want your black and white royal icing to be thicker, sort of like toothpaste, because you will be using it for detail work and outlining. If it is too runny, it will – obviously – run.
To get a thicker consistency, simply add more icing sugar. If you make it too thick, add some water ONE DROP AT A TIME and mix after each addition until you have the consistency you want.
For the brown royal icing I simply sifted in some cocoa powder until I got the shade of brown I wanted.
Hint: always make your royal icing slightly lighter than you need it to be. It darkens quite a bit when it dries. It also dries VERY quickly, so keep it well wrapped up when you are not working with it. I put my little bits of royal icing into squeezy containers as soon as they are coloured. That way it doesn’t dry out and it’s ready to go when I need it.
Making Flesh Coloured fondant
Take white, pink and yellow fondant in a ratio of 2:2:1 (see photo below). Mix the three colours really well until there is no more marbling. That just means until you have a nice uniform ball of fleshy fondant, that has no streaks of yellow, white or pink running through it. When your fondant is ready, wrap it up in clingfilm (really well) and set aside until you are ready to use it.

Making Brown Fondant
Take some white fondant. Add a little bit of shortening and sieved cocoa powder to it and mix until there is no more marbling. The shortening just counteracts the dry cocoa so that your fondant doesn’t become crumbly. For a tennis-ball sized piece of fondant, use half a teaspoon of shortening and about a tablespoon of cocoa. You can always add more cocoa if you want a darker shade.
This will give you quite a dull brown, though. I found that adding a little bit of yellow fondant (say 2 parts brown to one part yellow) gives you a nicer shade of light brown. Of course you could use less cocoa, but the brown appears watered down instead of light. Whatever.

This photo is just me checking if the shades are more or less what I wanted…and they are!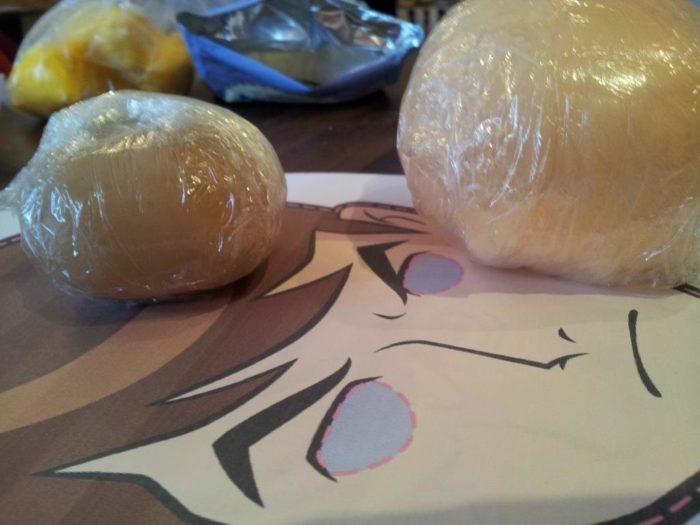
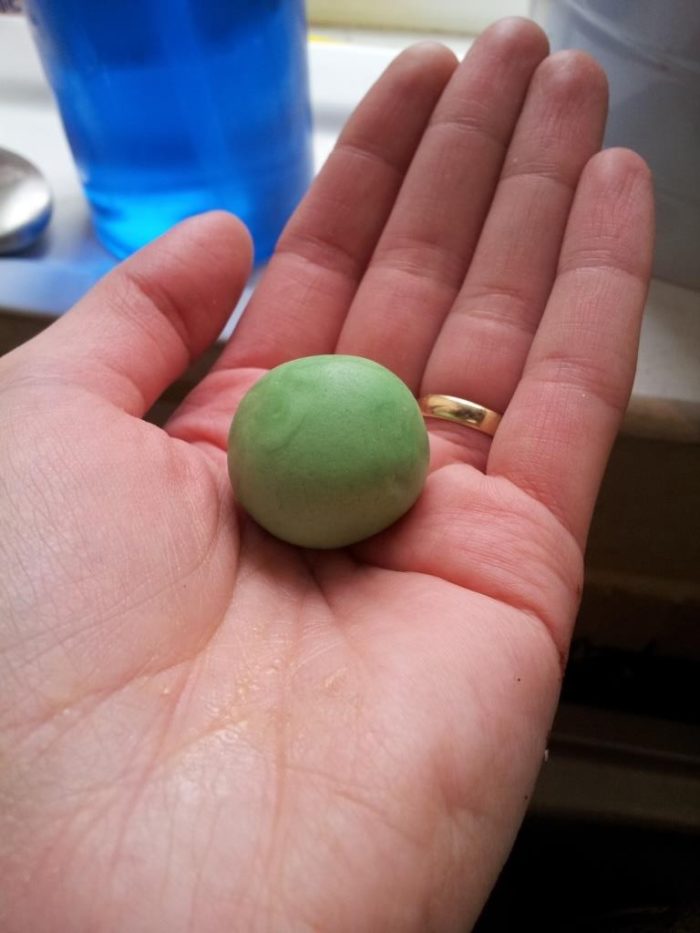
Making Green Fondant
Just take a teeny tiny ball of white fondant and colour it with a teenier tinier speck of green gel food colouring.
Decorating the Ben 10 Cake
You will need to cover your cake in Butter Cream Icing and let it set for a bit. You don’t have to be super neat on the top as you will be flooding the top with royal icing, so it won’t show.
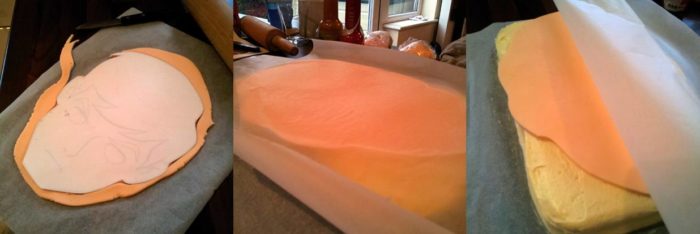
Cut out your template and roll your flesh coloured fondant out to about 5mm (on a piece of wax paper). Place the template of the face on top of the fondant (upside down so that the picture is facing the fondant).
Take a sharp knife and cut away the excess fondant. Then pick up the wax paper AND the fondant face and flip it over onto the cake. I say flip, but you’ll need to do it gently so that the fondant doesn’t break. Finally peel away the wax paper.
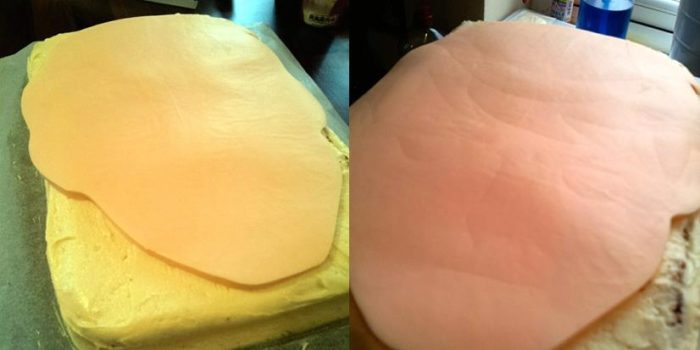
You should now have a Ben 10 face on top of your cake. Hopefully yours won’t hang over the edges slightly like mine! Now you will need to place the paper template on top of the fondant again, this time with the picture facing up.
Take your pencil and trace over all the black lines, applying enough pressure to leave a “trace” of the image on the fondant below. I didn’t take any usable pictures of this step, sorry. But in the photo on the right below you should just be able to make out the indents.
Now roll out some light brown fondant, again about 5mm thick, and trace the light brown segment of Ben 10’s hair onto the fondant. Cut it out and place it on the fondant face, lining it up with the trace lines on the flesh coloured fondant. You can brush a little bit of water onto the fondant to make it stick, but I didn’t bother as the brown royal icing will keep it in place.
Now use the black royal icing to pipe along the outside of the face.

Pipe in all the details of the face, following the trace lines. Then use the brown royal icing to fill in the rest of Ben 10’s hair. Give the cake a little shake to help the royal icing settle. If you see any bubbles on the surface of the royal icing, use a toothpick to pop them.
You’ll notice that I got a little bit carried away and piped his pupils as well. It doesn’t matter if you do it, but they will be covered by green fondant, so it’s a waste of time to pipe them on now.

Almost done!
Flood the eyes with white royal icing. Take 2 tiny pieces of green fondant and roll them into balls. Squish them flat and place them in the middle of his eyes. You can pipe a tiny white dot in the top left corner of each eye for a little bit of “life-like”. Finally pipe a little black pupil in the middle of each eye.


The last step is to outline the top of the rectangular cake with black royal icing and then flood all the remaining spaces with green royal icing.
You will notice that the royal icing dries matt. The photo on the left was taken while the royal icing was still wet, so it’s all nice and glossy. The photo on the right was taken about 4 hours later, so the royal icing has lost its shine.

I wonder how many more Ben 10 Cakes I will make…The boys are only 4, 3 and 1 and I have already made 2…one was for James next door, mind you, but still. I did swear off all things Ben 10 when the boys were babies and now I seem to be all about Ben 10.
I hope this tutorial helps you in your quest to make a quick and cheap Ben 10 Cake that doesn’t involve Ben 10 fighting Spiderman in 3D!
And if you DO want to make something a little bit more advanced, but still very much Ben 10, have a look at my 2-tier Ben 10 Cake with Fondant Ben 10 figurine (tutorial provided).
Remember to subscribe to my newsletter if you would like to be kept in the loop. You can also like my Facebook page or follow me on Bloglovin or Google+.
Happy Baking!