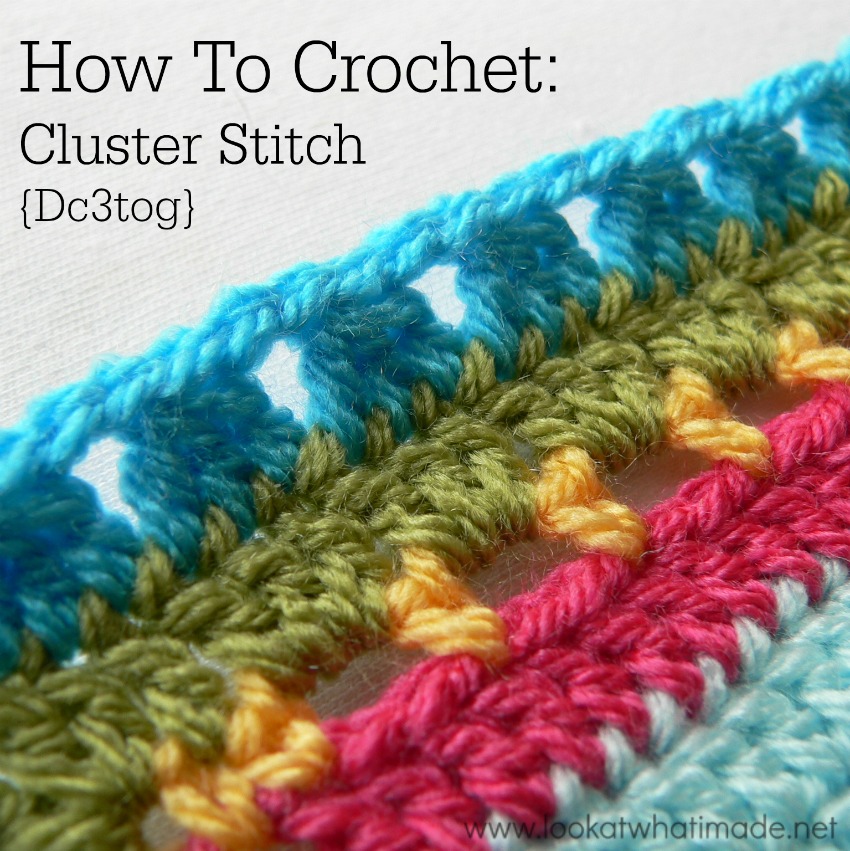
This tutorial is for making the Cluster Stitch (Dc3tog). It should not be confused with the bobble stitch, which is also sometimes called a cluster stitch.
Cluster Stitch vs Bobble Stitch
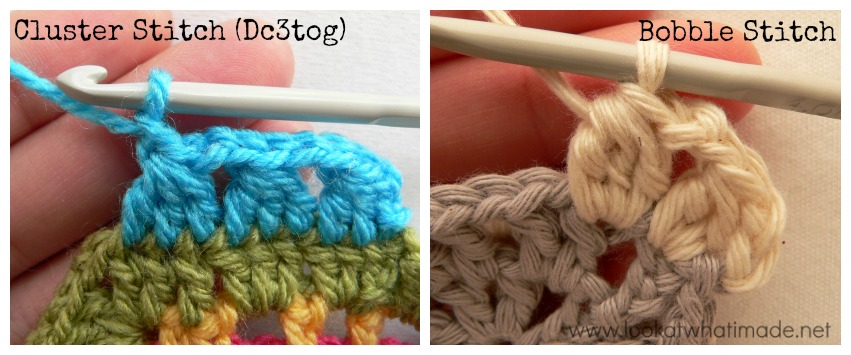
Both of these stitches are made by partially completing 3 double crochet stitches and then completing them all on the last yarn over. The difference is that the double crochet stitches are all made in the same stitch when making a bobble stitch, whereas they are made in subsequent stitches when making the cluster stitch.
If you need visual help identifying the difference between the two stitches, have a look at the photo below.
The cluster stitch is worked over 3 st’s and is triangular in appearance. The bobble stitch is worked into one stitch and has a teardrop shape.
 To compensate for the fact that you are decreasing by 2 st’s with every cluster that you make, cluster stitches usually have 2 or more chain stitches between clusters. The only exception to this rule is when you actually want to decrease, for example when shaping objects like toys or bags.
How to Make a Cluster Stitch
We are working on the premise that you already have a pattern to hand that calls for making cluster stitches or dc3tog’s, and you just want to clarify how to do that.
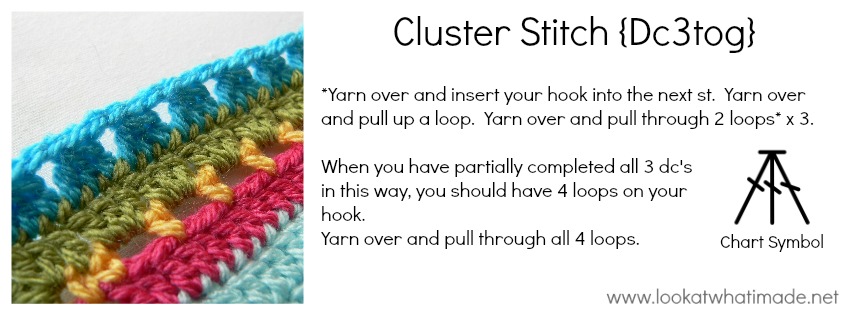
The whole idea of the cluster stitch (dc3tog) is that you partially complete the next 3 double crochet stitches – each in a subsequent stitch – and then yarn over and pull through all 4 loops on your hook (the original loop + 1 loop for each partially completed dc).
Cluster Stitch Photo Tutorial
Beginning Cluster Stitch
If you are starting your row/round with a cluster stitch, the initial ch-2 will count as your first partial dc.
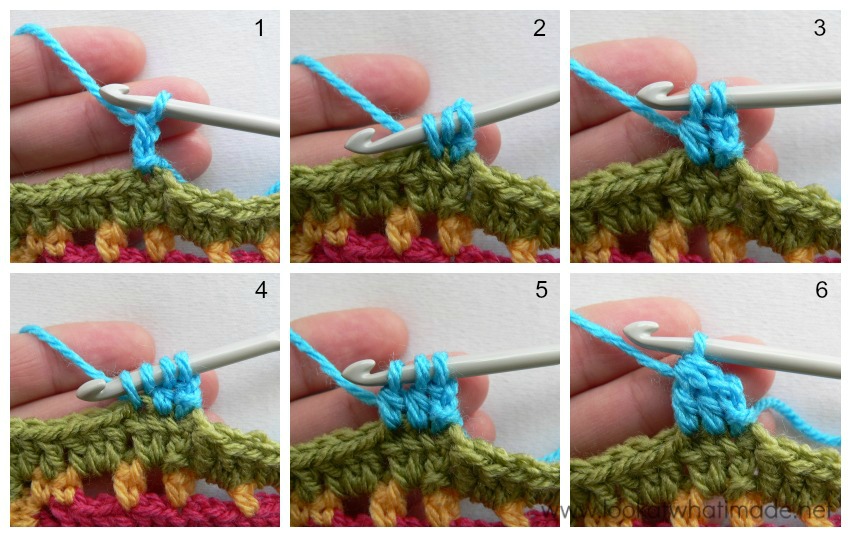
Ch 2 (Photo 1). Yarn over and insert your hook into the next stitch. Yarn over and draw up a loop – 3 loops on hook (Photo 2). Yarn over and pull through 2 loops – 2 loops on hook (Photo 3).
Yarn over and insert your hook into the next stitch. Yarn over and draw up a loop – 4 loops on hook (Photo 4). Yarn over and pull through 2 loops – 3 loops on hook (Photo 5).
Yarn over and pull through all 3 loops on your hook (Photo 6).
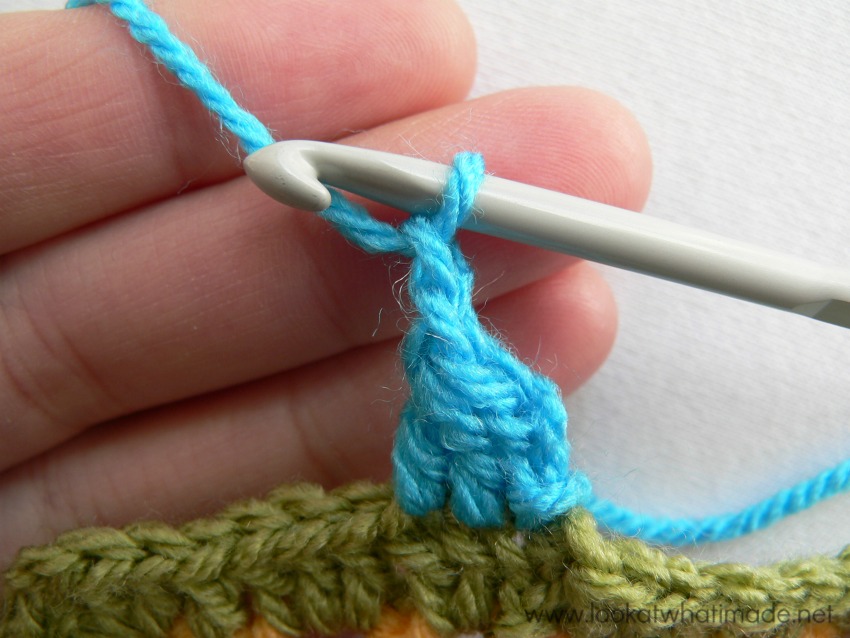
This is one beginning cluster stitch (or dc3tog) completed.
 Once you have made the cluster stitch, remember to ch 2 between cluster stitches. Some patterns might require you to make more chain stitches between clusters.
 Subsequent Cluster Stitches
If you are making a cluster stitch (or dc3tog) anywhere else than at the very beginning of a row/round, this is how you will do it:
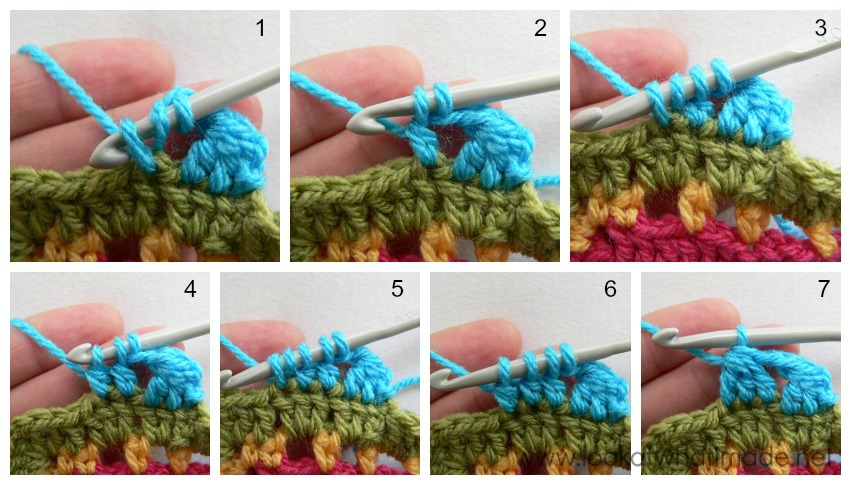
Yarn over and insert your hook into the next stitch. Yarn over and draw up a loop – 3 loops on hook (Photo 1). Yarn over and pull through 2 loops – 2 loops on hook (Photo 2).
Yarn over and insert your hook into the next stitch. Yarn over and draw up a loop – 4 loops on hook (Photo 3). Yarn over and pull through 2 loops – 3 loops on hook (Photo 4).
Yarn over and insert your hook into the next stitch. Yarn over and draw up a loop – 5 loops on hook (Photo 5). Yarn over and pull through 2 loops – 4 loops on hook (Photo 6).
Yarn over and pull through all 4 loops on your hook (Photo 7).
This is your cluster stitch (or dc3tog) completed.
 Anatomy of the Cluster Stitch
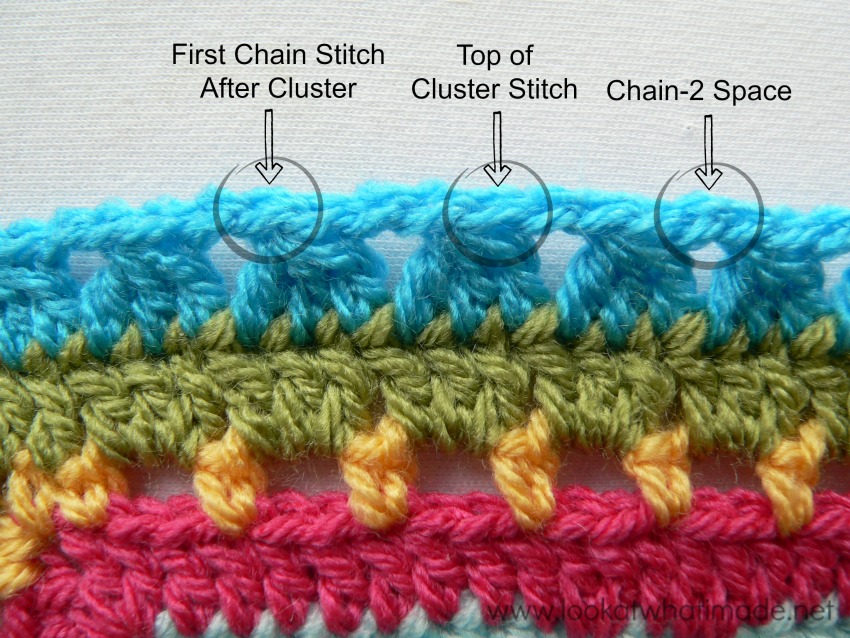
Some patterns will require you to work into the top of the cluster stitch. You will find the top (loops) of the cluster stitch right above the first partially-completed dc. If you are working in rounds, these loops will be situated more to the right (left if you are left-handed). If you are working in rows, these loops will be situated more to the left (right if you are left-handed).
Occasionally a pattern might instruct you to work into the ch st right after the cluster. You will identify this chain stitch as being the stitch (loops) directly above the third partially-completed dc of the cluster.
Sometimes a pattern will instruct you to work into the ch-2 space between clusters. If you are instructed to do that, work over the 2 ch st’s and into the space below them, not into the actual chain stitches…unless, of course, the pattern specifically tells you to.
My favourite way of using cluster stitches is by placing them over traditional granny-square 3-dc groups. They form little diamonds.
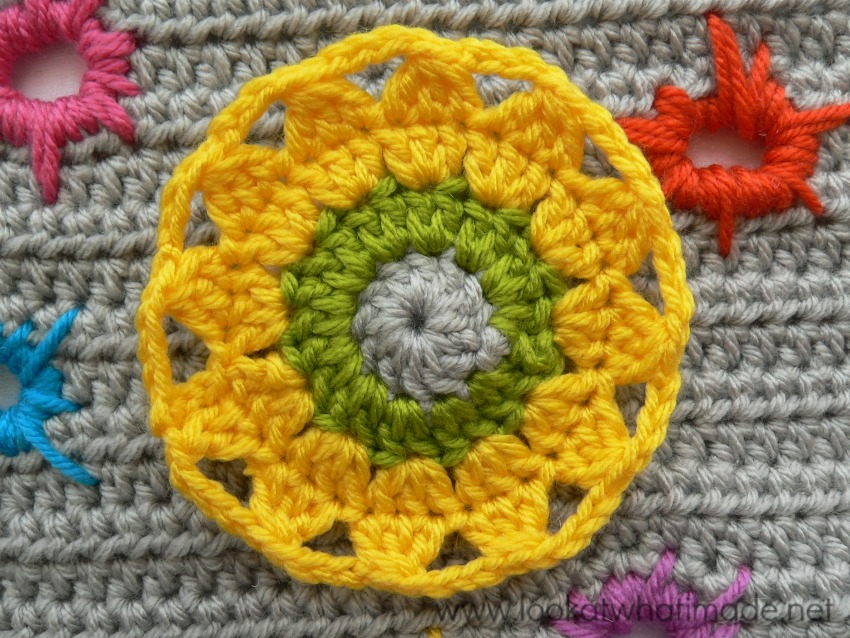
While I was doing this tutorial, I got distracted by my lovely new Deborah Norville Everyday yarn…I ended up making this quick little flower to illustrate the cluster stitch a bit better. The flower is resting on a Paint Splatter Square, also made with Deborah Norville.
And that’s it. Clusters done!
Remember to have a look at my other Free Crochet Tutorials and Patterns.
If you like what you see, consider subscribing to my Weekly Newsletter or following me on Facebook, Bloglovin or Google+.
Happy Hooking!



D says
So helpful!! Thank you :)
Jenny Lowman says
You’re welcome :)
Vidya says
Beautiful work! I am a newbie at crochet, and cannot help appreciating all your crochet work! I found the tutorial on clusters very helpful.
I am trying to make something from a pattern diagram. It is a cluster of three double crochets, but besides the chain connecting two cluster, the diagram shows two additional double crochets going horizontally between the clusters. I am not able to reproduce it. Would you be able to help? Thanks in advance.
Dedri Uys says
Hi. I would need to see the diagram in order to help you with this one. Please use the contact me tab to send me an email and I will reply, opening up a conversation in which you can send me a photo.
Dee Palin says
I haven’t done any crochet for years but am now getting my courage up to try again. I am a devoted knitter! Your tutorials are all so beautifully presented and helpful and are giving me no end of inspiration. When I get my new comfort crochet hooks from my husband for Christmas, I will be having a go. Thankyou so much. Keep up the good work.
Dee
Dedri Uys says
Hi Dee. Thank you. Which hooks are you getting? I have Clover Amour hooks and getting them was one of the best decisions I ever made! (And Jenny agrees)
Nina Paris says
Thank you for clear and concise directions and pictures. When ever I use the cluster stitch each row gets longer and my work would make a perfect collar to a sweater-top but the problem is I am making a blanket. Obviously I should delete stitches but everything I’ve tried doesn’t work. Any thoughts? Thanks
Dedri Uys says
Nina, have you got a photo of what your work looks like? That would help me tell you what the problem could be?
Людмила says
Очень веселые,яркие цвета и красивые орнаменты! очень рада,что нашла ваш сайт,мне нравится,я с вами! :))
Mary says
My pattern uses the cluster stitch over 3 stitches, but it also calls for a cluster stitch over 6 stitches. I haven’t started working on it yet, but would this mean to just continue the cluster for six stitches, having many loops on the hook, or should I do two clusters of 3?
Dedri Uys says
Mary, my guess is that you continue the cluster for six stitches. There should be an explanation somewhere. Maybe abbreviations or special stitches?
Suzanne Broadhurst says
My brain always gets bobbles and clusters mixed up. Thanks for the photos of both side by side. Maybe I’ll make the connection and get my terms straight. :-)
Dedri Uys says
Suzanne, you will have to refer to each individual pattern, though. As there is no real standard, people do use the terms interchangeably. But once you know what they expect of you (in the same stitch or in subsequent stitches), it is easy understand which of the two methods to use.
Rhondda Mol says
Beautiful photo tutorial Dedri :) Thank you!
Dedri Uys says
Thanx, Rhondda x