Jenny has been a very busy bee! She has fallen head over heels in love with Scheepjes Whirl, and every time I see her, it feels like she has started another Whirl project. Of all the Whirl projects she has made so far, her Whirl Sophie is my favourite! It is just so bright and beautiful.
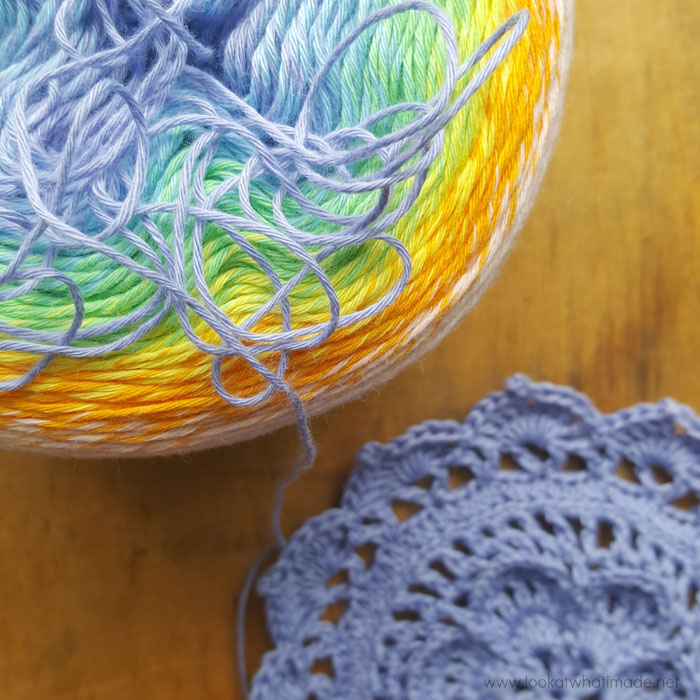
We know that a lot of people struggle with choosing colours for their Sophies, so using a long colour-change yarn like Whirl is perfect. All you have to do is choose your colourway, and away you go without having to worry about which colour to use next. And if colour isn’t your thing, you can have a look at Jenny’s Single Colour Sophie HERE.
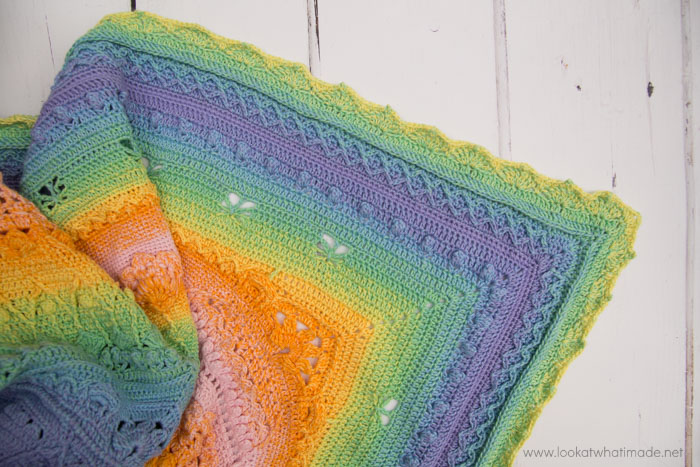
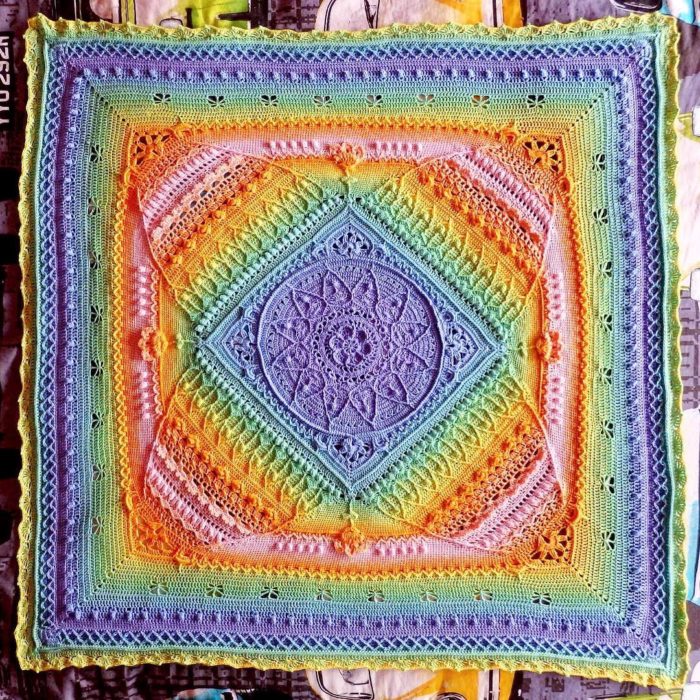
If you would like to make a Sophie in Whirl, you will find all Jenny’s notes below. But first I want to show you some photos of how prettily the colour changes played together.
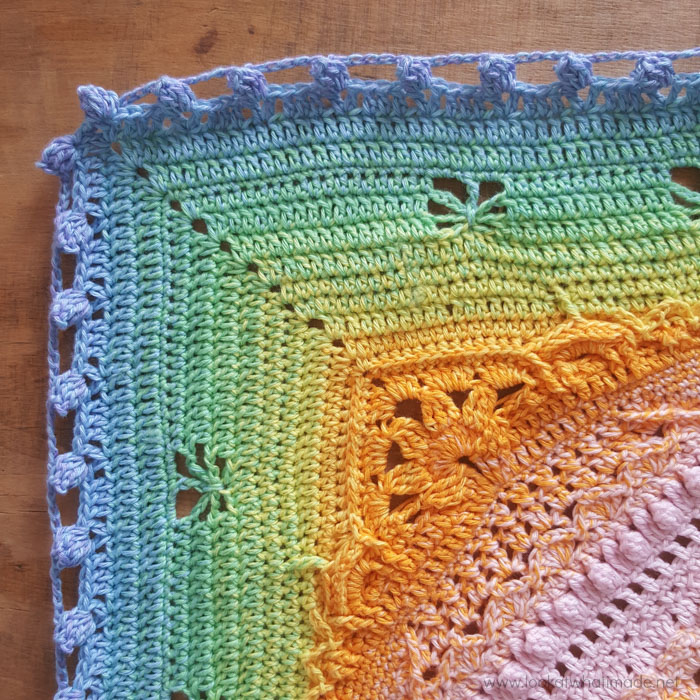
What a happy coincidence that the leaves of the central flower turned out green. It makes the central flower look like a summer flower bed under a blue sky.

And just look at that gorgeous orange corner flower!
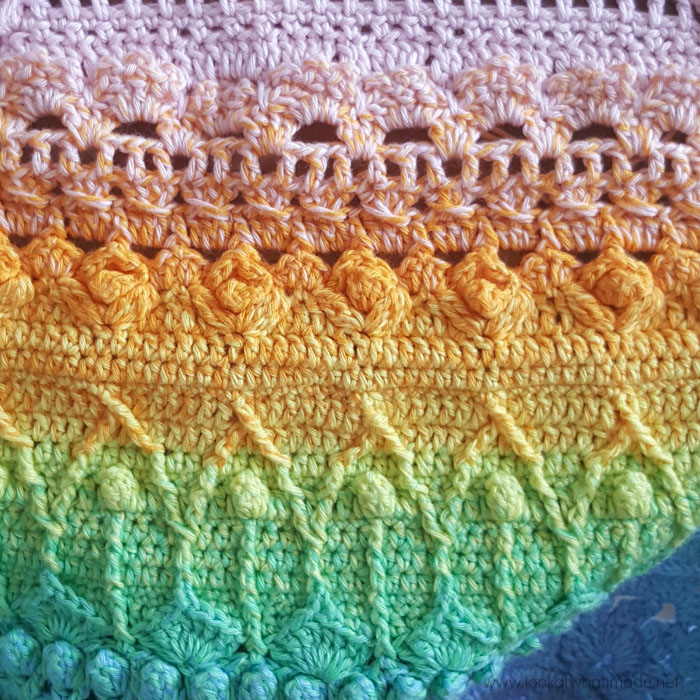
But my favourite part remains the roses!! If they weren’t so time-consuming, I would make a blanket just out of those roses.
You can see more of Jenny’s Sophie photos on Instagram at #scheepjeswhirlsophie and on Ravelry HERE.
Sophie’s Universe in Whirl
Pattern
You can find the pattern for Sophie’s Universe HERE. If you would like to buy the book, you can find the details HERE.
Materials
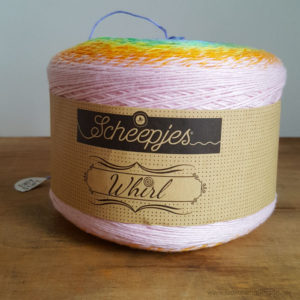
- 3 skeins of Whirl in the Cotton Candy Man (760) colourway (220g/1000m) – Available from Wool Warehouse, Deramores, and other Scheepjes Retailers.
- 3 mm hook (UK 11) – Parts 1 to 3
- 3.25 mm hook (US D/3 UK 10) – Parts 4 to 7
- 3.5 mm hook (US E/4 UK 9) – Part 8 onwards
Gauge
Your Sophie should measure 9.5 cm at the end of Part 1.
Size
- 95 cm at the end of Round 113
- 99 cm with extra rounds
Notes
- Jenny makes her chains much tighter than I do, so on Round 65, she replaced the ch-2 spaces on the short sides with ch-3 spaces to give her Sophie a bit more elasticity and to help prevent bulging. This is not such a big issue if you are working with a yarn that has a little bit of ‘give’, but if you work with cotton (no elasticity), and your chains are much tighter than the rest of your work, you might run into the same problem. If you feel that Round 65 is too tight for the previous rounds (in other words, your Sophie bulges at the end of this round), please redo it and replace your ch-2 spaces with ch-3 spaces (short sides only).
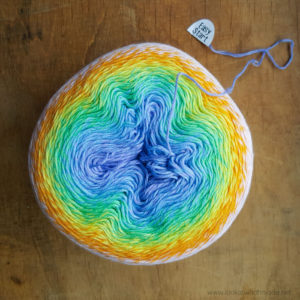
- Jenny started with purple (inside of the yarn cake) and worked her way to the pink (outside of the yarn cake). When the first cake was done, she started on the outside of the next one and worked her way back to the centre (pink to purple). For the last cake, she started with purple again.
- For her next Whirl Sophie, Jenny is starting with a 2.75 mm hook, moving up to a 3 mm hook at the start of Part 4, and moving up to a 3.25 mm hook at the start of Part 8. If you are a very loose crocheter, you might consider doing the same so that the last part of your blanket isn’t too ‘holey’.
- If you have questions about fastening off in some places despite using the same colour for the next round, please see the post about making Sophie in a Single Colour.

Photo taken by Jenny at The Arched House in Lyme Regis (June 2017 Devon Sun Yarns Retreat).
Jenny’s Border
When Jenny got to the end of Round 113, she didn’t want to stop. Partly because she just didn’t want to stop, and partly because she wanted to end on a pop of colour. She added three more rounds, which you can find below.
At the end of Round 113, you should have 216 sts per side.
Round 114
Sl st in the next st and into the ch-2 space. (Ch 3, dc, ch 2, 2 dc) in the same ch-2 space. This is your first corner made.
*Skip the first stitch, which will be hidden anyway. Dc in each of the remaining 215 sts. (2 dc, ch 2, 2 dc) in the next ch-2 corner space.* Repeat from * to * 3 more times, omitting the last corner on the last repeat. Join to the top of the beginning ch-3 with a sl st.
Stitch Count: 219 dc per side.
Round 115
Sl st in the next st and in the ch-2 space. (Ch 1, sc, ch 2, sc) in the same ch-2 space. This is your first corner made.
Sc in the first two sts. *(Skip the next 3 sts. Make 4 tr in the next st. Ch 3 and sl st into the third ch from your hook. This is your Picot made. Make 4 tr in the next st. Skip the next 3 sts and sc in the next st) 24 times. Sc in the last st. (Sc, ch 2, sc) in the next ch-2 corner space.* Repeat from * to * 3 more times, omitting the last corner on the last repeat. Join to the first sc with a sl st.
Stitch Count: 29 sc, 192 tr, and 24 Picots per side.
Round 116
Sl st into the ch-2 sp. (Ch 3, dc, ch 2, 2 dc) in the same ch-2 space. This is your first corner made. Dc in the next 3 sts. *(Hdc in the first tr of the next Petal. Sc in the next 3 tr. Ch 2 and skip the Picot. Sc in the next 3 tr, making sure to keep the ch-2 behind the Picot. Hdc in the last tr. Dc in the next sc) 24 times. Dc in the last 2 sts. (2 dc, ch 2, 2 dc) in the next ch-2 corner space.*
Repeat from * to * 3 more times, omitting the last corner on the last repeat. Join to the top of the beg ch-3 with a sl st. Fasten off and work away your ends.
Stitch Count: 144 sc, 48 hdc, 33 dc, and 24 ch-2 spaces per side (not including corner ch-2 sps).
Please Note: If you find that your last round makes your border too wavy for your liking, replace the repeats between bold brackets () with the following instead:
(Hdc in the first tr of the next Petal. Sc in the next 2 tr. Ch 2 and skip the next 2 tr and the Picot. Sc in the next 2 tr, making sure to keep the ch-2 behind the Picot. Hdc in the last tr. Dc in the next sc.)
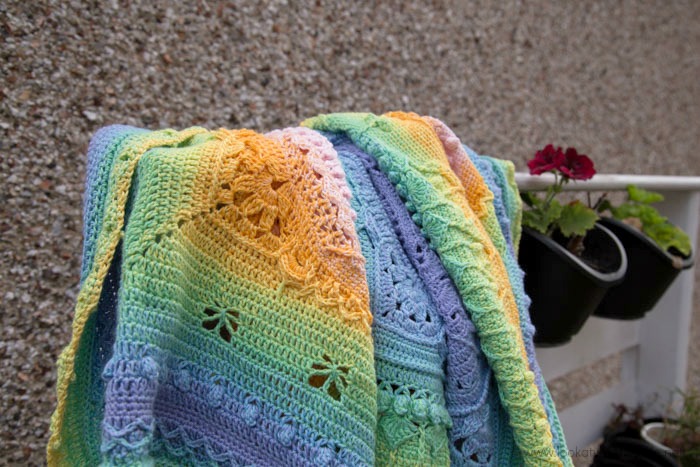
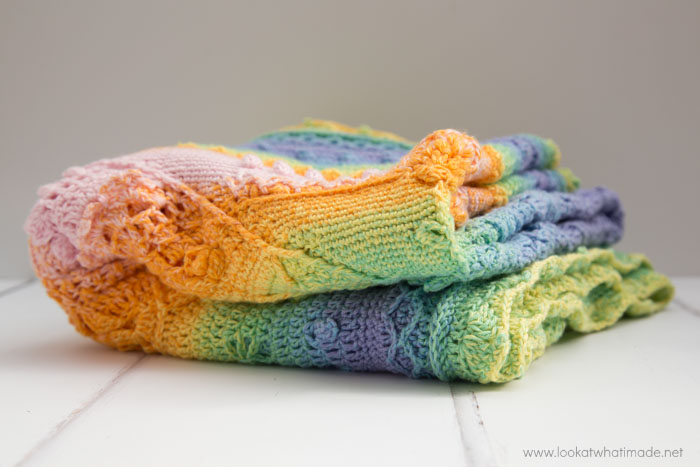
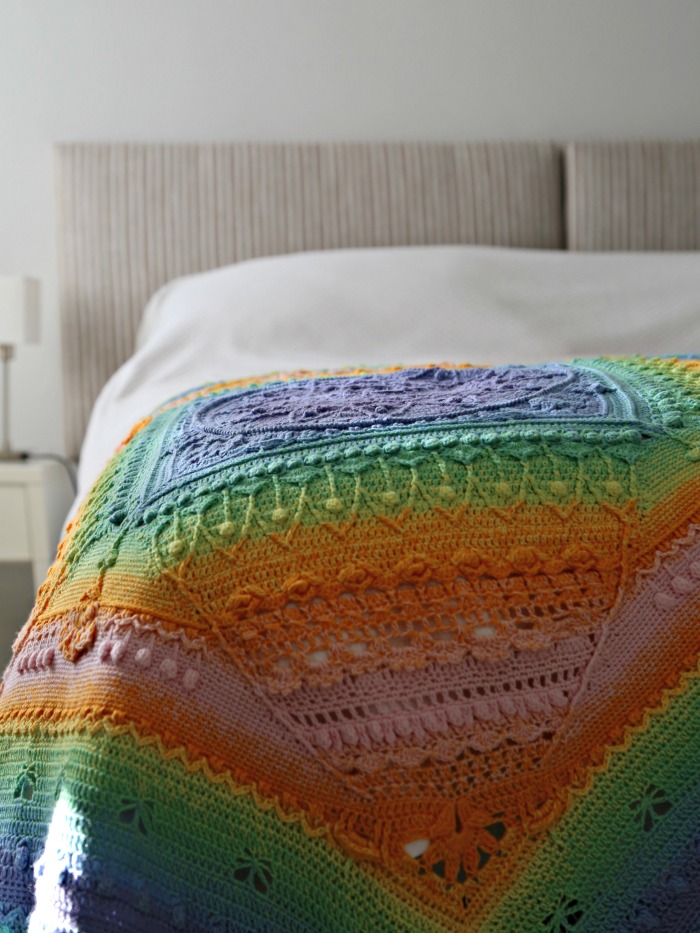
I’m going to share two more photos… just because I can’t resist. This is Sophie all folded up and ready to return to Jenny…
…and here is a photo Jenny took of the entire blanket. Isn’t it gorgeous?
And of course, I have to include a photo I took of this gorgeous blanket at one of our Devon Sun Yarns Retreats.
We would love to see your Whirl Sophies, so if you have made one (or will be making one), please use #scheepjeswhirlsophie so that we can see your photos.
More Whirl Patterns
Instagram Party
Ooh, before I go, I have just finished my first Instagram Party where I shared a 15-round Mandala as a photo tutorial. The pattern is by my friend John Kelly and will be available on my website soon can now be found on my website HERE. In the meantime, you can still join the party over on Instagram! Just scroll down on my feed until you see the photo that says #notacal and work your way up from there.

This blog post contains affiliate links. I only link to products I personally use or would use. All opinions are my own.


Angela says
Hello. I am having difficulty locating the link to your Sophie Universe crochet pattern on this webpage. Could you please assist me?
Also, I am a beginner at crochet (I’m a knitter) and wonder if it’s possible to gain access to your videos for this project präsent? Regards Angela
Jenny Lowman says
Here is the link Angela. It is under Cals on the home page, btw.
BW Jenny :)
Pilar says
Ni, Dedri. I’m just finishing my Sophie just like the one you show here from Jenny’s, using Scheepjes Whirl Cotton Candy Man. It’ s gorgeous.
When making round 116 of Jenny’s border, I chose the second option, but I was afraid anyway that the picots might fall back behind the ch 2, for example when using or washing the blanket, so I decided to make, instead of the ch 2: ch 1, bpsc around the 4th treble, ch 1. And I think it works. The border feels more stable, and I’m quite satisfied with the result. So, there’s an idea.
Congratulations for your patterns and your skill, and thanks so much for sharing them with all of us.
XXX from Spain, Pilar
Jenny Lowman says
So glad you enjoyed my Whirling Sophie version, Pilar :)
Annabel says
I just finished my Sophie. I stumbled upon the pattern by accident looking for something other than a scarf to crochet with a whirl. I had 3 cotton candy man whirls so it felt like fate.
I absolutely love the pattern. It’s easy to follow and if I got lost the videos were a huge help.
Thank you so much, for the lovely pattern.
Dedri Uys says
Hi Annabel,
Thank you for your lovely comment. I am so pleased that you enjoyed making Sophie. What a stroke of luck/fate that you had 3 whirls ready and waiting :)
Jacqueline says
Hi, I’m somewhat of a beginner but have done some other types of stitches using a video tutorial on YouTube. Are there any video tutorials for this pattern? It would be very much appreciated.
Dedri Uys says
Hi. There are step by step videos for each part. The links can be found at the start of each part.
Inbar says
Hey,
I love to crochet with those changing color cakes. But somtimes the color changes at the middle of a round (I hate that). I did not see it happens at this exsample. How come? And how can i avoid it?
Jenny says
Inbar, it does happen in my example here, you just can’t see it!
Best wishes
Jenny :)
Maryna van Emmenes says
Thanks Jenny as I am not going to crochet it for myself I have got to consider the fact that yellowish colours is not het favourite. Thanks for the advise.
Maryna van Emmenes says
Hi Jenny, I also bought the Cotton Candy but would like to skip the Yellow/Orange. What yarn will your recommend to use with the Whirl.
Your Sophie is beautiful!!
Dedri Uys says
Hello Maryna. I must admit to loving the orange and yellow in the Cotton Candy Man Whirl, but maybe have a look at the Whirlette in 852 Frosted, which is a lovely delicate silver grey? That shade would compliment the remaining colours pretty well, but would interrupt the smooth flowing colour changes a bit.
Jenny
Kay says
Hi Dedri,
What a beautiful blanket!
I have just finished Sophie’s universe which is my first project. It took 5 months and had brought me endless joy throughout the journey. Your instructions were clear and easy to follow. I cannot bear to part with it as a gift. And now you have provided me with a great colourway for my second sophie as a gift! Perfect!
Thank you for sharing your talent and skill with us all. May the sun be smiling at you in your corner of the world ☀️
Regards,
Kay, from Australia
Dedri Uys says
Hi Kay from Australia :) I am so pleased that you enjoyed your journey. Rosewater Cocktail is also a brilliant and slightly more vibrant Whirl colourway… just thought I would throw that out there :)
Malika says
Hi! This is beautiful. Can you let me know what the final dimensions are (including Jenny’s border, which is also very pretty). How much of the whirl was left?
Jenny says
Hi Malika. My Whirling Sophie is 95cm square after round 113 and 99cm with the border added.
Jenny
Leslie Madden says
I’m so excited…I had wanted to start one awhile back thinking i would use the Caron Cakes when they first came out but never got around to it…I’ve been buying whirls because i love the colors so much and now just started the Sophies with the whirl and am loving the color and feel! I’m using the Rhubarb Bumble and it’s so pretty! i just finished part 3 but didnt have a 3mm hook. I have a 2.75 and a 3.25, 3.5 but you had mentioned that the 3.5 left it a little holy…is it better with using the 3mm and then 3.25?
Dedri Uys says
If you are starting with a 2.75, I would use a 3 and then a 3.25. Otherwise, make the first 7 parts in a 2.75 and then go up to the 3.25? Good luck!
Vickie says
Looks really different doesn’t it? But still pretty, looks like Easter.
Jenny Watson says
I think this is lovely – both design and colours used. As I would not say that I am an ‘expert’ at crocheting, just how difficult is this pattern?
Thank you for sharing it with us.
Dedri Uys says
Hi Jenny. It was written specifically for adventurous beginners. There are photo tutorials for each round, as well as video tutorials that show you exactly what to do. Why not give the first part a go in scrap yarn and see how you get on :)
Amelia Vincent says
Just gorgeous!
Dedri Uys says
Thank you :)
Lynnell says
This is one of the most beautiful Sophie’s I’ve seen! So gorgeous!
Dedri Uys says
Jenny will be very pleased to hear that!