Welcome to Part 2 of the Camping in Cornwall Rug/Mandala pattern. You can find Part 1 (and all the information) HERE.
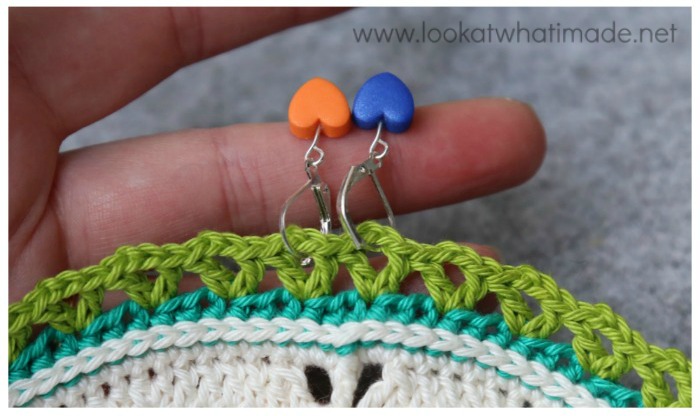
Round 15 {Yarn B}
With Yarn B sl knot on your hook, start in any BPhdc directly above a FPhdc from Round 13 with a standing st:
([Dc, ch 2, dc] in the next st. Skip the next 2 sts) 48 times. Join OVER the first dc with an invisible join and work away your ends. Mark the first and second ch-2 sps with a Stitch Marker.
{96 dc and 48 ch-2 sps}
Round 16 {Yarn G}
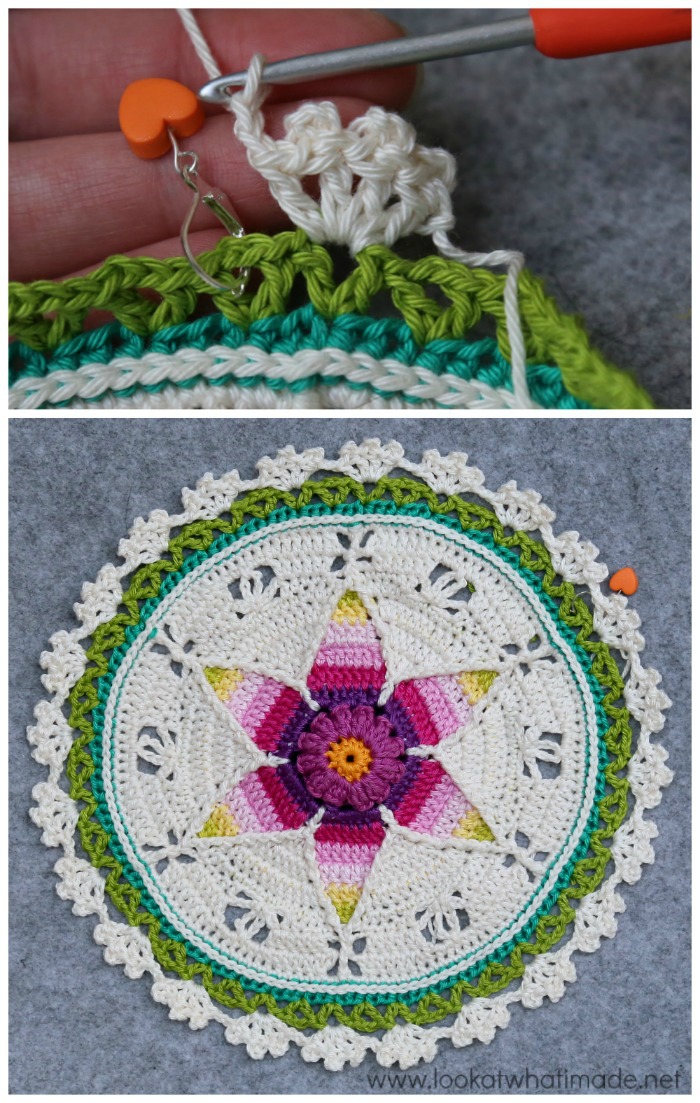
With Yarn G sl knot on your hook, start in the first (marked) ch-2 sp with a standing st:
*Make three Picot Dc in the next ch-2 sp. Dc in the same ch-2 sp. Ch 2. Skip the next (dc, ch-2, dc) group.*
Rep from * to * 23 more times. Join OVER the first dc with an invisible join and work away your ends. Remove the first Stitch Marker.
{24 Flowers (each containing 3 Picot Dc and 1 dc) and 24 ch-2 sps}
Round 17 {Yarn D}
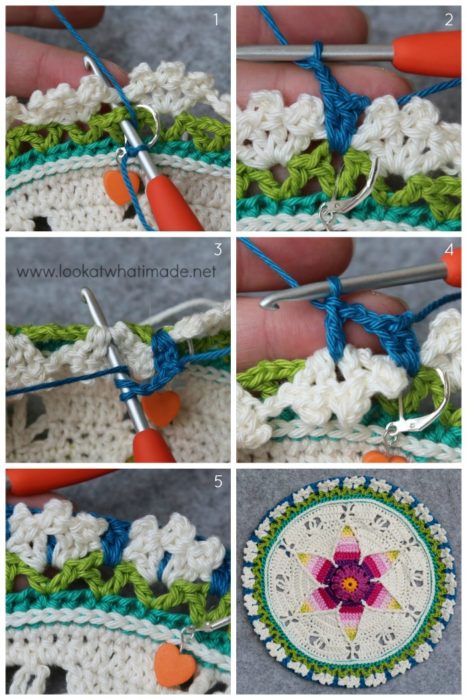
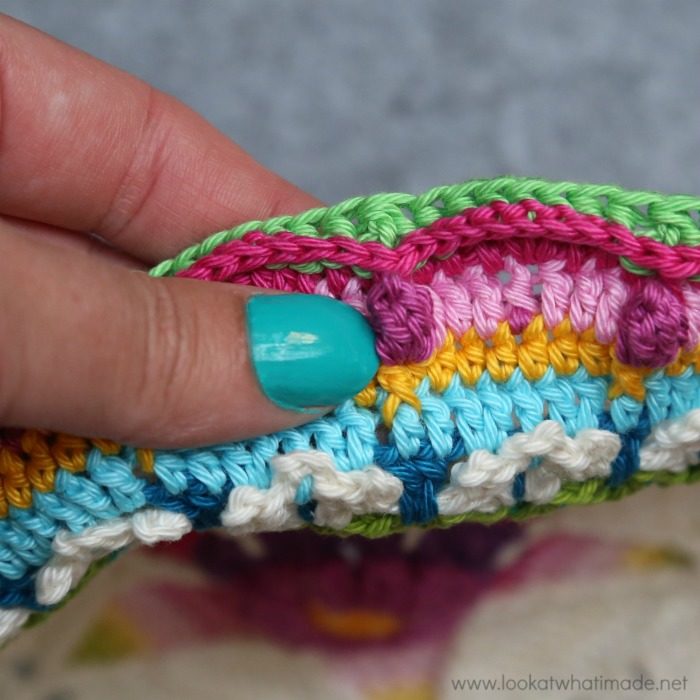
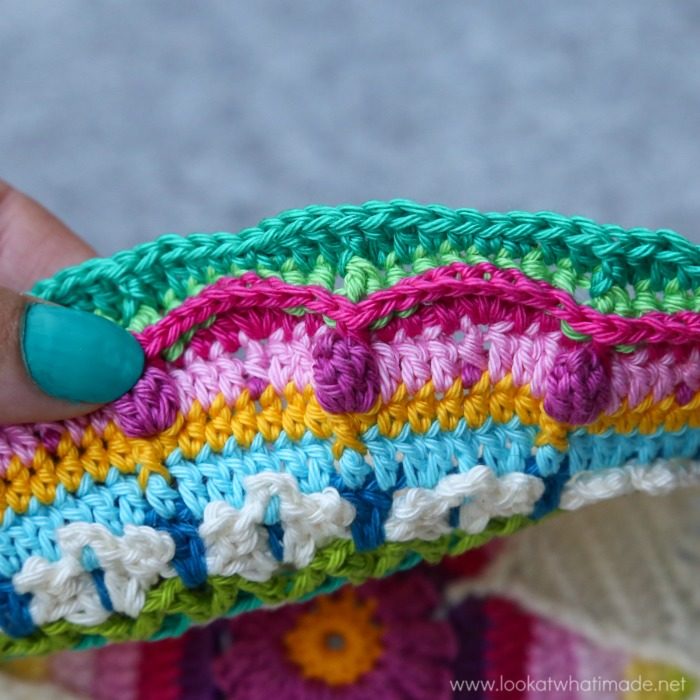
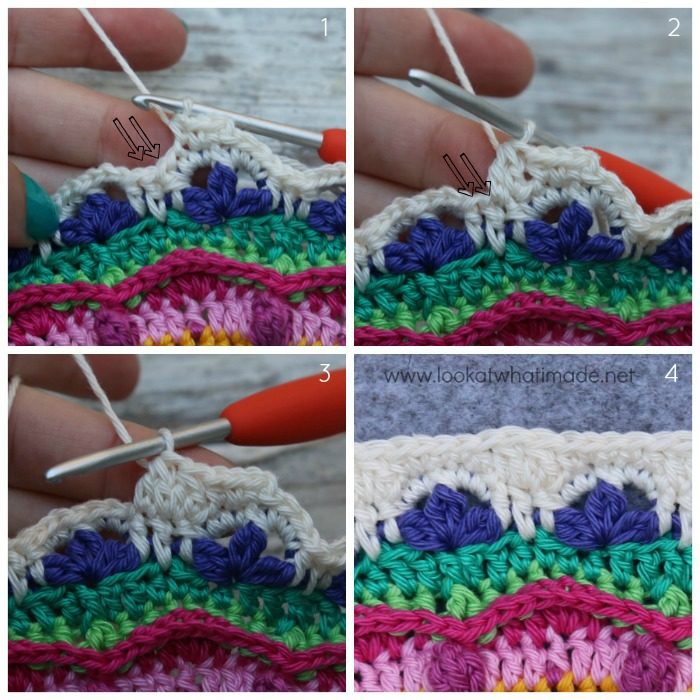
In this round, you will only be working into the ch-2 sps from Round 15. When working between the second and third dc of each Flower, you will find it easier to fold the Flower towards you {Photo 3}.
With Yarn D sl knot on your hook, start in the second (marked) ch-2 sp from Round 15 with a standing st:
*Make 2 dc in the next ch-2 sp from Round 15, working OVER the ch-2 from Round 16 {Photos 1 and 2}. Ch 2. Working behind the Flower, dc into the next ch-2 sp, placing the dc between the second and third dc from the previous round {Photos 3 and 4}. Ch 2.*
Rep from * to * 23 more times. Join to the first dc with a sl st. Remove the second Stitch Marker.
{72 dc and 48 ch-2 sps}
Round 18 {Yarn D}
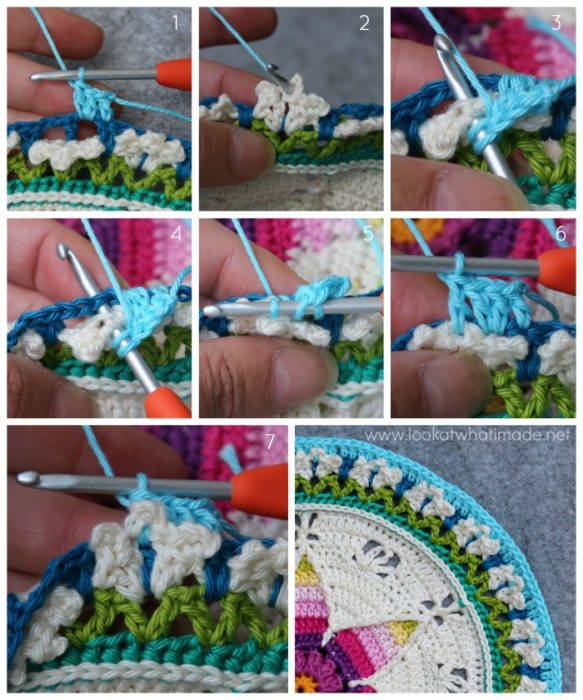
Catching Dc: Yarn over and insert your hook from back to front into the ch-3 loop of the central Picot from Round 16 {Photo 2}, then insert it from front to back between the posts of the second and third dc of the Flower {Photo 3}. Finally, insert your hook into the dc from Round 17 directly behind the flower {Photo 4}. Yarn over and pull up a loop (through all the layers). There should now be 3 loops on your hook {Photo 5}. (Yarn over and pull through two loops) twice {Photo 6}.
Sl st in the next st. Ch 3 (counts as first dc).
*Make 2 dc in the next ch-2 sp {Photo 1}. Make a Catching Dc into the Flower from Round 16 and the dc from Round 17 (directly behind it). Make 2 dc in the next ch-2 sp. Dc in the next 2 sts.*
Rep from * to * 23 more times, omitting the last dc on the last repeat. Join to the top of the beginning ch-3 with a sl st.
{168 dc}
Round 19 {Yarn D}
When you make this round, check that your FPdc stitches fall neatly between two Flowers. If they are offset, something has gone awry.
Here is a handy hint if you need a landmark: In Round 17, there are two dc between each flower. Mark the Round 18 dc that falls into the second of those two dc with a Stitch Marker. Your FPdc should fall in that stitch.
Ch 1.
([Hdc, FPdc] in the next st (see above). Hdc in the next 6 sts) 24 times. Join OVER the first hdc with an invisible join and work away your ends.
{168 hdc and 24 FPdc}
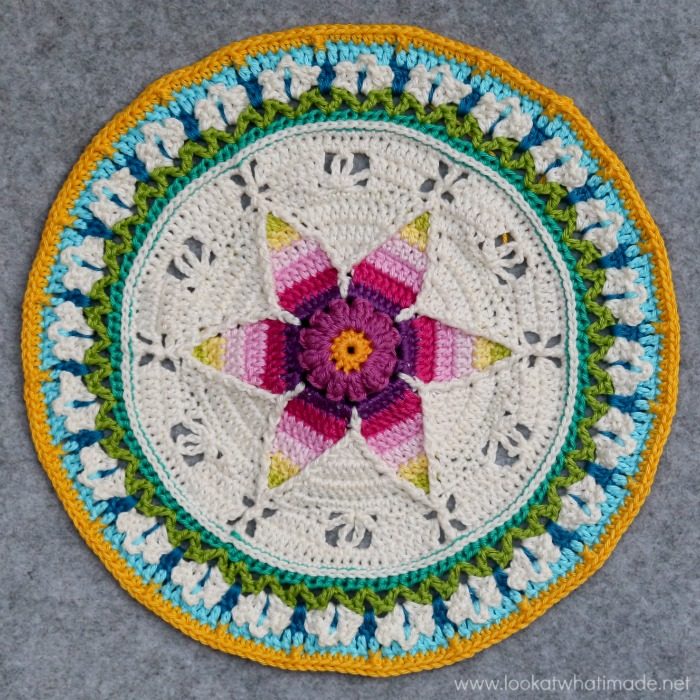
Round 20 {Yarn C}
With Yarn C sl knot on your hook, start in any FPdc with a standing st:
(Make a Popcorn in the next FPdc, ch 4, skip the next 3 sts. Sc in the next st, ch 4, skip the next 3 sts) 24 times. Join OVER the first Popcorn with an invisible join and work away your ends.
{24 sc, 24 Popcorns, and 48 ch-4 sps}
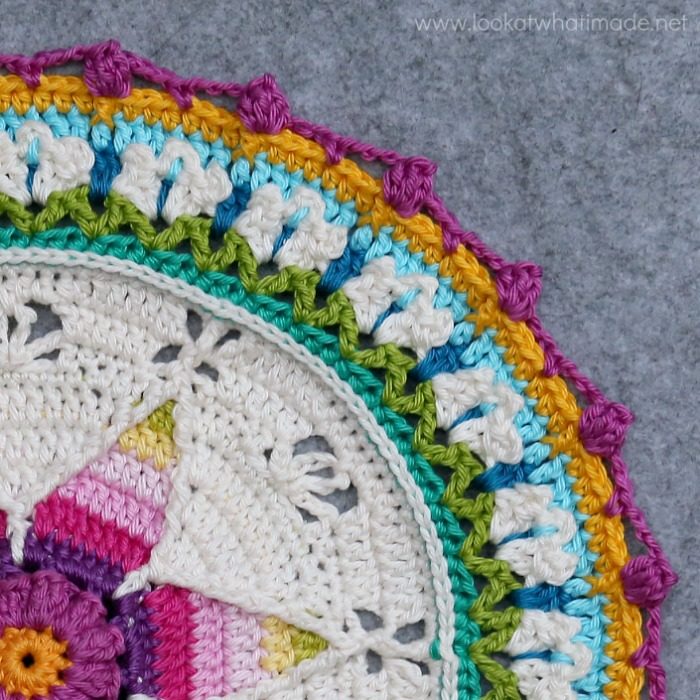
Round 21 {Yarn D}
Apart from when you make the FPhdc into the sc stitches, you will be working this round into Round 19 and IN FRONT OF Round 20. You will find it easier to do this round if you fold Round 20 down behind your work when not working into it {Photo 1}. Don’t worry about the fact that the Popcorns are hidden behind your work.
With Yarn D sl knot on your hook, start in the first hdc from Round 19 directly after a Round 20 Popcorn with a standing st:
(Dc in the next 3 sts. FPhdc around the sc from Round 20. Dc in the next 3 sts {Photo 1}. Ch 1 and skip the next Popcorn) 24 times. Join to the first dc with a sl st.
When you have completed the round, pop the Popcorns through the ch-1 spaces. Isn’t that just SO satisfying?
Photos 2 and 4 show the Popcorns before ‘popping’. Photos 3 and 5 show them after ‘popping’.
{24 FPhdc, 144 dc, and 24 ch-1 sps}
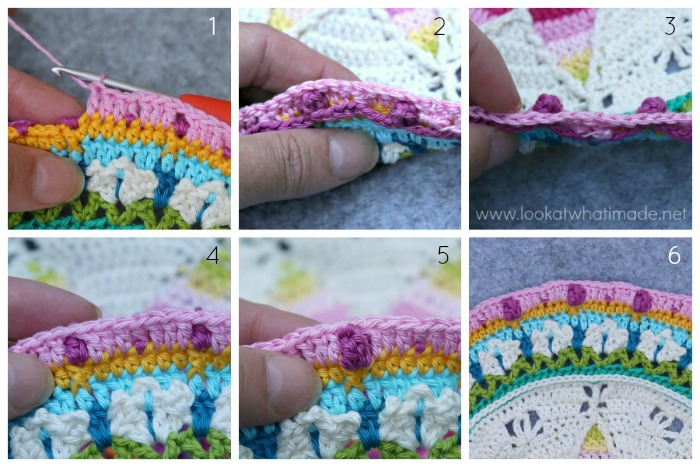
Round 22 {Yarn D}
When making your FPhdc around a Popcorn, insert your hook from front to back between the last Round 21 dc before the Popcorn and the Popcorn {Photo 1}. Then insert it from back to front between the Popcorn and the next Round 21 dc {Photos 2 and 3}. Complete your FPhdc as normal {Photo 4}.
Mark the second hdc of the round with a Stitch Marker.
Ch 1.
(Hdc in the next 2 sts. Dc in the next st. Make 3 dc in the next st, which should be the FPhdc. Dc in the next st. Hdc in the next 2 sts. FPhdc around the Popcorn from Round 20, making sure to work IN FRONT OF Round 21 as instructed above) 24 times. Join OVER the first hdc with an invisible join and work away your ends.
{96 hdc, 24 FPhdc, and 120 dc}
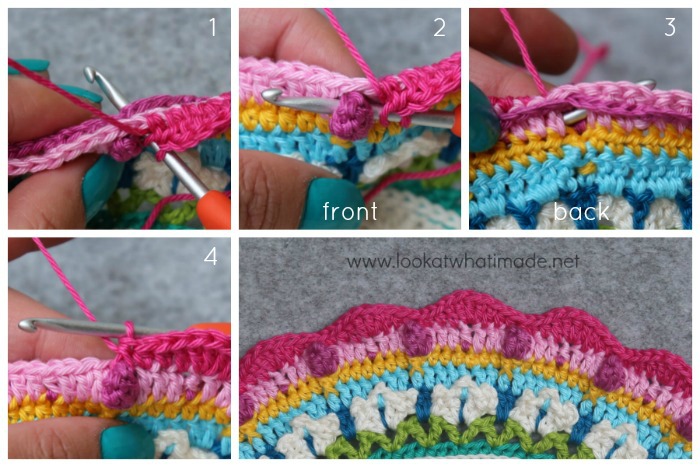
Round 23 {Yarn B}
With Yarn B sl knot on your hook, start in the second (marked) hdc of the previous round with a standing st:
(BPhdc in the next 2 sts. BPSc in the next 3 sts, which should be the 3-dc group from the previous round. BPhdc in the next 2 sts. BPdc2tog over the next 2 hdc, skipping the FPhdc between them) 24 times. Join to the first BPhdc with a sl st. Remove the Stitch Marker.
{72 BPsc, 96 BPhdc, and 24 dc}
Round 24 {Yarn B}
The first BPhdc after each BPdc2tog from Round 23 will be slightly hidden. Don’t accidentally skip it.
Ch 3 (counts as first dc). Dc in the next st, hdc in the next st. Sc in the next 2 sts, hdc in the next st, dc in the next st. [Dc, FPdc] in the next st, which should be the BPdc2tog.
(Dc in the next 2 sts, hdc in the next st. Sc in the next 2 sts, hdc in the next st, dc in the next st. [Dc, FPdc in the next st, which should be the BPdc2tog) 23 times. Join OVER the beginning ch-3 with an invisible join and work away your ends.
{48 sc, 48 hdc, 96 dc, and 24 FPdc}
Round 25 {Yarn F}
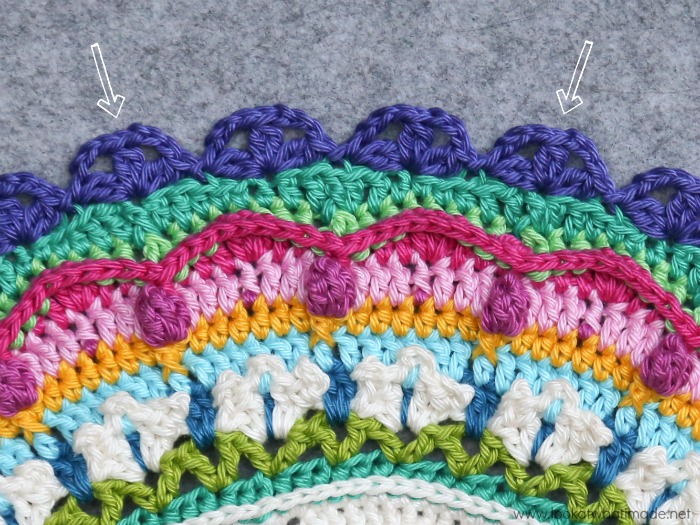
Landmark: The second Flower will fall in a FPdc. Every third Flower after that will also fall in a FPdc {see arrows in photo}.
Note: Don’t worry if the sl sts pull the back loops up. We will fix that in the next round.
With Yarn F sl knot on your hook, start in any FPdc:
(Sl st in the BLO of the next st. Skip the next 2 sts. [Dc Bobble, ch 3, Dc Bobble, ch 3, Dc Bobble] in the next st. Skip the next 2 sts) 36 times.
Finish by making a sl st in the BLO of the next st, which will already contain the first sl st. Fasten off and work away your ends.
{36 Flowers, each containing 3 Dc Bobbles and 2 ch-3 sps – not including sl sts}
Round 26 {Yarn A}
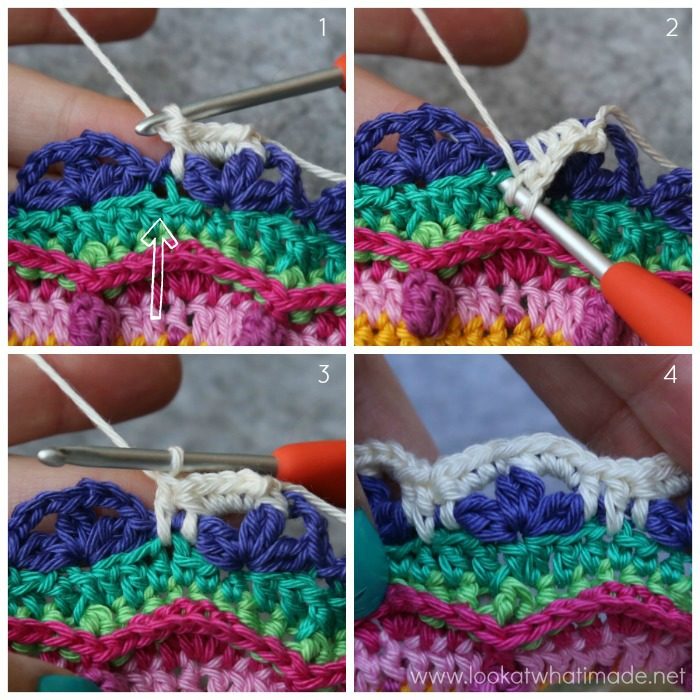
With Yarn A sl knot on your hook, start in the central Dc Bobble of any Flower with a standing st:
*FPsc around the next (central) Dc Bobble. Make 3 sc in the next ch-3 sp. FPhdc around the next Dc Bobble. Dc in the st from Round 24 that already contains the BLO sl st, working OVER the sl st and into both loops of the st {Indicated with an arrow in Photo 1 and illustrated in Photos 2 and 3}. FPhdc around the next Dc Bobble. Make 3 sc in the next ch-3 sp.*
Rep from * to * 35 more times. Join to the first FPsc with a sl st.
{216 sc, 36 FPsc, 72 FPhdc, and 36 dc}
Round 27 {Yarn A}
Ch 1.
*Sc in the FPsc, sc in the next sc, hdc in the next sc. Skip the next sc. Dc2tog over the next FPhdc and dc {Arrows in Photo 1}. Dc2tog over the same dc and the next FPhdc {Arrows in Photo 2}. Skip the next sc. Hdc in the next sc. Sc in the next sc.*
Rep from * to * 35 more times. Join to the first sc with a sl st.
{108 sc, 72 hdc, and 72 dc}
Round 28 {Yarn A}
Ch 1. Hdc in each st around. Join OVER the first hdc with an invisible join and work away your ends. {252 hdc}
Round 29 {Yarn D}
With Yarn D sl knot on your hook, start in any st with a standing st:
BPdc in each st around. Join OVER the first BPdc with an invisible join and work away your ends. {252 BPdc}
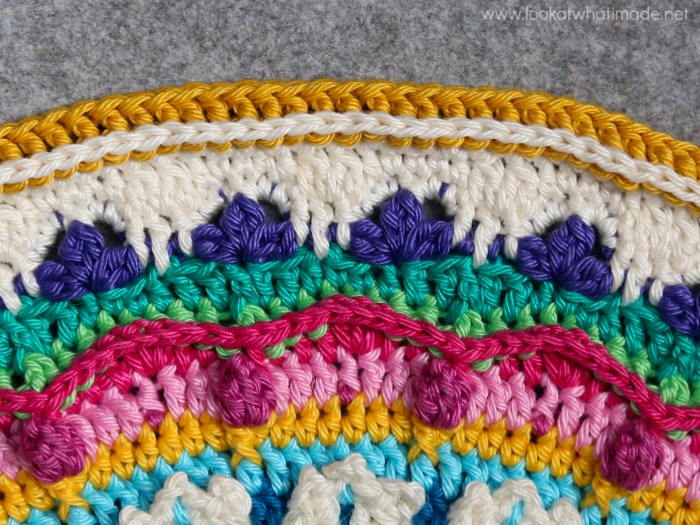
Blocking
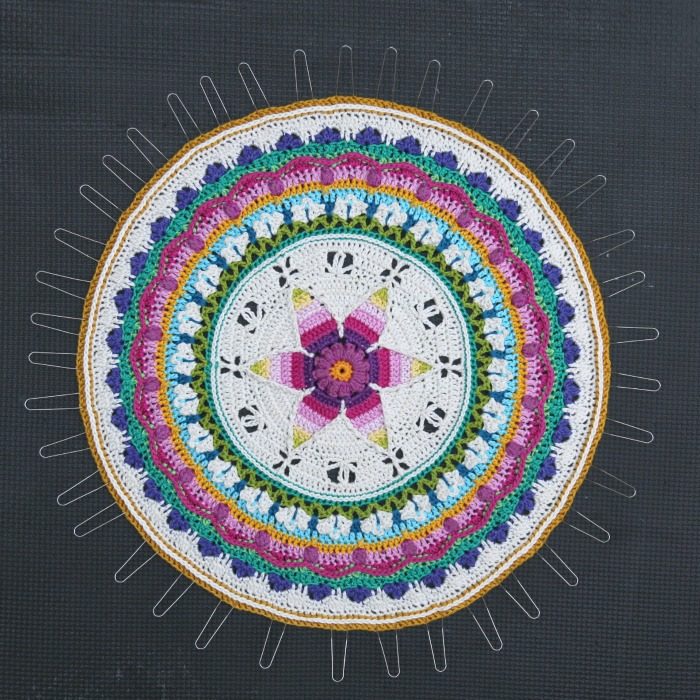
When you have finished, I suggest that you block your rug to open up the lace and floral detail. To do that, wet the rug and gently wring out the water. Pin the rug, stretching it gently and making sure that you end up with a circle not an oblong. When it it dry, unpin and use!!!
I use these Interlocking Foam Exercise Mats. They are similar to these Knitter’s Pride Lace Blocking Mats, but cheaper. I also use Clover Fork Blocking Pins, although regular sewing pins work just as well.
This is how my Catona version turned out. It is 36cm/14″ in diameter and weighs 104g. As soon as I find a suitable hoop, I am going to hang this one up on my Mandala Wall.
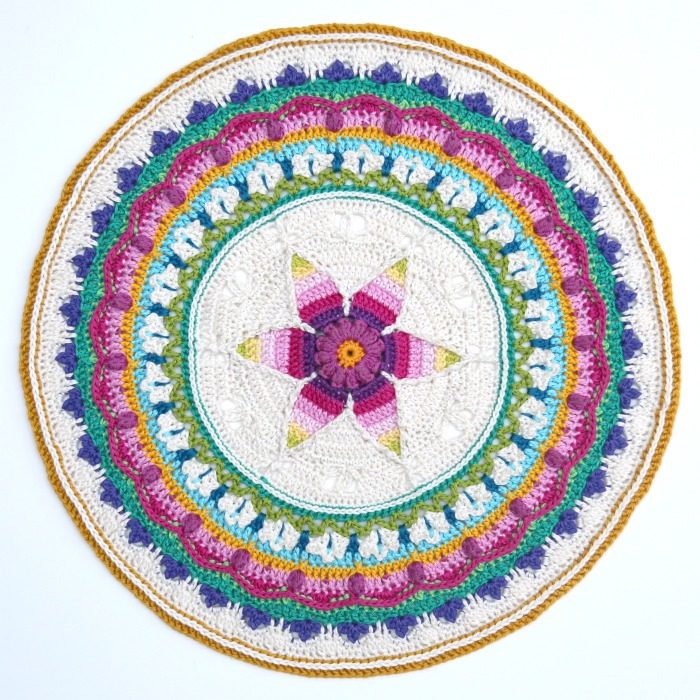
And this is what the rug looks like when it is done:
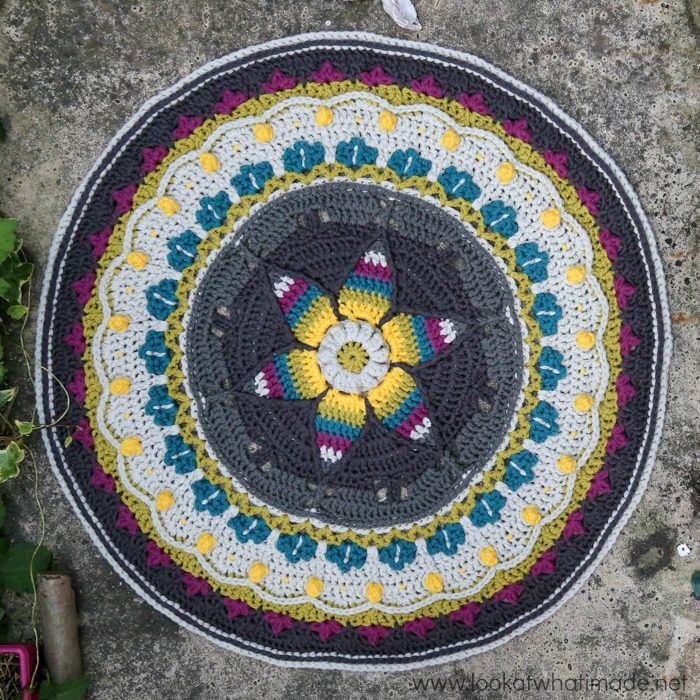
I hope you have enjoyed making this rug/mandala and cannot wait to see your versions.

This blog post contains affiliate links. I only link to products I personally use or would use. All opinions are my own.


Gramz says
This rug is so lovely! Thank you for sharing the pattern.
will make for granddaughters Hope Chest.
Thanks again,
A Pround Grandma
Merren says
Thank you so very much for this, it’s beautiful!
Dedri Uys says
Thank you :)
Vickie says
Thank you for this tutorial. Just love your patterns.