In Part 3 of the series on Joining Crochet Squares we will take a look at my 5 favourite solid join methods (with a few bonus ones added for fun). If you haven’t taken a look at Part 1 (Preparing to Join Crochet Squares), I suggest you hop over and take a quick look.
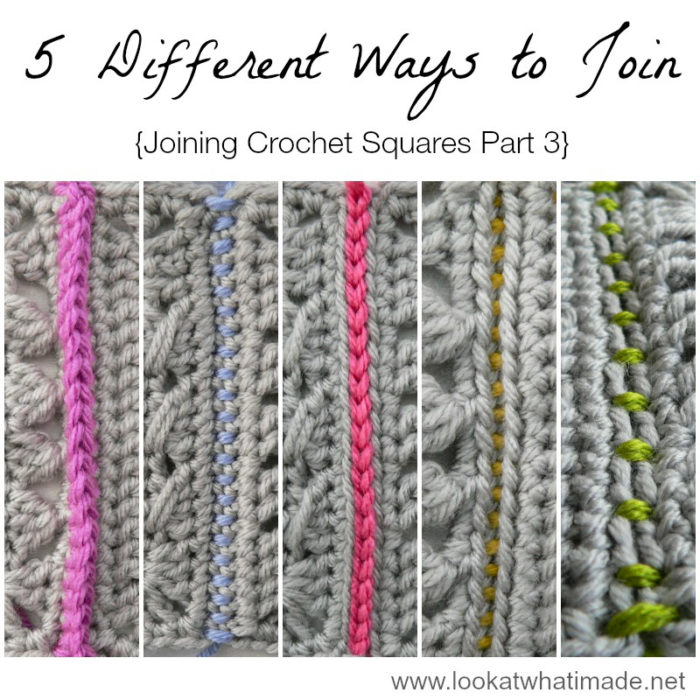
The 5 methods below each yield a different look with different characteristics. If you are sure that you want a solid joining method (as opposed to a lacey one), I am confident that one of these will suit your needs.
5 Different Ways to Join Crochet Squares (Solid Joins)
1. Single Crochet Join (Wrong Sides Together)
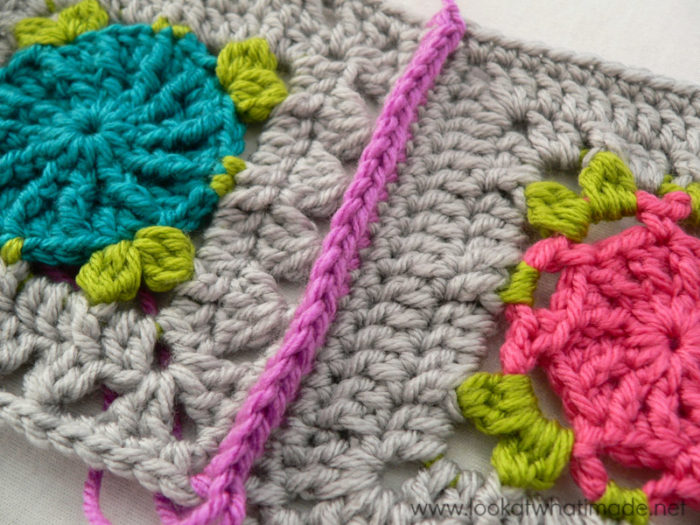
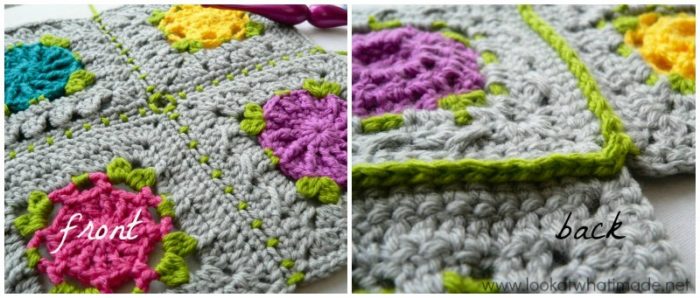
Using a single crochet join with the wrong sides of the squares facing each other yields a sturdy seam that stands up, forming a little dam around each square. This method is quick and one of the simplest. Some people love the 3-dimensional effect. Some people really dislike it. It all depends on you and the look you are going for.
You can find an excellent tutorial for the Single Crochet Join HERE. It is by Sarah from Repeat Crafter Me, and is a brilliant example of when the 3-dimensional effect enhances the overall look of the blanket. I love, love, LOVE the Daisy Afghan she uses to demonstrate the join.
2. Single Crochet Join (Right Sides Together)
Using the same method as above, but placing the squares with their right sides together instead, yields a lovely “stitched” look that is flat and just as sturdy as the first method (because they are the same thing, just done differently).
Because you are doing the join with the right sides together, the raised sc seam will be on the back of the blanket. If you use the same colour for joining as you used for the last round of your squares, the join will blend in and become invisible on the front of your blanket.
3. Completely Flat “Zipper” Join
This is my favourite join.
It used to be my least favourite. In fact, I would go so far as to say I hated doing it, because it does take more time than the others (and I was lazy back then). My friend Beth convinced me to give it another go and now I love it!
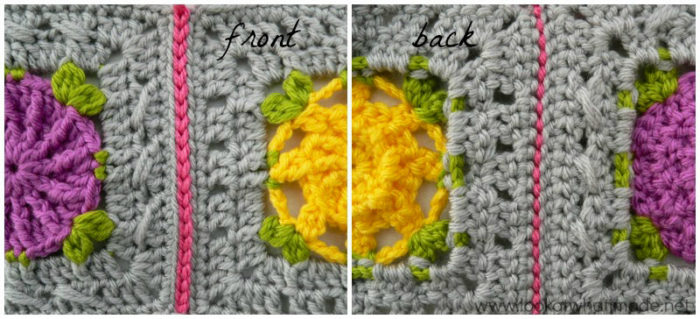
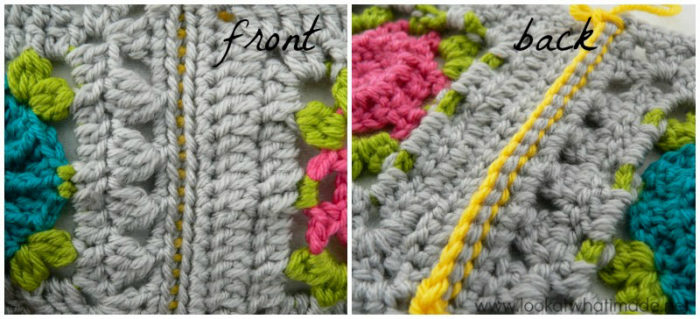
It yields a completely flat seam that looks beautiful and elegant, both in the same colour, and in a contrasting colour. On the front it looks like a row of chains, because it is essentially surface slip stitches. On the back it creates a running stitch (see photo above).
This method is less elastic than the others, for what that’s worth. It works really well with cotton, where elasticity isn’t an issue :)
You can find the tutorial for the zipper join HERE.
4. Slip Stitch Outside Loops Only Join (Right Sides Together)
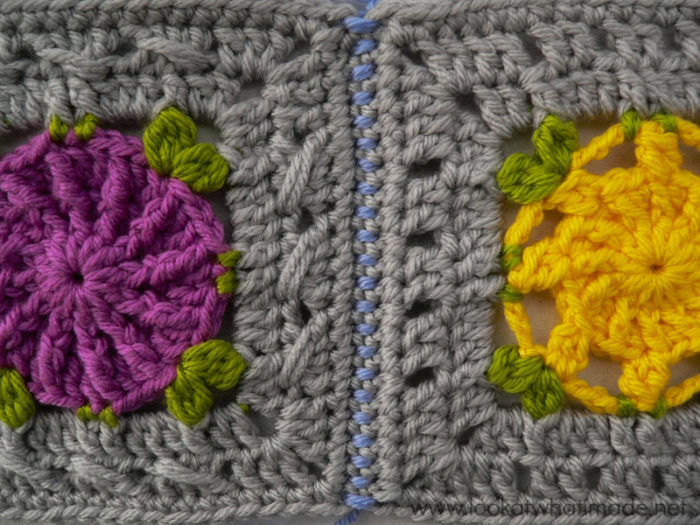
With this method the squares are joined with their right sides facing each other. You then sl st through the outside loops only of each stitch (in other words, the front loop of the square closest to you and the back loop of the square farthest away from you).
On the back it creates a 3-dimensional seam that is less prominent than the single crochet seam, but also less neat in appearance (when using a contrasting colour).
On the front, however, this method is a beauty!
If you pull the 2 squares apart slightly you can see the “stitches” formed on the front. I have done this so that you can see what the join should look like. However, at rest (so when not pulling the squares apart to reveal the stitches) the stitches are not visible from the front and the 2 unworked loops of each st lie next to each other and form a pretty little flat line.
You can find a brilliantly colourful tutorial from Attic24 HERE.
5. (Sc, ch 1, skip 1) Join (Right Sides Together)
For ease of use and simplicity this is my favourite method (but still less favourite than the zipper join). This is a modification of how my granny joins her blankets. It is very similar to the single crochet join (with right sides together), but slightly more elastic. The ridge created on the back is slightly less pronounced than the second method above, but more pronounced than Method 4.
The “stitches” on the front are less busy (because there are fewer of them) and the seam is completely flat on the front.
You can find the tutorial for the (sc, ch 1, skip 1) join HERE.
Additional Solid Joins You Might Like
- Solid Granny Join as You Go – This Video from Oana’s Crochet Chanel is so cute! Listening to her made me happy.
- Visible Join by Zooty Owl. This method is very similar to the (sc, ch 1, skip 1) join. Probably because Zelna is South-African and learnt it from her granny too.
- Tight Braid Join by Tamara Kelly from Moogly.
- *Sewing Alert!!!* Invisible Seam Stitch by Rhondda from Oombawka Design
Just to remind you what I have in store for the next fortnight:
- Part 1: Preparing to Join Your Afghan
- Part 2: (Sc, ch 1, skip 1) Join
- Part 3: Different ways to Join – This Post
- Part 4: Joining Squares With Different Stitch Counts
- Part 5: Making Foursquares
- Bonus: Betty’s Beautiful Border

This blog post contains affiliate links. I only link to products I personally use or would use. All opinions are my own.

MDy says
Your tutorials are an absolute delight. I find I learn so much – not only a way to join, but also how important color is and how to use it. (Yours is one of the very best tutorials where the color you use really helps to demonstrate the technique in question.). And I think your photography is super and inspirational. I find myself itching to try out the techniques. Thank you so much for sharing important and helpful information and for doing it in such a delightful way.
Jenny says
So glad you find this useful! I do too and refer to it whenever I need to join squares :)
Jenny
Mary Christensen says
I love all of your tutorials and Sophie is the root of all that is good! I am loving the 5 methods of joining. I am curious if you can tell me a good ‘rule of thumb’ on how much yarn each method requires? Which method is a yarn hog and which method uses the least amount? And most importantly how do I calculate the amount of yarn needed for a join? If my squares are 6 x 6 or 12 x 12 is there a number I can plug into a formula?
Dedri Uys says
Hi Mary. Unfortunately there is no formula for how much yarn you would need. It depends very much on personal tension and the type of yarn you decide to use. None of the methods are yarn-hogs. My favourite is the (sc, ch 1, skip 1) method, because it uses less yarn than making a sc into each st (but not by much) and it gives a flatter seam.
Caro says
Dedri, not Deidre – after all this time, you’d think I’d get it right! Sorry. And I’ve thoroughly enjoyed each and every week of this project. Thank you for that also.
Caro says
Thanks, Deidre – I don’t think I’ll ever again join any other way but the zipper method! I’ve fallen in love… :)
dolinski says
bonjour,
existe-t-il une traduction en français pour le CAL 2014 ? merci !
Jenny says
Salut. Je ne suis pas au courant de toutes les traductions Français pour la Dedri de Cal. 2014 fourni des tutoriels accompagner bon nombre des modèles créés par d’autres concepteurs dans cet CAL particulière
dolinski says
bonjour, existe-t-il une traduction en français pour ce caL ?
Jenny says
Salut. Je ne suis pas au courant de toutes les traductions Français pour la Dedri de Cal. 2014 fourni des tutoriels accompagner bon nombre des modèles créés par d’autres concepteurs dans cet CAL particulière :)
Janie Sloan says
You all are such a bunch of very clever, creative, inspiring, talented, etc., etc., ……………………….. bunch of people! I thank you from the bottom of my heart!
Zipporah says
Thank you so, so much Dedri for your wonderful tutorials and explanations!! Your blog is the best I’ve found for clear, complete, and competent tutorials and information. I’m a very thorough person but learning crochet online has not been easy, at least not until I found your site! Your prose is concise and your pictures are also clear and cover each detail, great for visual learners like me. Thank you for your hard work! I look forward to future posts and tutorials! :-D
Dedri Uys says
Thank you, Zipporah. It’s always nice to get such a lovely comment.
Shauna says
This is awesome! Thank you for sharing. Now I just have to try to decide which one to pick. They are all so pretty.